The information in this article applies to:

QUESTION
I want to be able to have different door styles on my cabinets. How can I do this?

ANSWER
For this tutorial, a Full Height Cabinet will be used. To place a Full Height Cabinet in your plan, navigate to Build> Cabinet> Full Height Cabinet  and click in your plan to place it.
To modify the height and width of the cabinet
- Use the Select Objects
 tool to select the cabinet, and click the Open Object
  edit button to display the Full Height Cabinet Specification dialog.
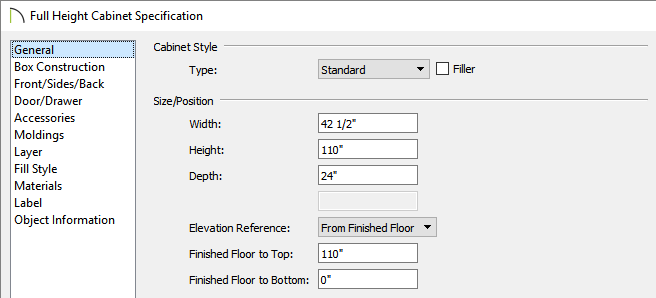
- On the General panel, specify the Width, Height, and Depth values for your cabinet.
To add sections to the cabinet
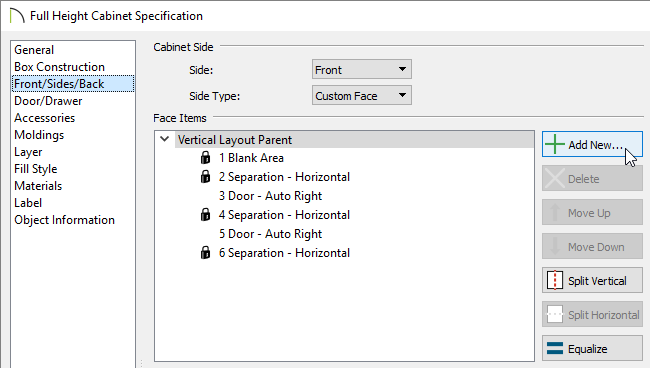
- On the Front/Sides/Back panel of the Full Height Cabinet Specification dialog, set the Side to Front, change the Side Type to Custom Face, then click the Add New button to add additional sections to the cabinet.
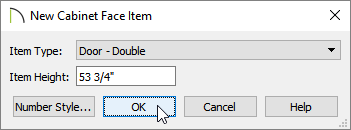
- In the New Cabinet Face Item dialog, set the Item Type and the Item Height, then press OK.
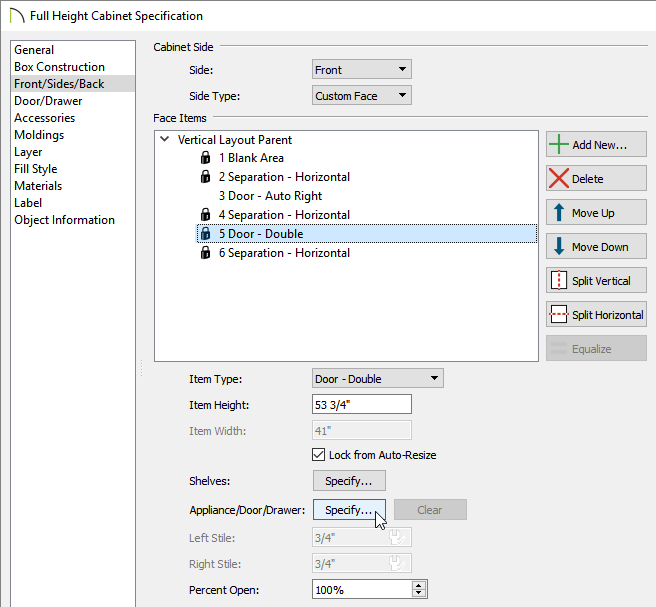
- Use the Move Up / Move Down and Split Vertical / Split Horizontal buttons to re-order the sections as necessary.
To modify individual sections to have different door styles
- Remaining on the Front/Sides/Back panel, click on the Face Item you want to modify to select it, and select the Specify button next to Appliance/Door/Drawer to open the Door Face Item Specification dialog.
- Click the Library button next to Door Style, and in the Select Library Object dialog that opens, pick and choose your preferred door/drawer style for this individual face item.
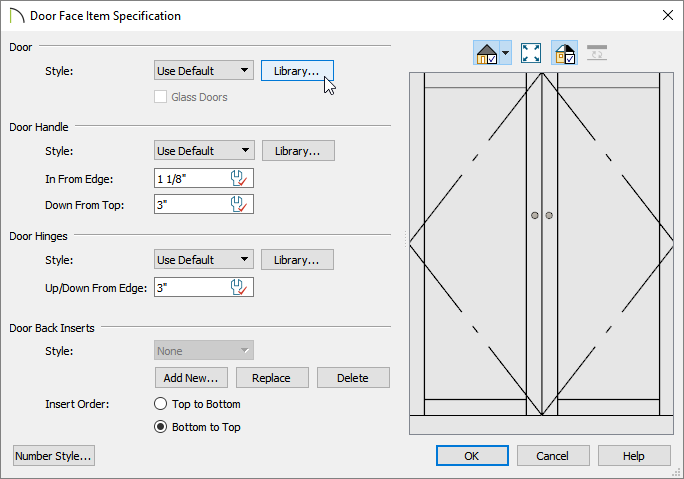
- Make any other desired modifications to this face item, then click OK.
To add or modify moldings
- On the Moldings panel, click Add New to add a new molding or Replace to replace an existing cabinet molding with a new profile.
- In the Select Library Object dialog that displays, navigate to Chief Architect Core Catalogs> Architectural> Molding> Crown Molding within the Library Browser
 , choose your preferred molding for the cabinet, then click OK.
- Specify the Width, Height, and Offset of the molding as desired, then click OK.
