The information in this article applies to:

QUESTION
How do I rotate the pattern or texture associated with a material?

ANSWER
In Chief Architect, materials display a pattern in Vector Views and a texture in most other rendering techniques, including Standard and Physically Based. Both the pattern and texture associated with a material can be rotated to your liking by accessing the Define Material dialog.
To rotate a material
- Select 3D> Materials> Plan Materials
 .
.
- In the Plan Materials dialog, select the material that you wish to rotate, then click the Copy button.
- On the Pattern panel of the Define Material dialog that opens next:
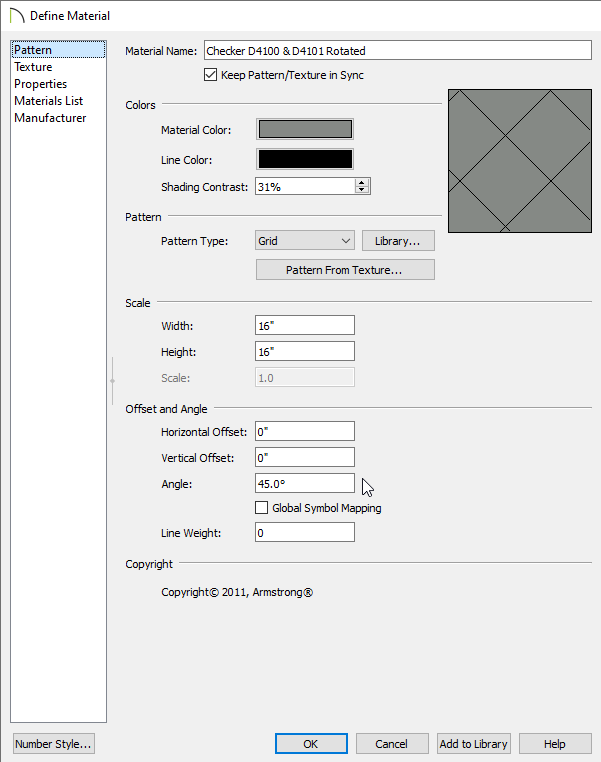
- Provide a short, descriptive Material Name.
In this example, the word "rotated" is added to the end of the original name.
- Specify the desired Angle for the pattern.
In this example, a vinyl tile material that is applied to the floor is rotated 45°.
- Check the Keep Pattern/Texture in Sync box (if applicable) if you want to maintain consistent Scale and Offset and Angle settings for the material's pattern and texture.
To learn more about the various settings listed here, select the Help button at the bottom of the dialog to open your program's documentation or see the Related Articles section below.
- On the Texture panel:
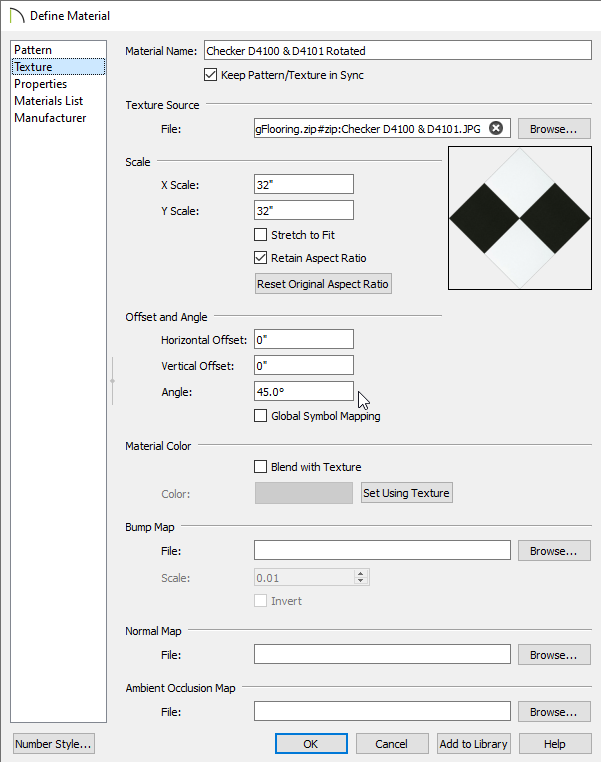
- Specify the desired Angle.
If the Keep Pattern/Texture in Sync box was checked in the step above, the Angle may already be at the correct value.
- Click OK to confirm the changes and close the dialog.
- Your rotated material is now listed in the Plan Materials dialog or in the User Catalog if you copied and edited a material directly from the Library Browser.
If the material is not in the User Catalog and you would like to use it in future plans, click the to Add to Library button located in the Plan Materials dialog.
In X13 and newer program versions, you can also click the Add to Library button located in the Define Material dialog to add the rotated material directly to the User Catalog without closing the dialog. This allows you to add several material variations to the library without the need to create copies beforehand.
- Your rotated material can now be applied to any object in the plan using the Material Painter
 or by opening the object's specification dialog and accessing the Materials panel.