The information in this article applies to:

QUESTION
I have a multiple-floor structure, and I would like to know how to align the walls of the structure from one floor to another and then check to make sure the alignment is satisfactory.
ANSWER
Checking wall alignment between floors is easily done using the Reference Floor Display and the Align With Wall Above/Align With Wall Below edit tools.
To turn on the Reference Display
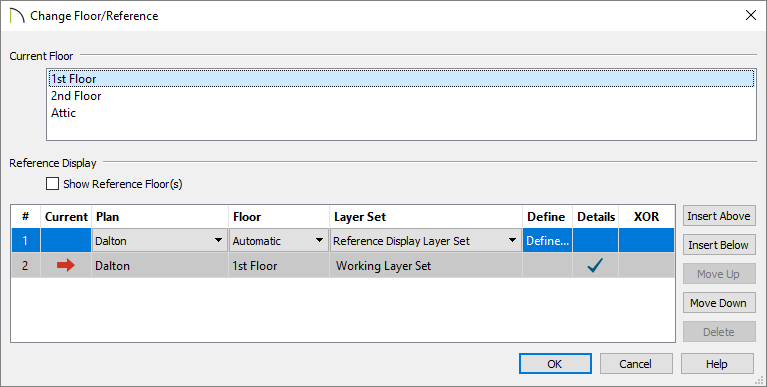
- Select Tools> Floor/Reference Display> Change Floor/Reference from the menu.
In Chief Architect X10 and prior program versions, navigate to Tools> Reference Floors> Change Floor/Reference.
- In the Change Floor/Reference dialog:

- Click the desired Current Floor in the top window to select it. This floor will be the active floor in floor plan view.
- In the Reference Display section, select the desired Plan, Floor, and Layer Set to reference.
For more information on using the Reference Display, select the Help button at the bottom of the dialog.
- When you are satisfied with your selections, click the OK button to close the dialog.
- Select Tools> Floor/Reference Display> Reference Display
 from the menu to toggle the Reference Display on and off.
To align regular walls on different floors
- Using the Select Objects
 tool, click on a wall to select it.
- Use the Move
 edit handle that displays at the location on the wall where you clicked to move the wall into position over a wall shown in the Reference Display.
- Do not worry about exact placement at this time. Just make sure that the lines representing the two walls overlap in floor plan view.
- Click on the Align With Wall Above
 or Align With Wall Below
  edit button.
By default, walls on different floors are aligned by the outer edges of their Main Layers when using the Align edit tools. In most circumstances, the Main Layer should be specified as the structural layer of the wall, particularly when the wall is a framed type.
If you do not want the walls to align based on the outer edges of their Main Layers, instead of using the edit tools, use the Reference Display as a guide and manually move the walls to the position you want them to be, relative to the floor above or below.
To align curved walls between floors
Curved walls are aligned between floors using the same technique to align straight walls.
- If the centers and radii of the walls are within a few inches of each other, the Align With Wall Above
 and Align With Wall Below
  edit buttons are enabled for the selected wall.
- The selected curved wall will take on the radius and center of the referenced wall when the walls are aligned.
To align Pony Walls between floors
When aligning a pony wall with either the wall above or below:
-
Align With Wall Above
 will always align the upper pony wall with the wall above, as specified in the upper pony wall's Wall Type Definition.
-
Align With Wall Below
 will always align the lower pony wall with the wall below, as specified in the lower pony wall's Wall Type Definition.
To align Foundation walls between floors*
*Applies to Chief Architect Premier Only.
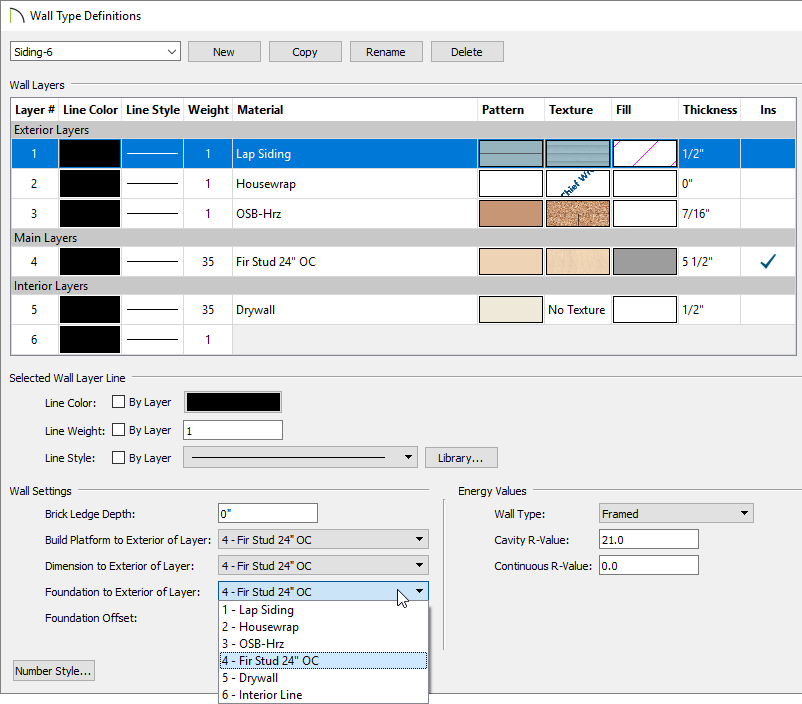
- The Foundation to Exterior of Layer setting in the Wall Type Definitions dialog controls how a wall of a given type aligns with foundation walls directly below on Floor 0.

By default, Foundation to Exterior of Layer is specified for the Main Layer of most wall types. An exception to this rule are the brick wall types, which have Foundation to Exterior of Layer defined as the exterior brick layer as shown in the image below.


 from the menu to toggle the Reference Display on and off.
 tool, click on a wall to select it.
 or Align With Wall Below
  edit button.
 and Align With Wall Below
  edit buttons are enabled for the selected wall.
 will always align the upper pony wall with the wall above, as specified in the upper pony wall's Wall Type Definition.
 will always align the lower pony wall with the wall below, as specified in the lower pony wall's Wall Type Definition.
