The information in this article applies to:

QUESTION
I cannot see any pattern lines when switching to the Vector View rendering technique or when using the Orthographic camera tools. How can I solve this problem?
ANSWER
Patterns lines are used to represent materials in vector-based views. These include views that use the Vector View, Technical Illustration, and Line Drawing rendering techniques. By default, all of the Orthographic camera tools use the Vector View rendering technique, thus displaying patterns when used.
To toggle the display of patterns
-
Navigate to 3D> Toggle Patterns
 from the menu while a vector-based view is active.
If there is a checkmark next to to this option, the patterns are already toggled on.
-
Alternately, you can navigate to Tools> Layer Settings> Display Options
 within the view that patterns are not displaying in, locate the "Patterns, 3D Views" layer, and place a check in the Disp column or Display box.
If only one particular material does not display a pattern, it may be that particular material does not have a pattern applied to it. In this case, you can either choose a different material, which does have a pattern, or you can instead apply a pattern to the existing material in the plan.
To check to see if a material has a pattern
- With your vector-based view is active, select 3D> Adjust Materials> Adjust Material Definition
 .
.
- Click on the material which does not display a pattern to display the Define Material dialog, then access the Pattern panel.
- Under the Pattern section, locate the Pattern Type drop-down.
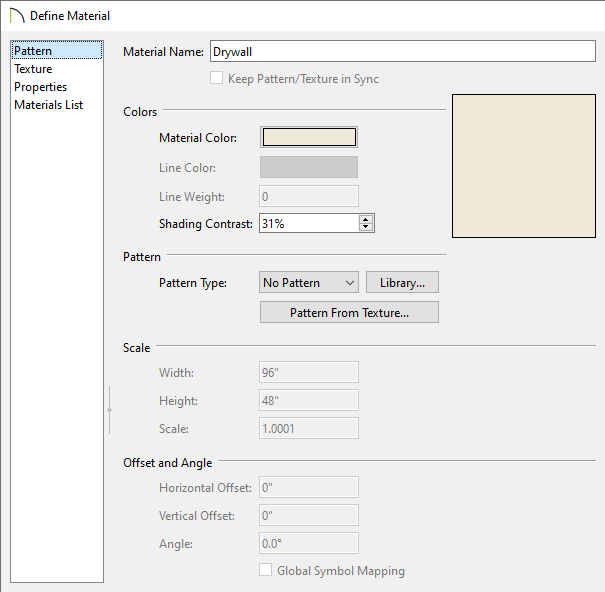
- If this is currently set to "No Pattern," a pattern is not specified for the current material and a solid color will appear in the preview square next to the Colors section.
In this example, you can see that we're editing a "Drywall" material which does not contain a pattern, which is the default for this material. Notice, also, that many of the additional properties located on this panel are grayed out and not editable.
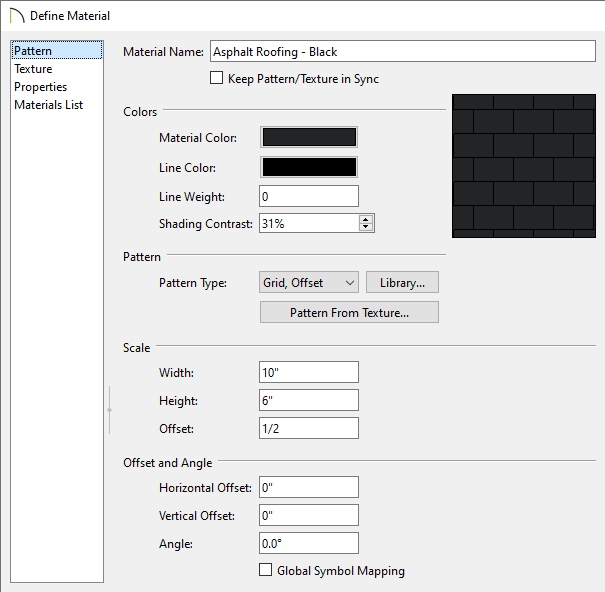
- If a pattern is specified, it will mention the type of pattern, the preview square next to the Colors section will likely consist of lines, and many of the fields here will be editable.
In this example, you can see that we're now editing the "Asphalt Roofing - Black" material, which has a pattern of "Grid, Offset".
- You can change the Pattern Type using the drop-down, click the Library button to choose a pattern from the Library, or use the Pattern From Texture button to generate a pattern based on an image.
- Once you have finished making changes to the material, click OK, and all instances of this material in the plan file should now have the settings you specified.