The information in this article applies to:

QUESTION
How is the square footage, or living area, calculated in Chief Architect?
ANSWER
The Living Area label is an automatically generated text object that reports the area of the current floor specified as living space. This label is created as soon as a room area is defined by walls and/or railings and is recalculated every time you add, remove, resize, or redefine a room. If multiple buildings are created, each will have its own Living Area label.
By default, interior type rooms are defined as part of this calculation, while exterior and hybrid type rooms are not. Some of the room types that aren't included in the Living Area calculation are: Attic, Court, Deck, Garage, Open Below, and Porch. In addition, rooms with a Rough Ceiling height less than 48" (1200 mm) are excluded from this calculation by default. Regardless of the room type or height, you can specify whether a room or room type is included in this calculation using the Room Type Defaults or Room Specification dialog.
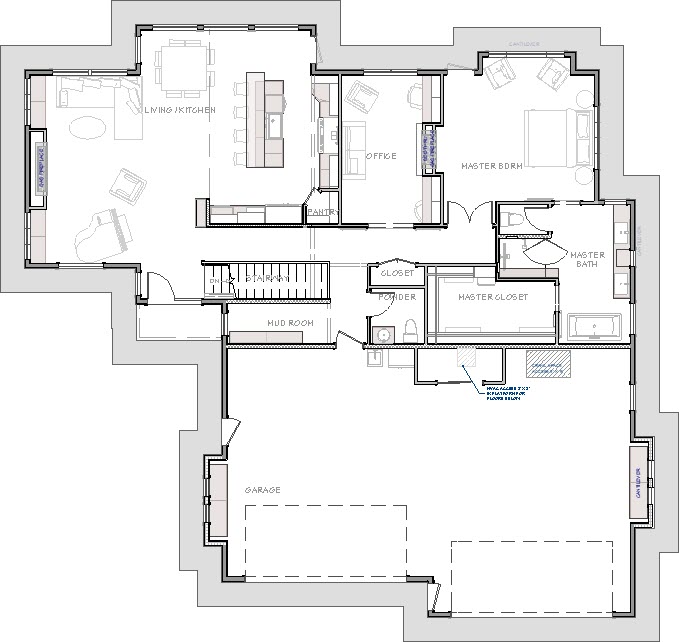
The Living Area should not be mistaken for the footprint of the house. Only true livable areas are included in the Living Area calculation. The Living Area is measured from either the outside surface of the wall or the outer surface of the Main Layer of exterior walls.
To change how the Living Area is calculated
- Navigate to the the floor in which you want to adjust how the Living Area is calculated.
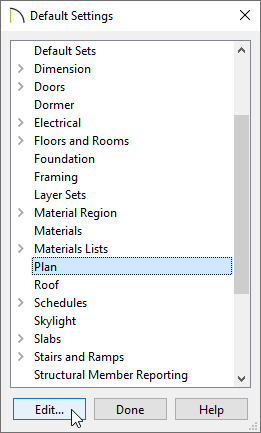
- Select Edit> Default Settings
 from the menu.
-
In the Default Settings dialog that displays, click on the Plan category, then click the Edit button.
- In the General Plan Defaults dialog that displays next, locate the Living Area section near the bottom of the dialog, then change the selection to the desired setting.
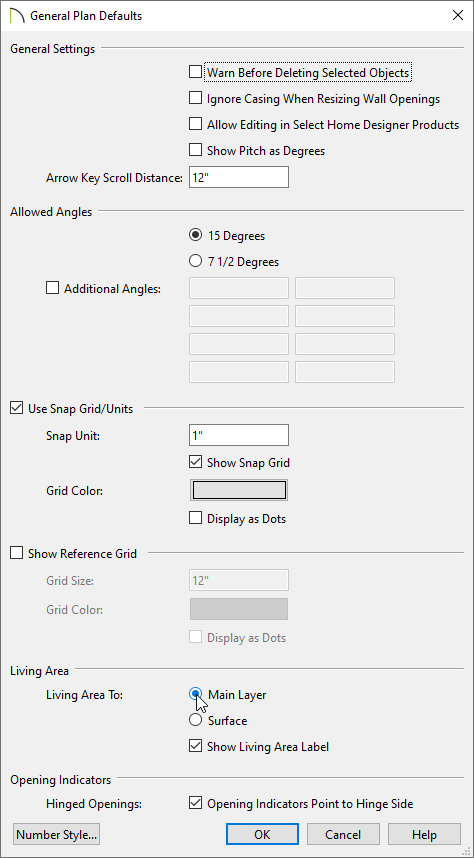
- Select Main Layer to have the Living Area measured from the walls' Main Layer (the framing or structural layer typically).
-
Select Surface to have the Living Area measured from the walls' exterior surface.
-
Click OK and click Done to close the dialogs and apply your change.
The Living Area label for this floor will now reflect the square footage of the current floor.
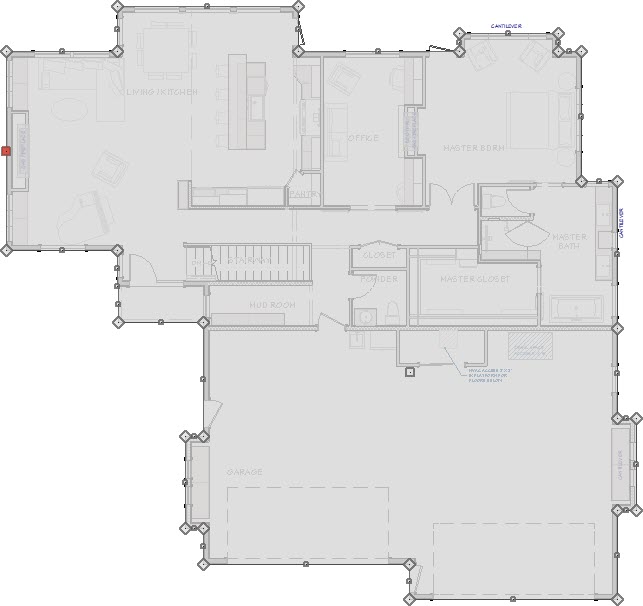
To create a Living Area polyline
- Navigate to the the floor that you would like to calculate the Living Area of.
- Using the Select Objects
 tool, click just outside of an exterior wall in your plan
- The entire exterior area of the plan will highlight, indicating that the "exterior room" has been selected.
- If you are unable to select the exterior room, try pressing the Tab key on your keyboard or click the Select Next Object
 edit button to cycle the selection through nearby objects.
- With the exterior room selected, click the Make Living Area Polyline
 edit button to create a polyline that shows the living area.
You can edit the polyline’s shape to include or exclude portions of the plan if you wish.
-
With the living area polyline selected, click the Open Object
 edit button to open the Polyline Specification dialog.
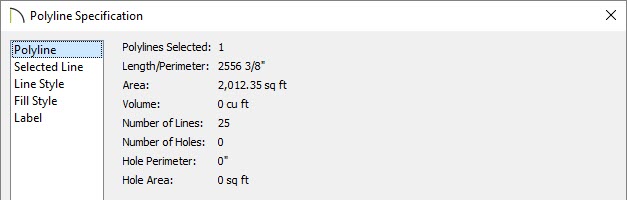
- On the Polyline panel, the Area of the polyline is provided in square feet.
- Select the Label panel and enter the Area value in the Label input field.
Alternatively, you can insert the %area% macro into the Label input field to have the label update automatically anytime a change is made to the polyline's shape.
- Click OK to apply the change and close the dialog.
To calculate the area of the plan's footprint
- Navigate to the the floor that you would like to get the footprint of.
- Using the Select Objects tool, click just outside of an exterior wall in your plan.
- The entire exterior area of the plan will highlight, indicating that the "exterior room" has been selected.
- If you are unable to select the exterior room, try pressing the Tab key on your keyboard or click the Select Next Object edit button to cycle the selection through nearby objects.
- With the exterior room selected, click the Make Room Polyline
 edit button to create a polyline that follows the exterior surfaces of the exterior walls.
Edit the shape of the polyline if you wish.
- With the exterior room polyline selected, click the Open Object edit button to open the Polyline Specification dialog.
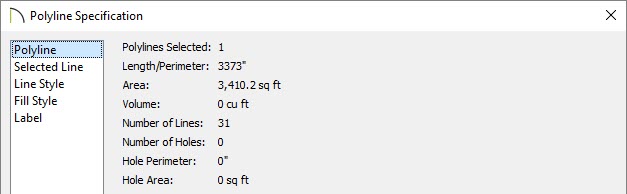
- On the Polyline panel, the Area of the polyline is provided in square feet.
- Select the Label panel and enter the Area value in the Label input field.
Alternatively, you can insert the %area% macro into the Label input field to have the label update automatically anytime a change is made to the polylines shape.
- Click OK to apply the change and close the dialog.