The information in this article applies to:

QUESTION
I have placed a wall in my plan, but now I'd like to change the wall type that's being used. Is there an easy way change the wall type for walls that have already been drawn?
ANSWER
Wall types can be changed after the walls are drawn by using the Wall Specification dialog.
To change an individual wall
- Launch Chief Architect and Open
 the plan that has the wall that you want to modify.
- Using the Select Objects
 tool, select the wall that you want to change, then click the Open Object
  edit button.
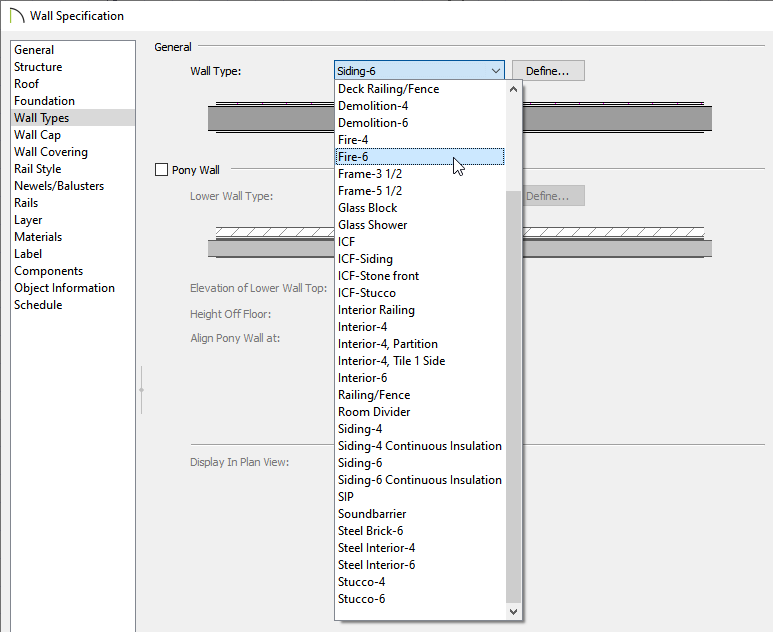
- On the Wall Types panel of the Wall Specification dialog that displays, use the Wall Type drop-down menu to select the appropriate wall type.
- Once you have selected the appropriate wall type, click OK.
To change multiple walls at once
-
Using the
Select Objects tool, select one wall, hold down the
Shift key on your keyboard, then click to select the remaining walls in the plan that you want to change.

The status bar in the lower left corner will show the number of objects that are currently selected.
If you have trouble selecting walls because of other objects in the same area, you may find it helpful to have a Wall tool active when clicking on the walls. Please see the Related Articles section below to learn more about group selecting objects.
-
Click on the
Open Object edit button.
- On the Wall Types panel of the Wall Specification dialog that displays, use the Wall Type drop-down menu to select the appropriate wall type as done in the section above.
- Click OK to apply the change.