Joining Curved Roof Planes


Reference Number: KB-00688
Last Modified: April 12, 2022

The information in this article applies to:

Chief Architect Premier or Chief Architect Interiors


QUESTION

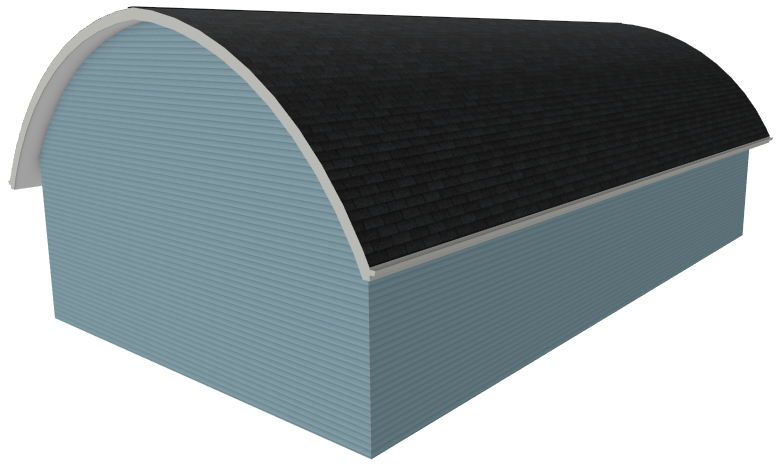
I tried to create a barrel roof using two roof planes, but I am having trouble joining them to form a smooth curve. What is the best way to accomplish this? 

sample image of a curved roof


ANSWER

There are a number of different ways to create a barrel roof in Chief Architect. The easiest way to do this using two roof planes is to join them before they are specified as curved.  

Perspective full overview of a building with curved roof planes


Use one of the following procedures to join two curved roof planes so that they form a single, smooth curve.  

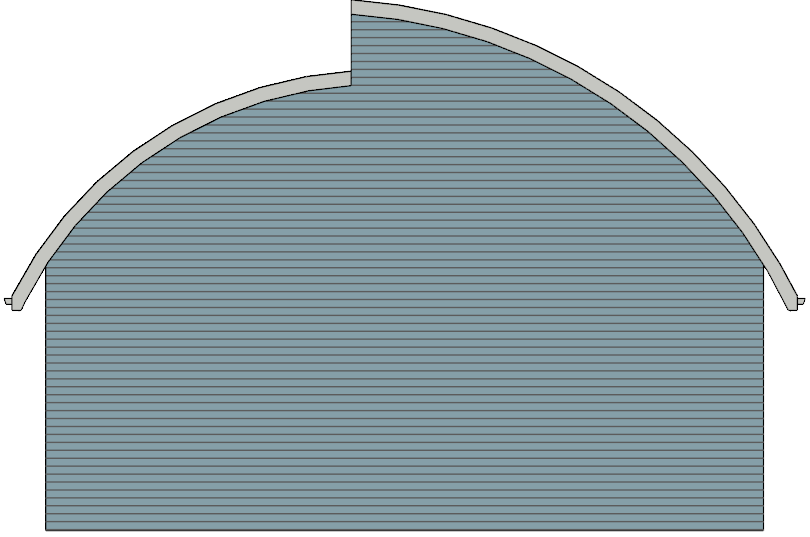
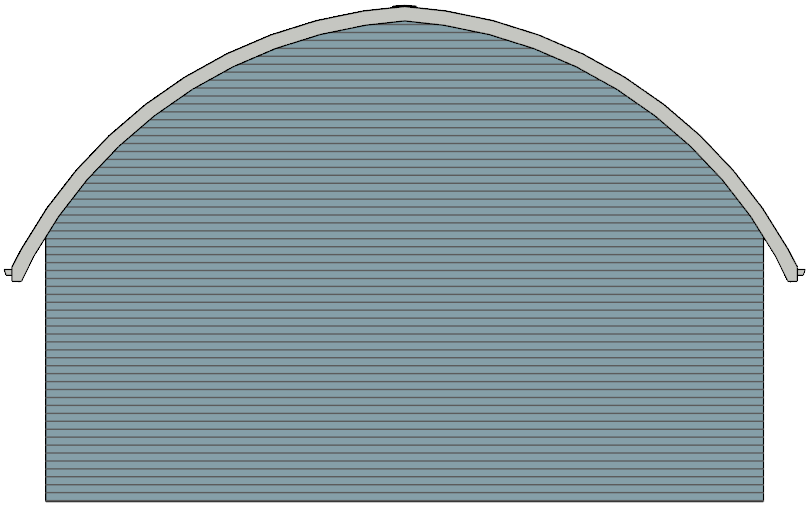
In this example, two roof planes were created manually using the Roof Plane tool, and then specified as curved in their Roof Plane Specification dialogs.

Using either the edit handles, or the Join Roof Planes edit tool, the planes do not meet in the center of the building to form a single curve.


Floor plan view showing two curved roof that will not meet in the center


Cross section/elevation showing the roof planes not joining as one is taller than the other


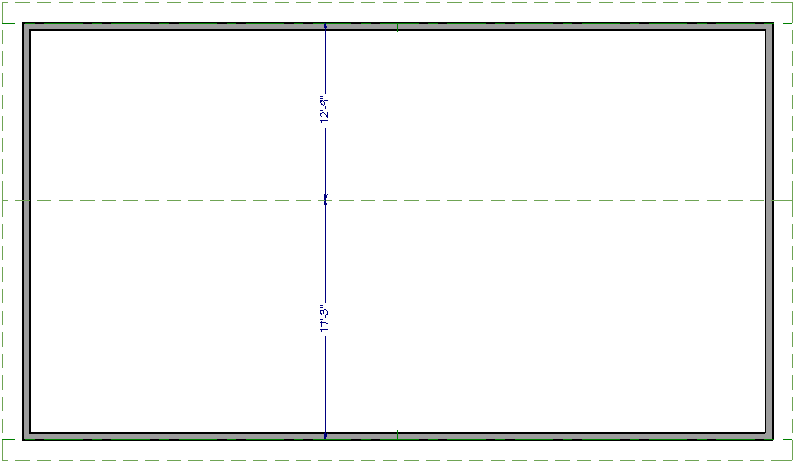
Because the width of this structure is exactly 30 feet (9.14 m) and both roof planes have the same fascia height, it is possible to accurately position the joining edges by enabling Object Snaps and specifying dimensions in the Move Object Using Dimension dialog.


To use the Move Object Using Dimensions feature

  1. Open up both roof planes to specification and enable the Curved Roof option.


  2.  Still in the Roof Plane Specification dialog, specify the Angle at Ridge value as 0 and hit OK.


  3. Select one of the roof planes near the edge where it meets the other to display its edit handles and temporary dimensions.

  4. Click on a temporary dimension to open the Move Object Using Dimension in line text box.  


  5. Specify the distance that the edge should be from each wall, in this example, 15 feet (4.57 m) and click the OK button to close the dialog and apply the change.

  6. Select the other roof plane near the edge nearest the other plane and use the move edit handle that displays to reposition the edge until it snaps to join the other roof plane.  


  7. Select 3D> Create Orthographic View> Cross Section/Elevation  then click and drag out to generate the view to confirm that the roof planes are curved as expected.  

    Floor plan view with equal width roof planes

    Cross section/elevation with the roof planes joining in the center

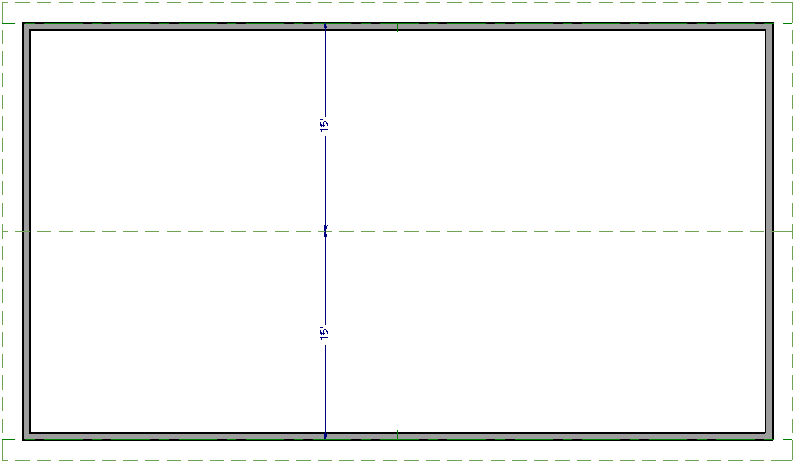
In most situations, however, joining curved roof planes will not be this simple. The easiest way to join roof planes to make a smooth barrel shape is to join them while they are flat and then curve them.


To curve flat roof planes

  1. For existing curved roof planes, begin by clicking on one of the planes near an edge to select it, hold down the Shift key on your keyboard and click on the other plane to select them both.  


  2. Click the Open Object  edit button to open the Roof Plane Specification dialog.  


  3. Remove the check in the box beside Curved Roof to make both planes flat, as they were when they were first created. Click the OK button to close the dialog and apply the changes.  


  4. Select one of these flat roof planes near the edge where it should meet the other roof plane to display its edit handles.

  5. Click the Join Roof Planes  
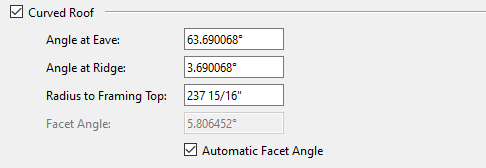
edit button and then click on the other roof plane's edge to which it should join. 

    The Join Roof Planes tool automatically joins the two roof planes at a point equidistant from their baselines.  


  6. Group-select the two roof planes using the Shift + Click method described above and click the Open Object  edit button to open the Roof Plane Specification dialog and edit both planes at the same time.  
      
  7. Place a check in the box beside Curved Roof and then specify the Angle at Ridge to be 0. Notice that the Angle at Eave value adjusts to the change.  

    In X14 and newer versions, you don't have to change the values in the curved roof section in order to get a curved roof plane, but you are welcome to adjust them to fit your needs.


    Curved Roof section of the Roof Plane Specification dialog


  8. Click the OK button to close the dialog and select 3D> Create Perspective View> Perspective Full Overview  to confirm that the roof planes are curved as expected.