The information in this article applies to:

QUESTION
How can I use the Plan Database tool in Chief Architect?

ANSWER
A Plan Database is a special list that stores information such as the type of construction, number of rooms, and price of each plan in the database. Once a database is created, you can use the Find Plan Assistant to search for plans that meet the construction, size, and price criteria that you specify.
Creating a Plan Database involves several steps:
To create a plan database
- Select Tools> Plan Database> Create Plan Database
 from the menu to open the Create Plan Database dialog.
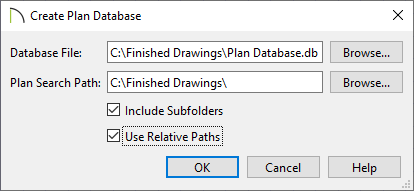
- Click the Browse button to specify the database file's name and the location where this database will be saved. Generally you will want to save this in the same folder as your plan files.
- Next, specify the folder that will contain the plans in your database by clicking the Browse button next to the Plan Search Path field, finding and selecting the folder that contains your plan files, and choosing select folder.
- Check the box beside Include Subfolders if you want your plan database to include plans located in subfolders of the Plan Search Path folder.
-
If you want to distribute your plan database to clients or colleagues, check the box beside Use Relative Paths. This allows the plan database to be copied to other computers along with the plans.
To add or delete plans from the plan database
- Select Tools> Plans Database> Edit Plan Database
 from the menu.
- In the Edit Plan Database dialog, browse to the plan database you want to edit and open it.
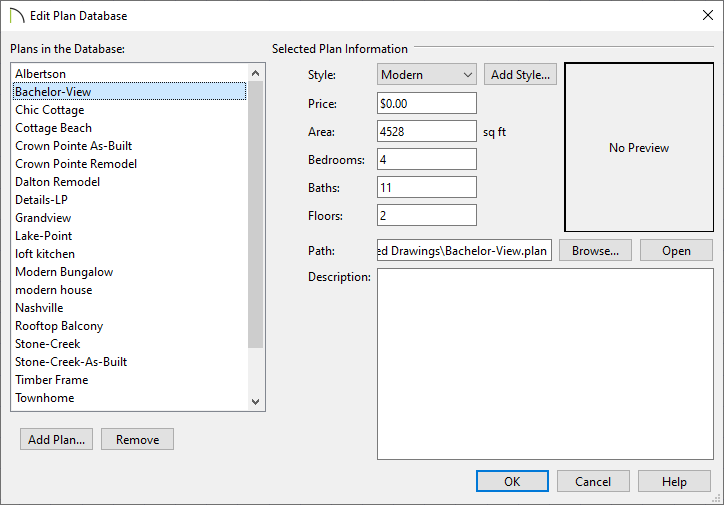
- In the Edit Plan Database dialog:
- Click the Add Plan button to add a new plan to the database.
- Click the Remove button to remove the selected plan from the database.
- Click the Browse button to change the link of the selected plan to a new location.
- Click the Open Plan button to open the selected plan in Chief Architect.
To add pricing information to each plan
- Select Tools> Plans Database> Edit Plan Database from the menu.
- In the Edit Plan Database dialog, browse to the plan database you want to edit and open it.
- In the Edit Plan Database dialog, click on a plan to select it and then:
- Specify a Price for the model. This could be the price to purchase the plan, an estimate of the construction costs or any other price information you might want to convey.
- Enter a Description of the plan. You may want to indicate what is purchased for the price indicated above.
- The Area, number of Bedrooms, Baths and Floors are added automatically based on the Living Area, number of floors, and Room Type specifications saved in the plan file. Each of these values can be adjusted as needed in the plan database.
To organize plans by style
- From the menu, select Tools> Plans Database> Edit Plan Database .
- In the Select Plan Database dialog, browse to the plan database you want to edit and open it.
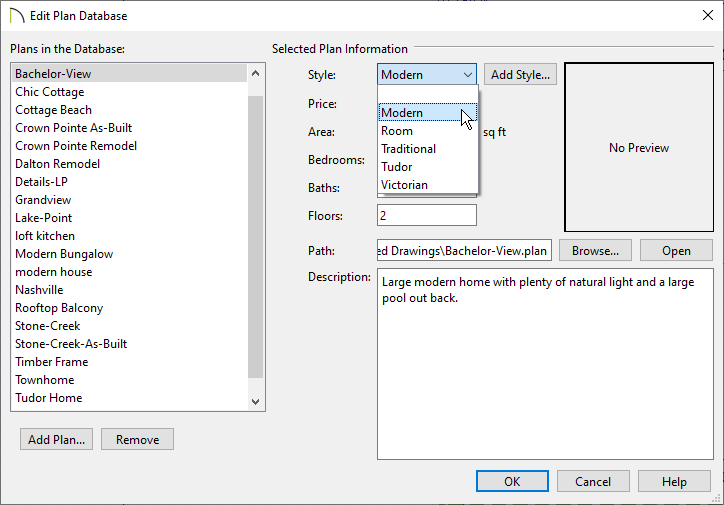
- In the Edit Plan Database dialog you can create a new style by selecting Add Style, and then apply your style by selecting a plan and selecting a style from the drop-down.
To create and display custom thumbnail images
-
Open
 the plan you wish to create a custom thumbnail image for.
- Create the view that you want to use for the plan thumbnail, which can be a floor plan, Perspective
 , or Orthographic
  view.
view.
For a consistent presentation, consider using the same view for every plan thumbnail in your database. For example, you might always use a Full Overview or a Front Elevation View.
- When the desired thumbnail view is active, select File> Save Thumbnail Image
 from the menu.
- To display thumbnail images you will need to enable the setting in your preferences. Select from the menu on PC or Chief Architect> Preferences on Mac to open the Preferences dialog.
- Under the File Management panel, look for Thumbnail Images:

- Place a check mark next to Thumbnail Images to enable this option.
- Select Large or Small images. Selecting Large typically results in better quality images.
- The next time you open the plan by selecting File> Open Plan from the menu or use the Find Plan Assistant
 to search the plan, this plan thumbnail will display as a preview image.
To search for plans using your plan database
- Open a new or existing plan and select Tools> Plans Database> Search For Plans from the menu.
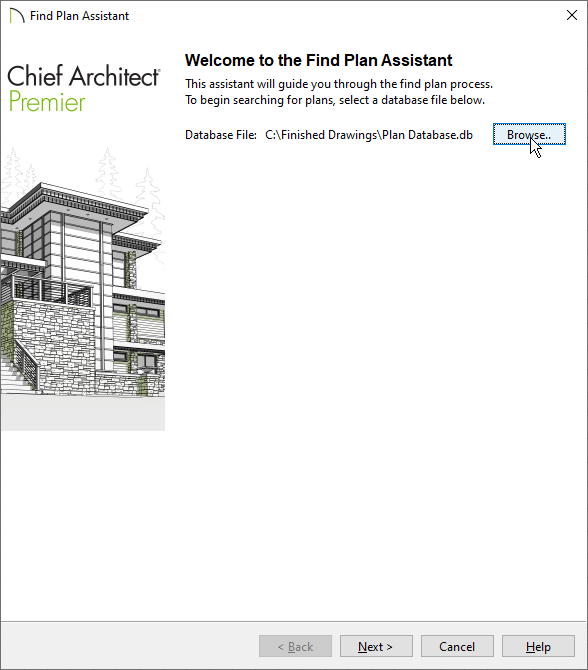
- On the Welcome page of the Find Plan Assistant, click Browse, navigate to the Plan Database File, select it and choose Open to search that plan database.
- Click Next to go to the House Style page and specify the style of home, the amount of floors, the amount of bedrooms you would like to search for, and click Next.
- Go to the House Size page where you can specify the amount of bathrooms, the sq. ft, the price range of projects you would like to search for, and click Next.
- Go to the Plan Details page and browse the collection of plans that match the specified criteria.
- Select the plan you would like to open, click Next, and click Finish to open the specified plan file.
 from the menu on PC or Chief Architect> Preferences on Mac to open the Preferences dialog.