The information in this article applies to:

QUESTION
How do I build hip and gable roofs automatically?
ANSWER
The automatic roof functionality in Chief Architect allows you to create a wide variety of roof designs in your plans. In this tutorial, we will cover building an automatic hip roof, an automatic gable roof, an automatic dutch gable roof, as well as how to control the roof's height.
Before continuing, it's important to have an understanding of how the automatic roof functionality works in the program. In Chief Architect, a structure's roof is automatically generated using the "Build Roof Planes" and "Auto Rebuild Roofs" settings located within the Build Roof dialog. While the "Build Roof Planes" setting allows you to build the roof based on the current state of the plan, and requires you to recheck the box each time you want to rebuild the roof, the "Auto Rebuild Roofs" setting is a persistent setting that, when enabled, rebuilds the roof in the plan anytime a change is made.
Although these settings allow you to quickly, and effortlessly, create a roof for your structure, you will want be aware that its generation is contingent on having properly defined rooms that have been established using the Wall tools. This is important because the roof planes that are generated automatically receive directives from the established rooms (such as the specified room height) and the walls that they bear on. For example, creating a roof gable is accomplished by opening a wall that is part of an enclosed room up to specification and specifying it to be a Full Gable Wall (we will discuss this more later on in the article).
If you have created rooms within a plan using the Wall tools, but the roof isn't generating or updating when using one of the mentioned settings within the Build Roof dialog, it may be caused by one of the following:
- One or more established rooms have the "Roof Over This Room" setting unchecked in the Room Specification dialog. When this setting is unchecked, the program will not generate a roof over the area when using the automatic roof functionality.
- Roof baseline polylines are being used. When the "Make Roof Baseline Polylines" box is checked in the Build Roof dialog, the program creates one or more roof polylines, in which the automatic roof utility receives its directives from. Although useful in many situations, these polylines take precedent over the roof settings set within the Wall Specification dialog. Please refer to the Related Articles section below to learn more about roof baseline polylines.
Use the links below to quickly navigate to the various sections within this tutorial:
An automatic hip roof is the easiest type of roof to create in Chief Architect, because the program will generate a roof plane on each exterior wall in your plan by default, resulting in a hip condition.
To create an automatic hip roof
- Select Build> Wall> Straight Exterior Wall
 from the menu, then click and drag four walls to form a basic rectangular structure.
In this example, a 30' x 40' structure is created.
- Select Build> Roof> Build Roof
 from the menu to display the Build Roof dialog:
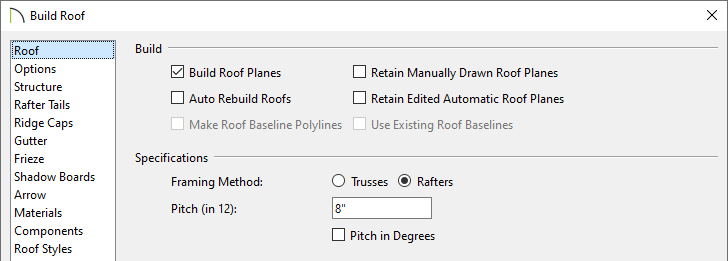
- Check the box beside Build Roof Planes or Auto Rebuild Roofs.
- Make note of the Pitch and adjust it as necessary; all automatically generated roof planes will be made using the pitch specified, unless a different pitch value has been set within a bearing wall.
- Click OK to close the dialog and generate an automatic hip roof.
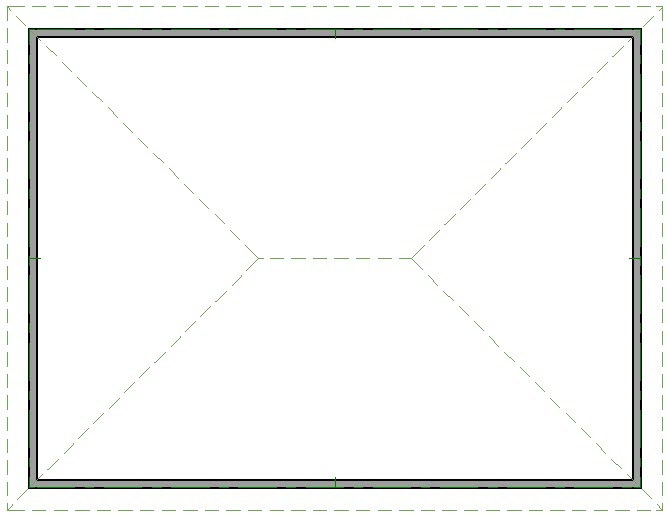
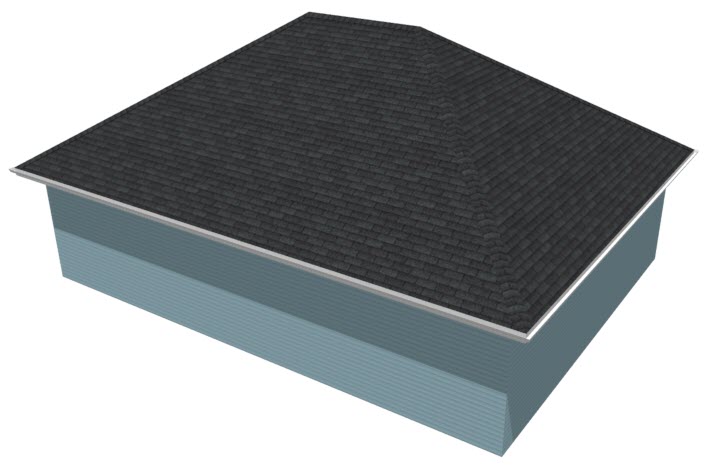
- Select 3D> Create Perspective View> Perspective Full Overview
 from the menu to see the results.
If a gable is needed above a particular wall instead of a hip roof plane, this can be set in the Wall Specification dialog of the wall in question.
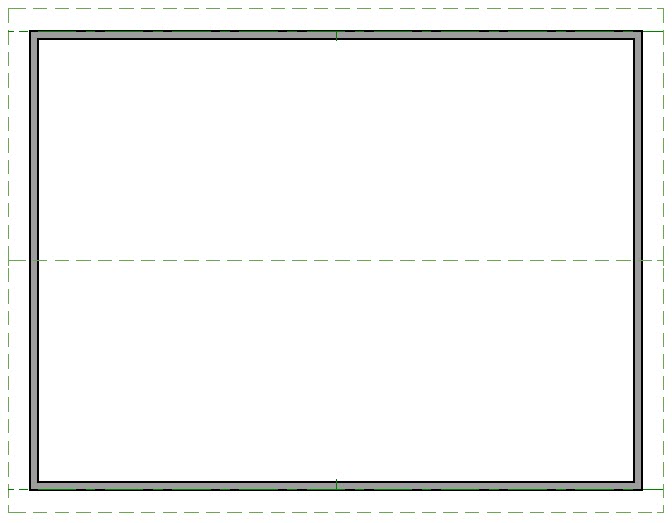
To create an automatic gable roof
- In a floor plan view, click on a wall that you would like to form a gable over to select it, then click on the Open Object
 edit button.
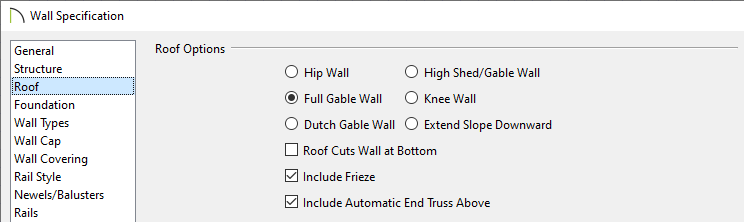
- On the Roof panel of the Wall Specification dialog, select the Full Gable Wall option, then click OK to close the dialog and apply the change.
- If Auto Rebuild Roofs is enabled, the roof will automatically update to reflect this change. If Auto Rebuild Roofs is not enabled, select Build> Roof> Build Roof from the menu, check the box beside Build Roof Planes, then click OK to rebuild the roof.
- Click on the wall opposite the new Full Gable Wall and repeat steps 1-3 above.
You can also use the Change to Gable Wall(s)  edit tool to convert hip walls to gable walls without having to open the Wall Specification dialog.
- Select 3D> Create Perspective View> Perspective Full Overview from the menu to see the results.
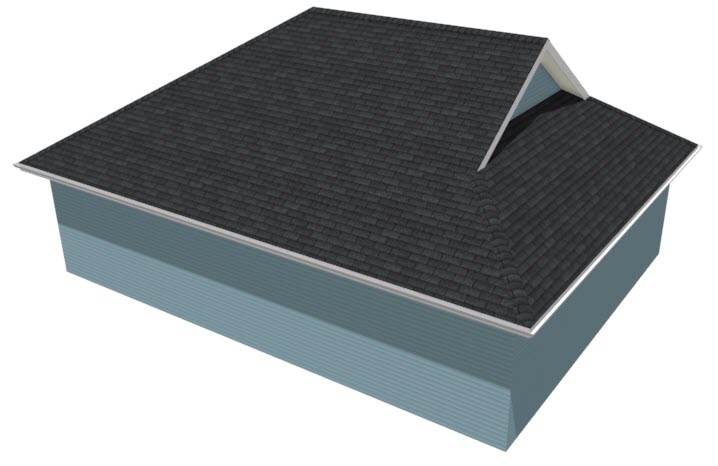
In Chief Architect X10 and newer program versions, dutch gable roofs can be generated automatically.
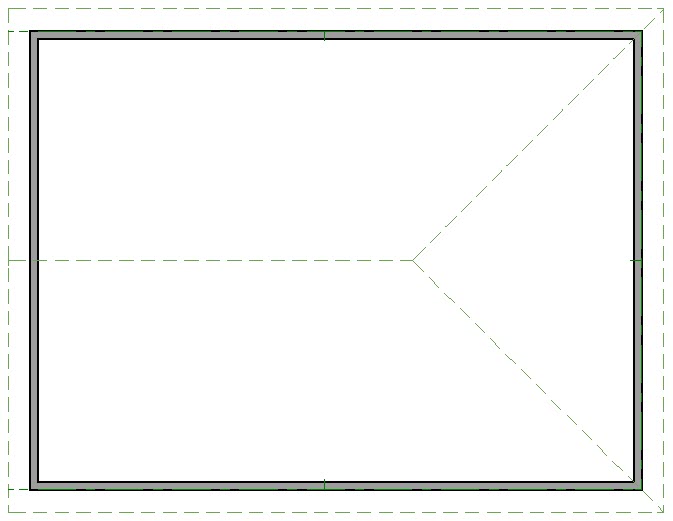
To create an automatic dutch gable roof
- Click to select the wall in which you would like to create a dutch gable over, then click the Open Object edit button.
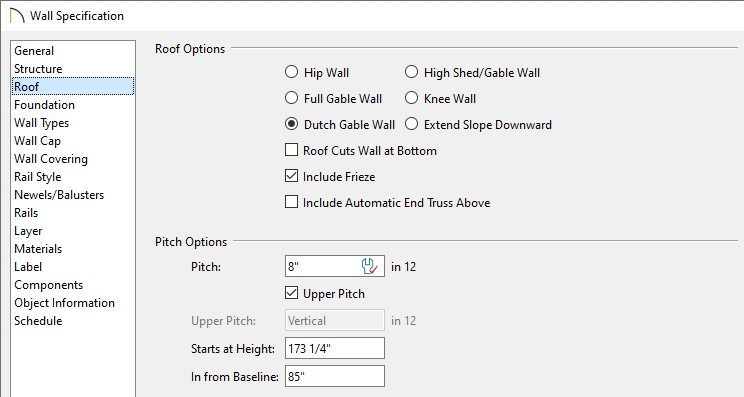
- On the Roof panel of the Wall Specification dialog, select the Dutch Gable Wall option, specify the Pitch leading up to the dutch gable as well as either the Starts at Height or In From Baseline value for where the dutch gable will start, then click OK to close the dialog and apply the change.
- If Auto Rebuild Roofs is enabled, the roof will automatically update to reflect this change. If Auto Rebuild Roofs is not enabled, select Build> Roof> Build Roof from the menu, check the box beside Build Roof Planes, then click OK to rebuild the roof.
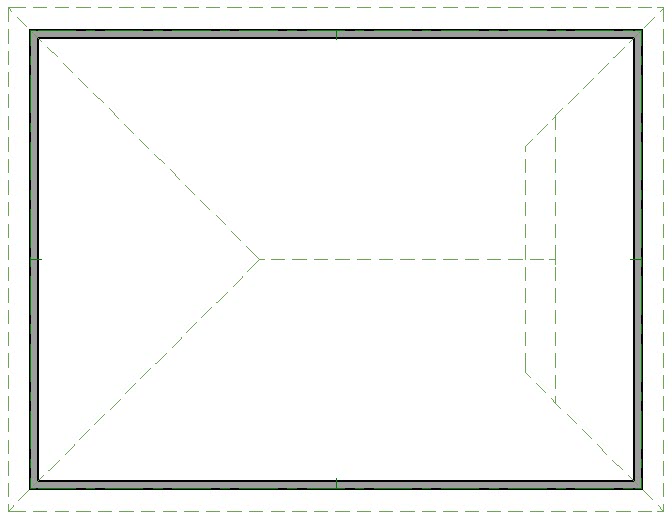
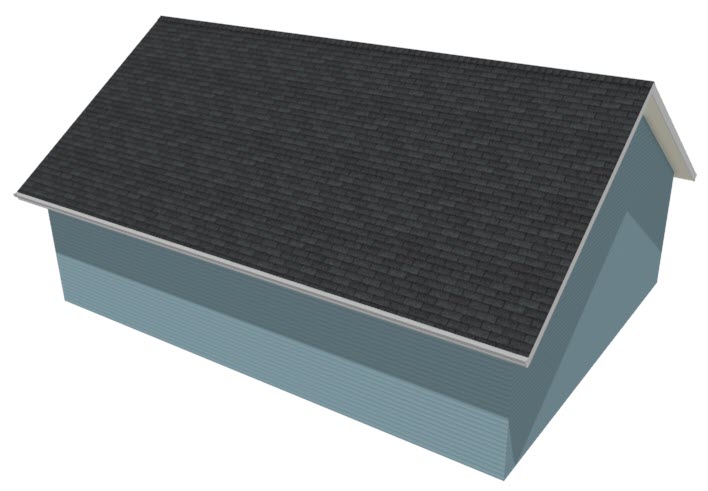
- Select 3D> Create Perspective View> Perspective Full Overview from the menu to see the results.
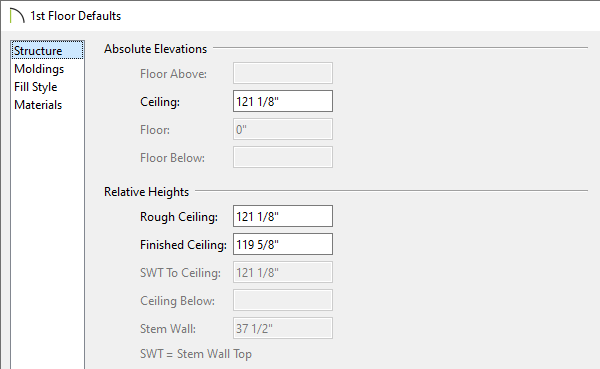
The height that automatic roofs generate at is determined by the ceiling heights within the structure. So, when the ceiling height for an area is adjusted, the automatic roof plane directly over this area will adjust accordingly when the roof is rebuilt.
To control the height of automatic roofs
- Select Edit> Default Settings
 from the menu, and in the Default Settings dialog, expand Floors and Rooms, expand Floor Levels, select the floor you'd like to change, then click the Edit button.
- In the Floor Defaults dialog that displays, change the Rough Ceiling to your liking, then click OK to close the dialog.
In this example, a value of 121 1/8" is specified.
- If Auto Rebuild Roofs is enabled, the roof will automatically update to reflect this change. If Auto Rebuild Roofs is not used, select Build> Roof> Build Roof from the menu, check the box beside Build Roof Planes, then click OK to rebuild the roof.
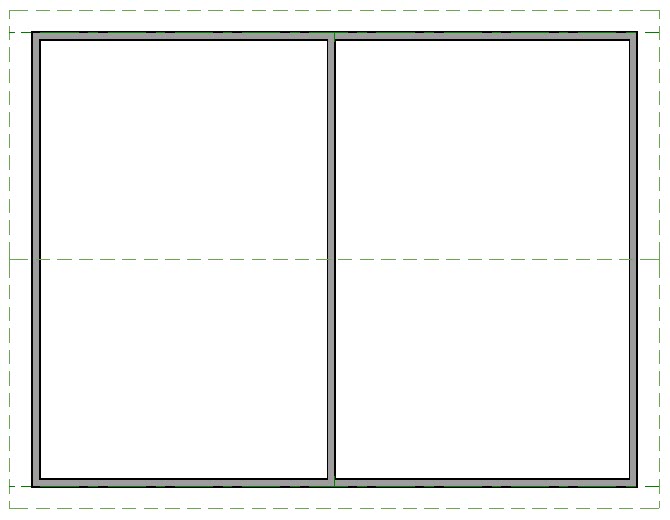
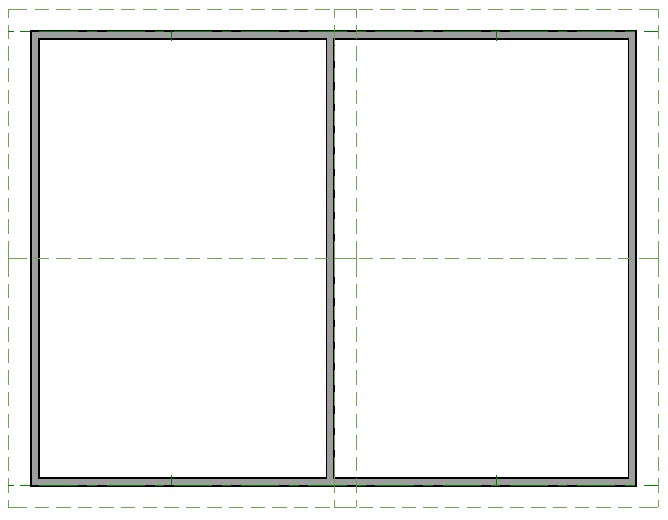
- To see the difference that this change makes on roof height, specify the structure to have a gable roof, then use the Straight Exterior Wall tool to separate the structure into two separate rooms, as shown in the image below.
- Click on this newly created wall to select it, then click the Open Object edit tool to open the Wall Specification dialog.
- On the Structure panel, check the Balloon Through Ceiling Above checkbox.
- On the Roof panel, select the Full Gable Wall option, check the Lower Wall Type if Split by Butting Roof checkbox, then specify the wall type to be used for the interior wall portion.
In this example, an Interior-6 wall type is specified.
- Click OK.
- Click in an empty area in the room on the right to select it, then click the Open Object edit button.
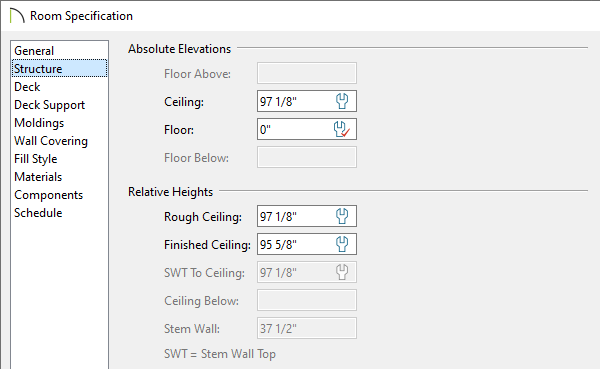
- On the Structure panel of the Room Specification dialog that displays, specify a lower Rough Ceiling value, then click OK to close the dialog.
In this example, a value of 97 1/8" is specified.
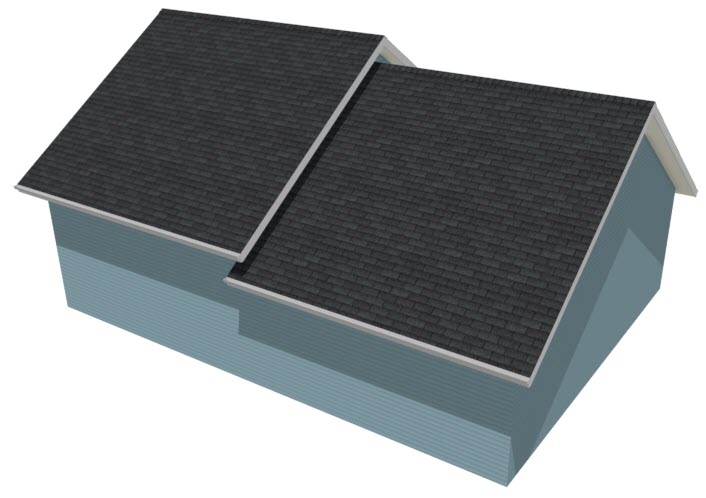
- If Auto Rebuild Roofs is enabled, the roof will automatically update to reflect this change. If Auto Rebuild Roofs is not used, select Build> Roof> Build Roof from the menu, check the box beside Build Roof Planes, then click OK to rebuild the roof.
- Select 3D> Create Perspective Camera> Perspective Full Overview from the menu to see the results.
It's important to remember that automatic roofs are generated based on the current ceiling heights. If you change the ceiling height after the roof is built, the height of the roof will not be affected until it's rebuilt.
Return to top