The information in this article applies to:

QUESTION
I have reached the review stage in my plan, and need to indicate where changes are being made. I have heard that Chief Architect has a tool for revision clouds. How does this tool work?
ANSWER
The Revision Cloud tool allows you to draw a closed polyline with a series of arcs or bulges displaying along each edge.
To create a Revision Cloud
- The easiest way to create a Revision Cloud is to select CAD> Revision Cloud
 , then click and drag to draw a rectangular shape with edges that display a series of arcs.

- Additional ways to create a Revision Cloud include:
- With the revision cloud created, click on it using the Select Objects
 tool and then select the Open Object
  edit tool.
- In the Revision Cloud Specification dialog that opens:
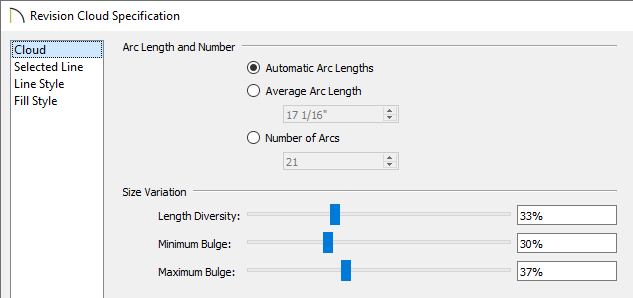
- On the Cloud panel, adjust the Arc properties to your liking. To learn more about each option listed here, click on the Help button at the bottom of the dialog.
- On the Line Style panel, adjust the layer and line properties of the Revision Cloud.
- If you would like the Revision Cloud to contain a pattern or color within it, click on the Fill Style panel.
- Once all changes have been made, click OK to close the dialog.
MORE INFORMATION
- Revision Clouds are drawn based on the settings in the Revision Cloud Defaults dialog, and are initially placed on the layer specified there.
In X12 and newer program versions, multiple Revision Cloud Defaults can be setup and specified to be used with various Default Sets (formerly known as Annotation Sets). Please refer to the software's Reference Manual to learn more.
- Once created, Revision Clouds can be selected and edited much like other closed-polyline based objects. Unlike other closed polylines, however, the edges of a Revision Cloud can only be seen when it is selected. When it is not selected, only the arcs along its perimeter are visible.

- The arcs along a Revision Cloud are not its actual edges and cannot be individually selected, although you can control their size and frequency. If you wish to individually edit the arcs, you need to convert it to a plain polyline.