The information in this article applies to:

QUESTION
Is there a way to specify the sun's angle in the sky?
ANSWER
You can use the Sun Angle tool to specify the exact latitude and longitude of the building as well as the exact date and time, then produce sunlight and shadows based on that information.
To create a Sun Angle
-
Open
 the plan in which you would like to control the angle of the sunlight.
In this example, a simple rectangular structure has been built and a 3D Maple Tree has been placed on a flat terrain.
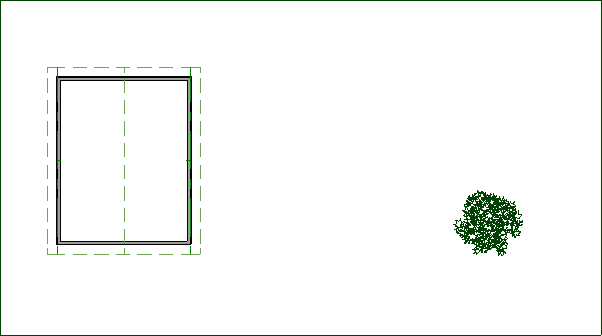
3D trees can be located in the 3D Plants bonus catalog.
For more information on obtaining additional library content, please see the Related Articles section below.
- Navigate to CAD> North Pointer
 , then click and drag to define the direction of true north in your plan.
In X14 and prior versions, navigate to CAD> Lines> North Pointer instead.
- Select 3D> Create Perspective View> Perspective Full Overview
 from the menu to create a 3D view of the model. Rotate the view as needed so that the north side of the structure can be clearly seen.
- If shadows are not enabled, select Tools> Active View> Edit Active View
 and in the Perspective Full Overview Specification dialog that opens, place a check in the Show Shadows box, then click OK.
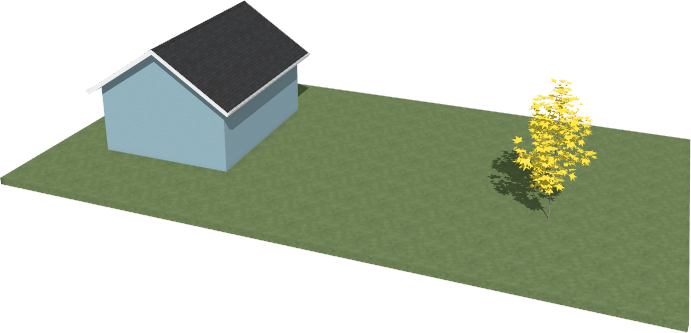
- Notice the appearance of the shadows, then select File> Close View to return to floor plan view.
- On either Floor 0 or Floor 1 of a floor plan view, select CAD> Sun Angle
 from the menu, then click in the drawing area.
In X14 and prior versions, navigate to CAD> Lines> Sun Angle instead.
Alternatively, the tilt and direction angle of the generic sun can be adjusted on a per camera basis by navigating to 3D> Lighting> Adjust Sunlight while a 3D camera view is active. You can also specify default properties for the generic sun by accessing the Sunlight Defaults.
Additionally, in X15 and newer versions, the Move Sun tool can be used to adjust the tilt and direction angle of the generic sun. This tool can be found by navigating to 3D> Lighting> Move Sun, and it can be used by holding down the left mouse button and dragging in your desired direction while in a 3D camera view.
- The Sun Angle Specification dialog will open. On the Earth Data panel:
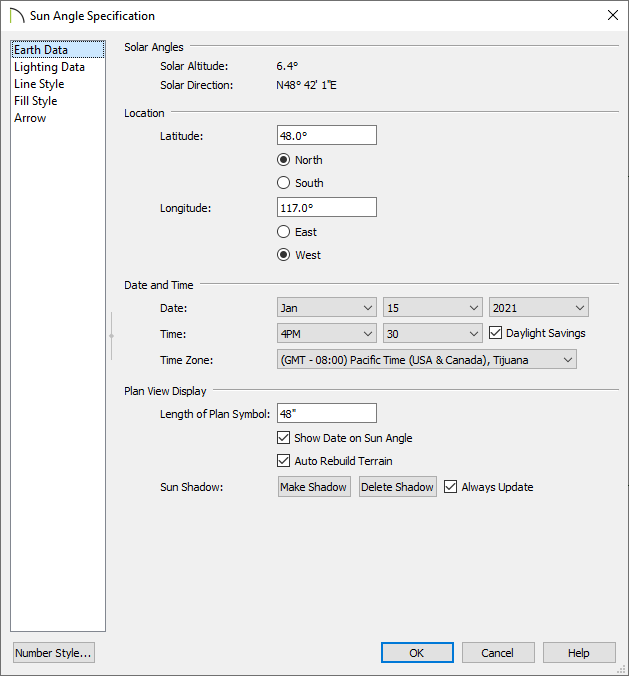
- Specify the Latitude and Longitude of the building site's location. If you don't have this information, there are many free online services that you can use to obtain it.
- Specify the Date and Time that you would like to use for calculating the location of the sun.
- If Daylight Savings is used in your area and is in effect at the selected time, check this box.
- Specify the Time Zone used at the location of the building site.
- If you'd like a Sun Shadow polyline to display in floor plan view, click the Make Shadow button.
- Make any other desired changes, then click OK.
- Select 3D> Create Perspective View> Perspective Full Overview from the menu.
- Again, if shadows are not enabled, navigate to Tools> Active View> Edit Active View , place a check in the Show Shadows box, then click OK.
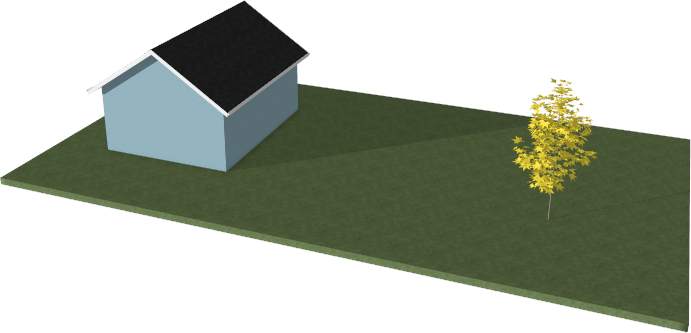
- The shadows in this image are generated using a Sun Angle set for 4:30 PM on January 15th, 2021, in the Pacific Time Zone.
- Notice that the shadows are elongated due to the sun's lower angle in the sky.
Sun angles can also be copied. Use the Select Objects  tool to select the Sun Angle that you would like to copy, click on the Copy/Paste
  edit tool located in the Edit toolbar, then click in your desired location to paste it. This is helpful if you have defined a Sun Angle in one plan and would like to transfer it to another plan.
If multiple Sun Angles have been created in a single plan, you can specify which is used on a per camera basis by navigating to 3D> Lighting> Adjust Sunlight while a 3D camera view is active. You can also specify a default Sun Angle by accessing the Sunlight Defaults.