The information in this article applies to:

QUESTION
How can I make my fireplace appear to be glowing and casting light around my room?

ANSWER
Adjust fire materials to have an emissive value and then add additional lights to provide a realistic, glowing, fireplace effect.
To create a 'Glowing Flame' effect
-
Open
 the plan that contains a fire material that you'd like to modify.
-
Navigate 3D> Create Perspective View> Full Camera
 and and click and drag towards the fire material to create a camera view.
-
Next, select 3D> Adjust Materials> Adjust Material Definition
 and click on the flame material.
-
On the Properties panel of the Define Material dialog that displays, increase the Emissive setting to your liking, then click OK.
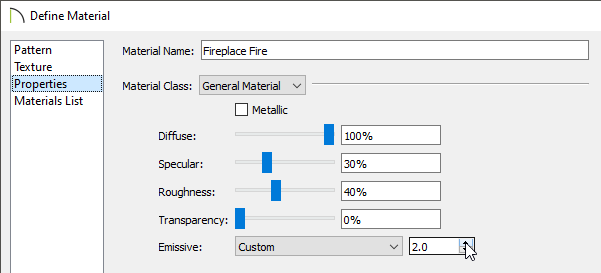
Emissive controls how bright a material appears independent of the lighting in the scene. It can be used to simulate surfaces that are glowing with their own light. Use the Emissive drop-down list or input your own value using the spin control arrows or text field. This setting is only available for General materials.
The flame should now appear to be glowing.
To create the lighting for the rest of the room
- From a floor plan view, select 3D> Lighting> Add Lights
 .
.
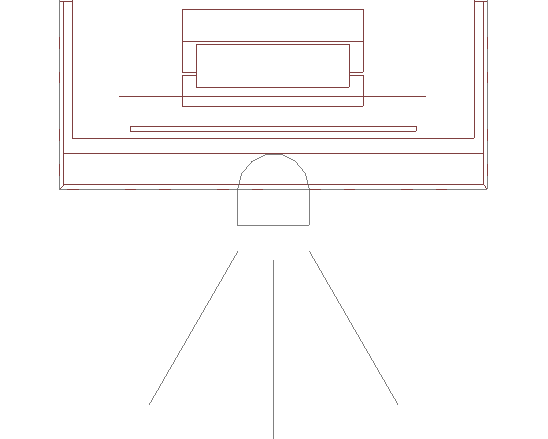
- Left-click and drag in front of the fireplace to draw a spot light facing away from the fireplace.
- Using the Select Objects
 tool, select the newly placed light source, then click the Open Object
  edit tool.
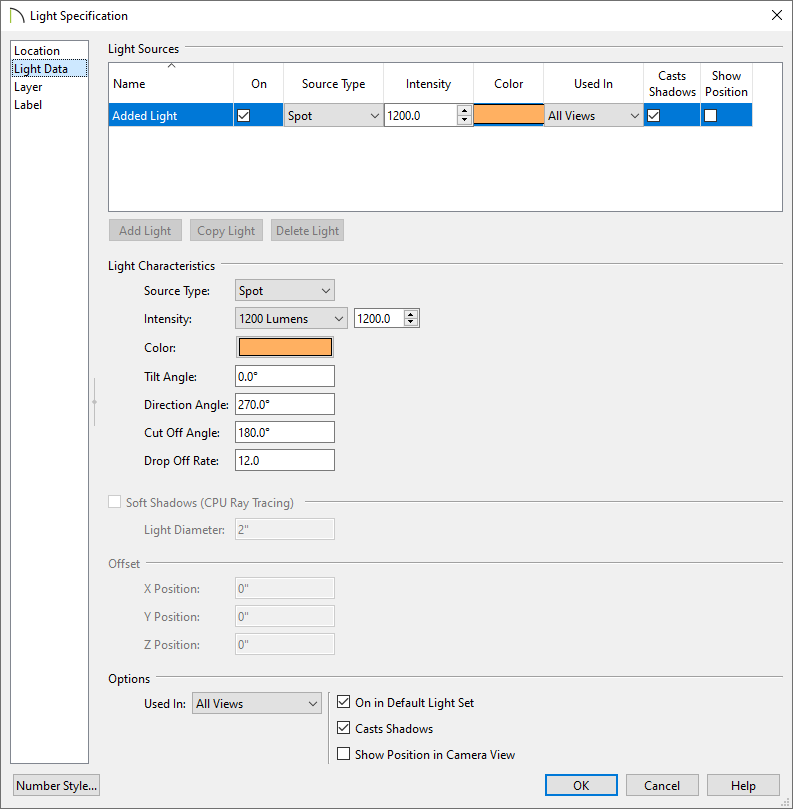
- On the Location panel of the Light Specification dialog that displays, specify the floor and height properties for the light.
In this example, 1 is specified as the Floor Number and the Absolute Elevation is set to 24".
- On the Light Data panel, specify your desired properties for the spot light, then click OK.
In this example, the Color is set to orange, the Cut Off Angle is set to 180°, and the Drop Off Rate is set to 12.0.
The room will now be lit by the spot light in front of the fireplace, and appear as though the light is coming from the fire.