The information in this article applies to:

QUESTION
How can I create a commercial front with a curtain wall in Chief Architect?

ANSWER
A curtain wall is an exterior wall that encloses the space within, but is not load-bearing. Often, the term "curtain wall" specifically refers to glass walls such as those found on store fronts. Curtain walls are typically used on commercial buildings; however, they also have residential applications - for example, sunrooms or indoor swimming pools.
This article will explain how to create a simple curtain wall with a commercial awning in Chief Architect.
To create a folding glass wall or door system, consider downloading the NanaWall Manufacturer catalog. For more information on additional catalogs, please refer to the "Obtaining Library Content" resource in the Related Articles section below.
To create the curtain wall
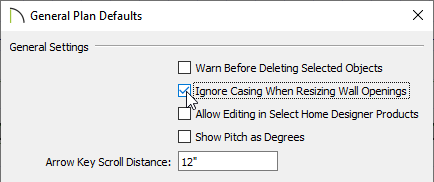
- Navigate to Edit> Default Settings
 , select the Plan category, then click Edit.
- In the General Plan Defaults dialog that displays, check Ignore Casing for Opening Resize, then click OK.
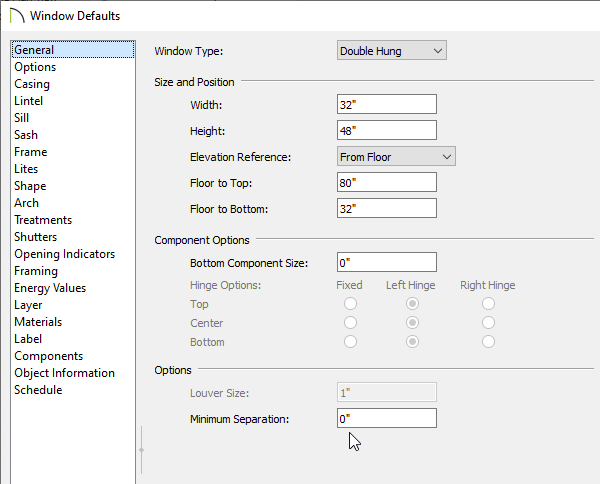
- Next, select the Window category in the Default Settings dialog, then click Edit.
- Change the Minimum Separation value to 0", click OK, then Done to close the dialog boxes.
- If you haven't already, use the Window
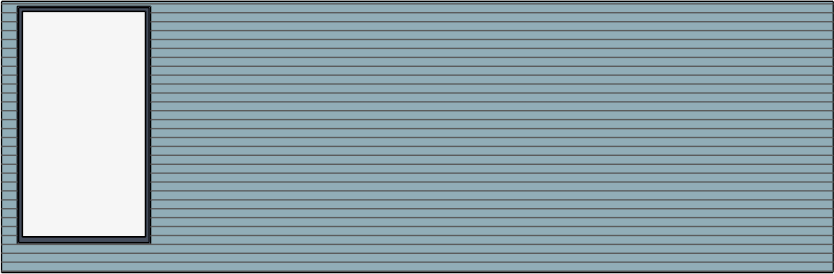
 tool to place a window into an existing wall of your structure.
- Using the Select Objects
 tool, click on the window, then click on the Open Object
  edit tool.
- In the Window Specification dialog that displays:
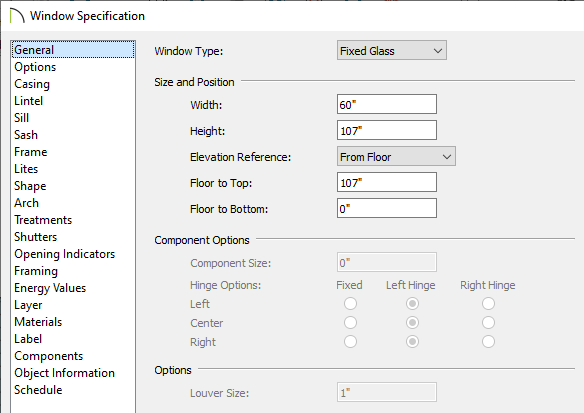
- On the General panel, set the Window Type to Fixed Glass, then specify the Width, Height, and Floor to Top values to your liking.
In this example, the Width is set to 60", the Height is set to 107", and the Floor to top is set to 107".
- On the Casing panel, remove the checkmark from Use Exterior Casing.
- On the Sill panel, remove the checkmark from Use Exterior Sill.
- You can also remove the sash by accessing the Sash panel, if desired.
- Once all desired changes have been made, click OK.
- Navigate to 3D> Create Orthographic View> Cross Section/Elevation
 and create a cross section/elevation of the front of the building.
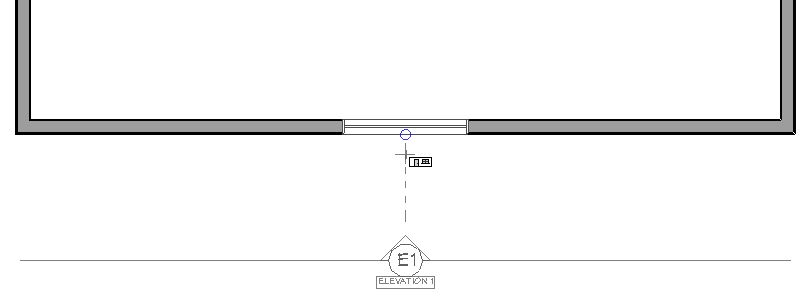
- In the cross section/elevation view, use the Select Objects tool to select the window, then use the Move
 edit handle to butt it against one side of the wall.
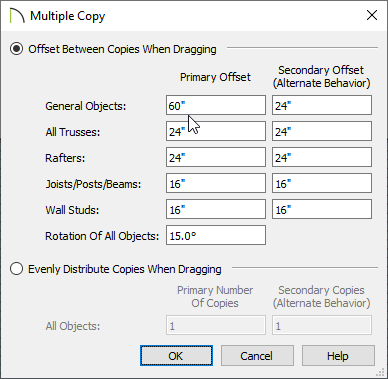
- With the window still selected, click Multiple Copy
 edit tool, then click the Multiple Copy Interval
  secondary edit tool. In the Multiple Copy dialog that appears, specify the General Objects Primary Offset value to match the width of the window, then click OK.
For this example, a value of 60" is used.
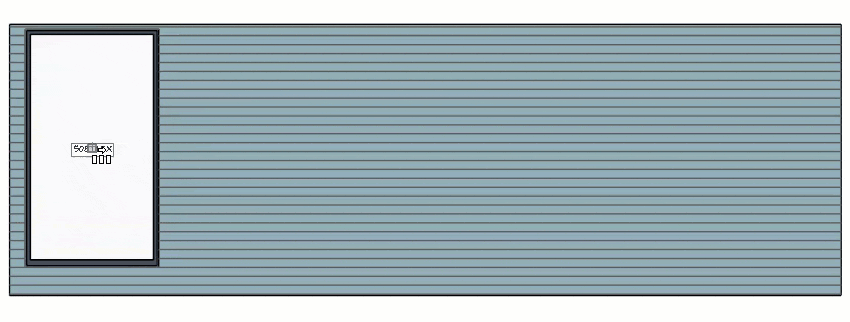
- Move the cursor over the center of the window until the Multiple Copy
 cursor appears, then click and drag until the desired number of copies are achieved.
To add an awning and other details
- Awnings can be located in the Exterior Commercial Awnings Bonus catalog. For more information on additional catalogs, please refer to the "Obtaining Library Content" resource in the Related Articles section below.
- Once the catalog has been downloaded and imported into your program, access the Library Browser
 .
.
If the Library Browser side window is not open, navigate to View> Library Browser to enable its display.
- Select an appropriate awning from the catalog, then click to place it into your plan. You may wish to change the width of this awning in your floor plan view to fit the width of your windows.