This article also applies to the following legacy products:
Pro
QUESTION
Is there a way to easily see where roof planes would intersect?
ANSWER
The Join Roof Planes edit tool is the easiest way to move roof plane edges so that they meet correctly, but you can also locate where roof planes might meet or intersect using temporary roof intersection points. Once these points are in place, you can drag roof plane edges or corners to these points.
To create roof plane intersection points in X15, Home Designer 2024, and newer versions
- Using the Select Objects
 tool, click on a roof plane that you would like to have roof plane intersection points associated with.
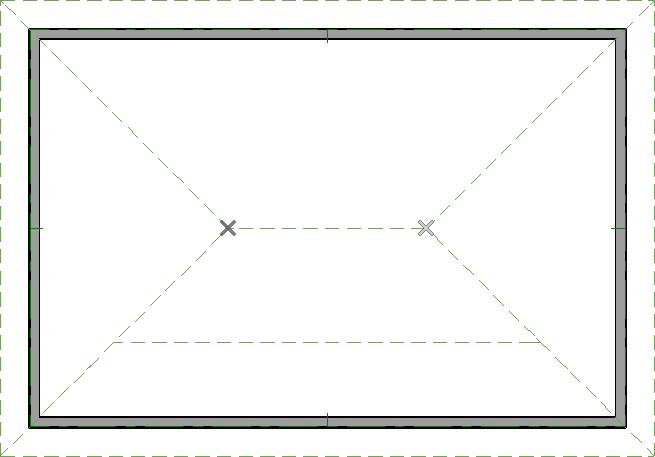
- Select the Place Roof Intersection Point
 edit tool, then hover over and click on an adjacent roof plane to place a temporary point, as shown in the image below.

To create roof plane intersection points in X14, Home Designer 2023, and prior versions
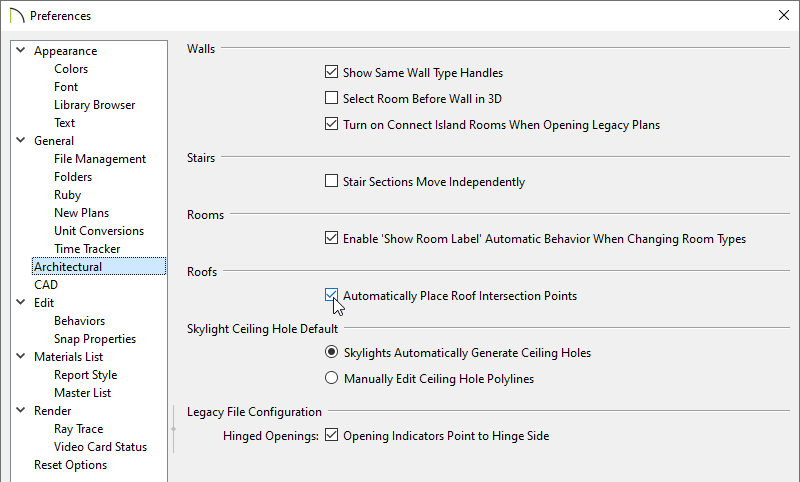
- Click on Edit> Preferences
 if you're on a Windows PC or Chief Architect> Preferences if you're on a Mac.
- On the Architectural panel of the Preferences dialog that opens, check the Automatically Place Roof Intersection Points box, then click OK.
- Select a roof plane that you would like to have roof plane intersection points associated with.
- Click the edge of another, adjacent roof plane to place a temporary intersection point where it would meet the selected roof plane.
To delete roof plane intersection points
- While in a floor plan view, navigate to CAD> Points> Delete Temporary Points
 from the menu.
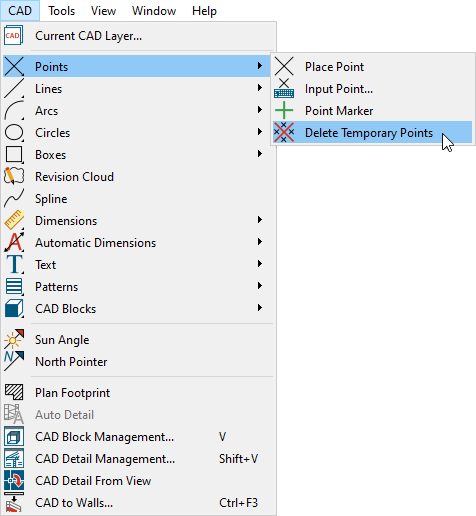
- All roof intersection points will be removed from the view and new points can now be generated, if you wish.