QUESTION
I am trying to create a walkout basement on sloping terrain. How do I do this?

ANSWER
By default, the program will produce a flat building pad under your plan, which is helpful in many situations but not when you want to model a walkout or daylight basement on sloping terrain.
To create a walkout basement
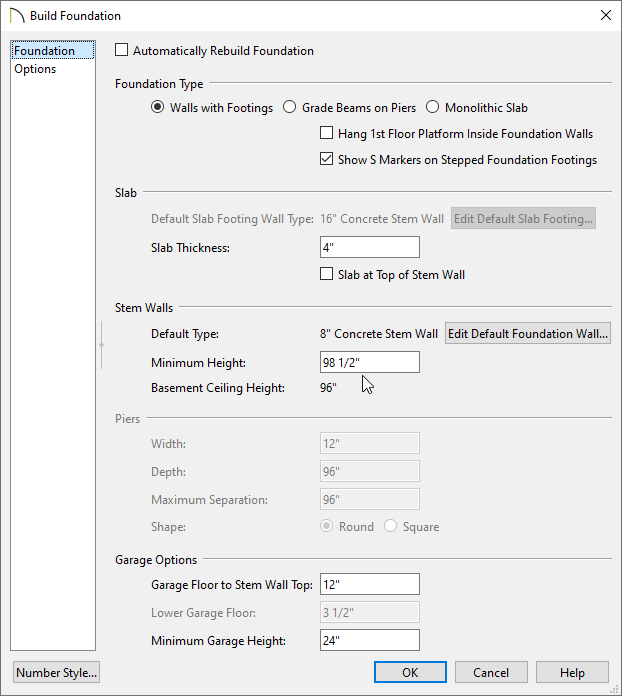
- If you have not done so already, create a foundation by navigating to Build> Build Floor> Build Foundation
 , and create a basement level with a Minimum Height of at least 98 1/2" inches.
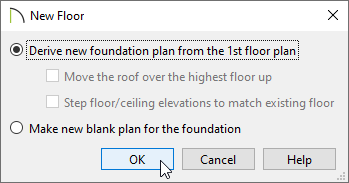
- In the New Floor dialog that displays next, choose to Derive new foundation plan from the 1st floor plan, then click OK.
-
(Optional) If your foundation walls will consist of two different wall types and/or materials, consider defining these walls as pony walls. You may also want to create a stepped effect for your foundation. Please see the Related Articles section to learn more about these topics.
- On Floor 0, which is your foundation level, select Terrain> Create Terrain Perimeter
 from the menu to create a terrain perimeter in your plan. This will create a 100' x 50' flat terrain pad surrounding your structure.
If the 'Create Terrain Perimeter' option is grayed out and inaccessible, an existing terrain perimeter may already exist.
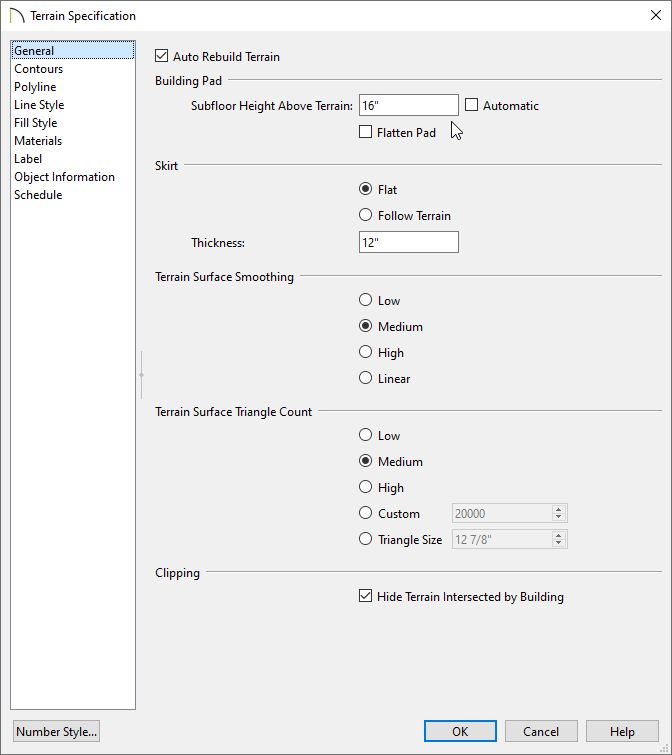
- Next, navigate to Terrain> Terrain Specification
 , and on the General panel of the Terrain Specification dialog that displays, uncheck the Automatic box next to Subfloor Height Above Terrain, specify an appropriate value in this field, then click OK.
in this example, a value of 16" is specified.
The Subfloor Height Above Terrain value is the distance between Floor 1 and the terrain at the building footprint center.
- Now, we can modify the slope of the terrain. Navigate to Terrain> Elevation Data
 , select the Elevation Line
  and/or Elevation Region
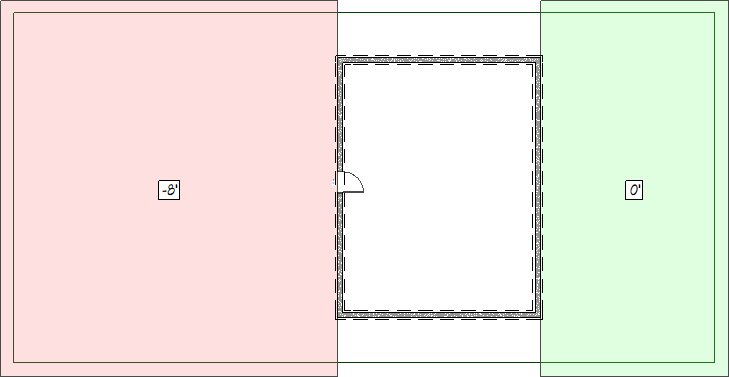
  tools, then click and drag to create elevation lines/regions in various areas of the terrain perimeter.
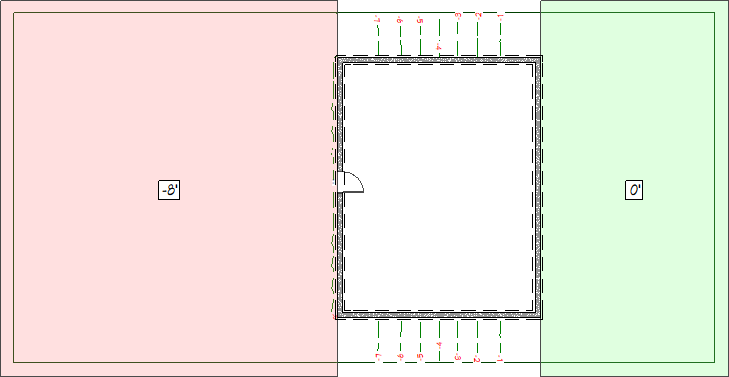
In this example, two elevation regions are used. The first region starts at the bottom (ledge edge) and is set to have an Elevation of -96" (8'). For demonstration purposes, this is represented with a light red fill in the image above. The second region starts at the top (right edge) and is set to have an Elevation of 0". For demonstration purposes, this is represented with a light green fill in the image above.
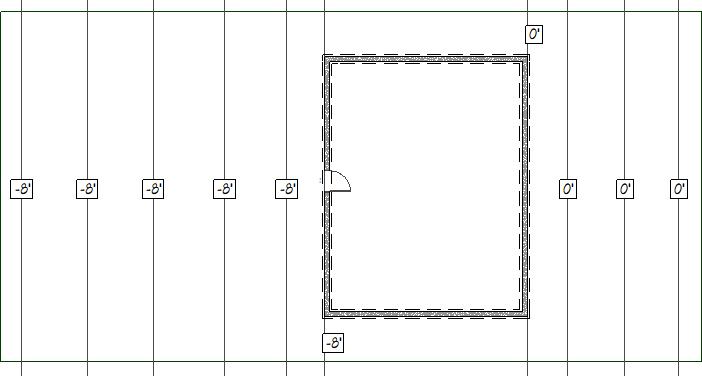
Elevation lines can also be used to create a similar effect, though several additional lines may need to be placed if flat areas are wanted throughout the terrain. Please reference the following image and note the placement and Elevation of each of the lines.
- When your elevation data is in place, select Terrain> Build Terrain
 from the menu. The program automatically generates contour lines between the elevation lines that you drew.
In this example, you can see green contour lines with red labels. The labels are red, as the contours are at negative values.
- To see the results, create a 3D view by navigating to 3D> Create Perspective View> Perspective Full Overview
 .
.