QUESTION
I want to be able to apply a solid color to a surface displaying a pattern, or texture, and blend the two. How do I do that?

ANSWER
Instead of using the Material Painter to replace a material with a new one, we can use it with the Blend Colors With Materials tool to blend a color with a textured material.
To blend colors with materials
- Create a Camera
 view looking at the material that you'd like to blend with a color.
- Select 3D> Material Painter> Material Painter
 .
.
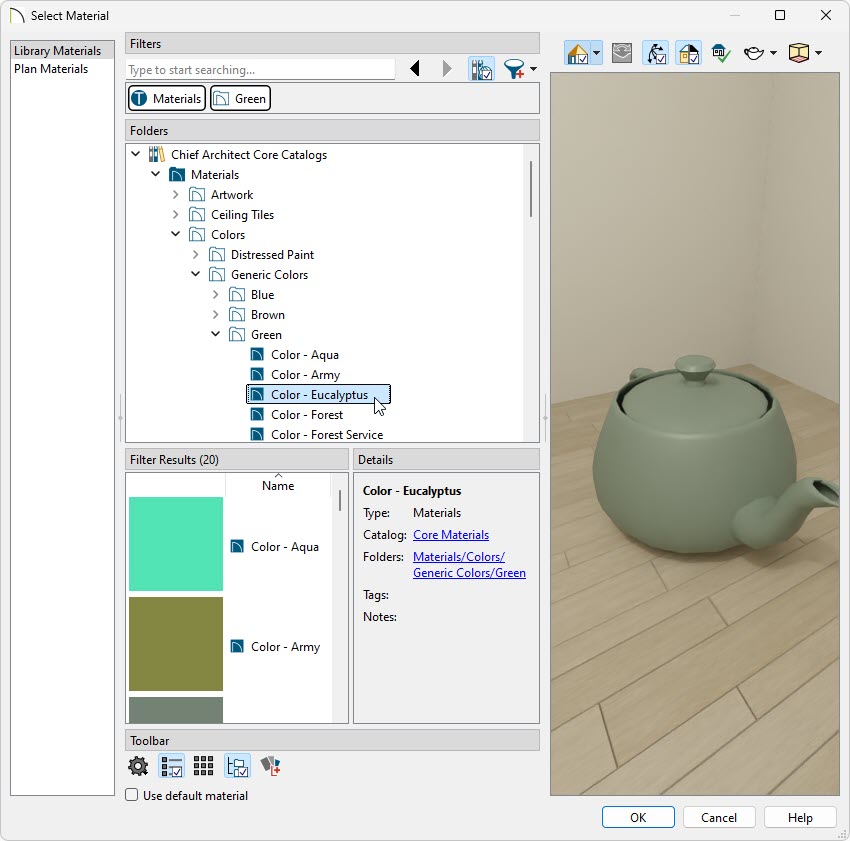
- In the Select Material dialog that displays, search for and locate an appropriate color material, then click OK.
In this example, Color - Eucalyptus is used.
- Select a Material Painter Mode from the Edit toolbar, which displays at the bottom of the program window when the Material Painter is enabled.
You can also navigate to 3D> Material Painter from the menu to choose a mode.


For more information on the various modes, please access the "Using the Different Material Painter Modes" resource in the Related Articles section below.
- Select the Blend Colors With Materials
 edit tool. The paint roller
  icon will follow your cursor when this setting is enabled.
You can also navigate to 3D> Material Painter> Blend Colors With Materials from the menu.
When the Material Painter is active, but the Blend Colors With Materials tool is not, the cursor displays a spray can  icon instead.
-
Click on the object to blend the selected color with the current texture. The result is a new material, with the textured appearance of the initial material, and the color that you have selected.
- If either the Component or Object Mode is active, you can continue to click on surfaces to apply the selected material. When you are finished, press the Spacebar on the keyboard.