QUESTION
I would like to know how to change the side of a door the hinges are located on, as well as how to alter the direction that the door opens.
ANSWER
Changing the hinge and swing sides of a door is easy to do using its edit handles or the Change Opening/Hinge Side and Change Swing Side edit buttons.
You can also use the edit handles to switch the side of the door connected to the doorway if there is no hinge - as is the case with a slider, pocket, and bi-fold doors.
To change a door's hinge side using the edit tool button
- Using the Select Objects
 tool, select the door.
- Click on the Change Opening/Hinge Side
 edit button.
To change a door's hinge side using the edit handles
- Click the Select Objects tool and click on a door to select it and display its edit handles.
- Click the triangular edit handle that displays near the end of the door symbol and drag this handle across the door and parallel to the wall in which the door is placed.
- When you place your cursor over this handle, it displays as a circular arrow
 .
.
- When you drag the handle far enough, the door hinge side will move to the opposite side of the door.
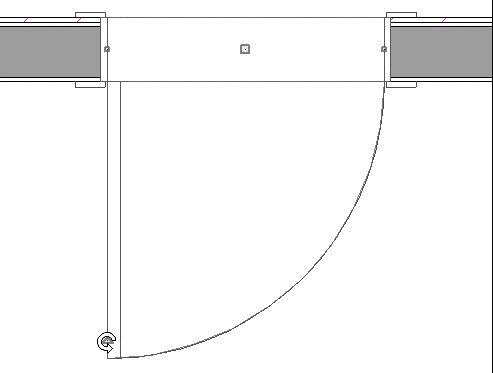
- Release the mouse button and the hinge will remain on the opposite side of the door.
To change a door's swing side using the edit tool button
- Using the Select Objects tool, select the door.
- Click on the Change Swing Side
 edit button.
To change a door's swing side using the edit handles
- Click the Select Objects tool and click on a door to select it and display its edit handles.
- Click the triangular edit handle that displays near the end of the door symbol and drag this handle across the door and perpendicular to the wall in which the door is placed.
- When you place your cursor over this handle, it displays as a circular arrow .
- When you drag the handle far enough, the door hinge side will move to the opposite side of the door.
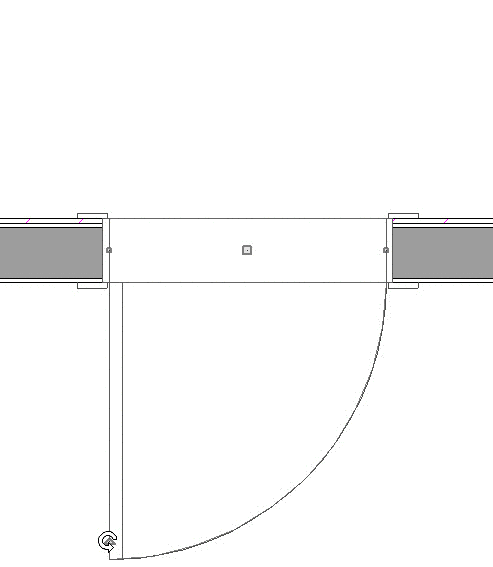
- Release the mouse button and the hinge will remain on the opposite side of the door.