QUESTION
How do I modify the height of the retaining wall or create a stepped top?

ANSWER
The height of a retaining wall is initially determined by the heights of the terrain on either side of the wall. Once placed, a retaining wall can be modified using various edit handles in a Cross Section/Elevation view.
To add a retaining wall
-
Open
 the plan in which you would like to add a retaining wall, or create a new plan by selecting File> New Plan
  .
.
- To add a retaining wall, you must first have a terrain perimeter on your plan. From the menu, select Terrain> Create Terrain Perimeter
 and create a Terrain Perimeter on Floor 1.
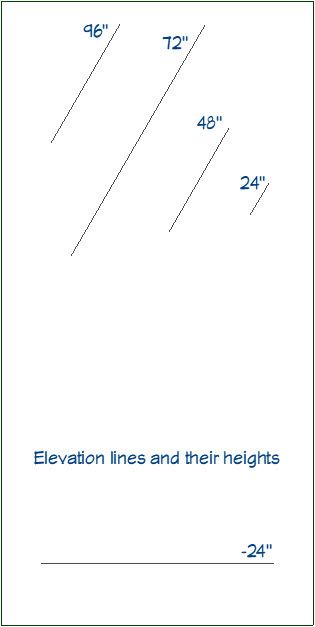
- Although you can add terrain elevation data to your plan after a retaining wall is placed, it is usually easier to do so beforehand using the Elevation Data
 . tools.
In this example, Elevation Lines  were used.
- With elevation data in place, draw a retaining wall in floor plan view by selecting Terrain> Terrain Wall and Curb> Straight Retaining Wall
 , then click and drag the retaining wall from one edge of the terrain perimeter to the opposite edge.
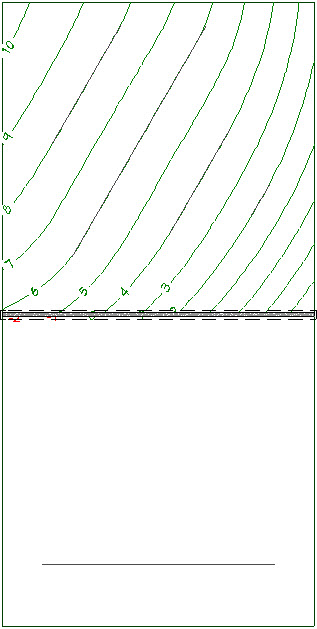
- Select Terrain> Build Terrain
 to generate contour lines between the elevation data that you entered. The terrain wall creates a break in the terrain, so that elevation data above it has no affect on the elevation data below.
To modify a retaining wall
- Select 3D Create Orthographic View> Cross Section/Elevation
 , then click and drag the camera toward the retaining wall to create a cross section/elevation view of the retaining wall.
- In the Cross Section/Elevation view, click on the retaining wall near the top edge using the Select Objects
 tool to select it and display its edit handles.
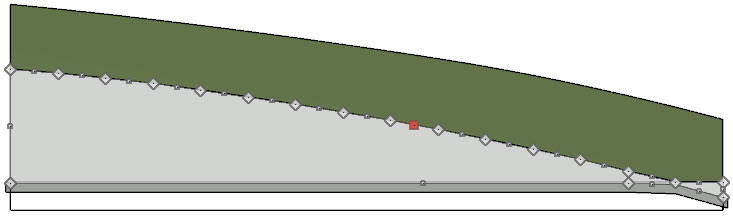
- Retaining walls feature numerous diamond-shaped reshape handles which allow them to follow the terrain contours.
Notice, too, the square move handle that displays on the edge near the spot where you clicked, indicating that this is the selected edge of the wall. If you click on this handle and drag up or down, you can adjust the height of the wall, if needed.
- To create a stepped top, start by turning off Grid Snaps
 and Object Snaps
  , which can both be toggled on and off by selecting them under Edit> Snap Settings
  .
.
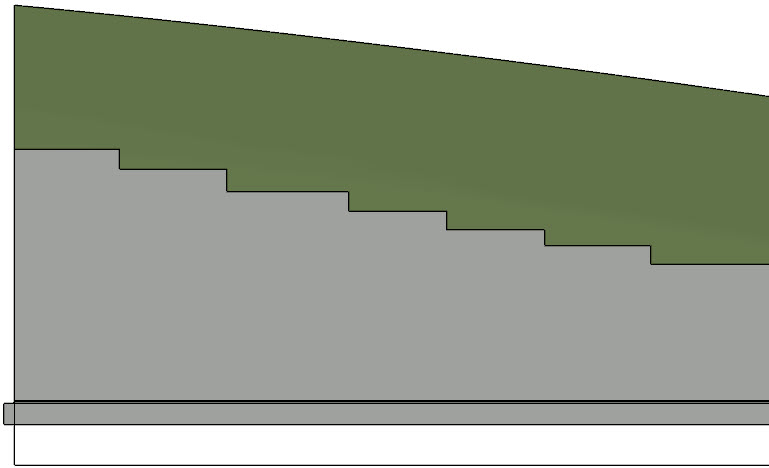
- Next, select the third reshape handle from the left and drag it down and to the left until it forms a vertical edge to create your first step.
In this example, we will create steps in the retaining wall from left to right.
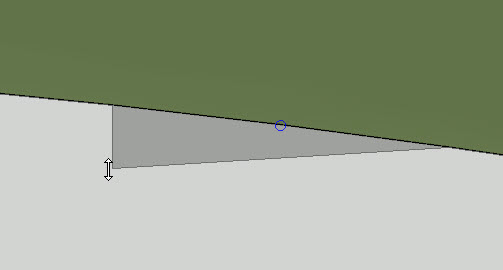
- Select the next reshape handle to the right and drag it down until it forms a horizontal edge, which forms the second step.
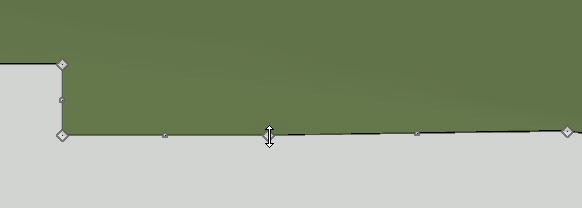
- The height and width of any step can be adjusted by clicking near the edge that you would like to move, to select it, and display its square move handle.
- Repeat these steps until you have created a stepped retaining wall that meets your needs. You can also use the Add Break
 edit tool to add more breaks as needed.
- To view your terrain and retaining wall in a 3D view, select 3D> Create Perspective View> Perspective Full Overview
 .
.
Additional changes can be made to the retaining wall, such as adding wall caps or changing the wall type, by clicking on the retaining wall and selecting the Open Object  edit tool.