QUESTION
How do I apply a gutter profile to the roof in my plan?

ANSWER
The Library Browser includes a selection of gutter profiles that can be applied to both automatically generated and manually drawn roofs.
To add or remove gutters from all roof planes
- Select Build> Roof> Build Roof
 from the menu.
If you have modified roof planes manually and don't want to rebuild the entire roof, you can instead group select your roof planes and open them all up to specification by selecting the Open Object  edit button. To learn how to group select roof planes, please see the article "Group Selecting Objects" in the Related Articles section below.
- On the Gutter panel of the Build Roof or Roof Plane Specification dialog that opens:
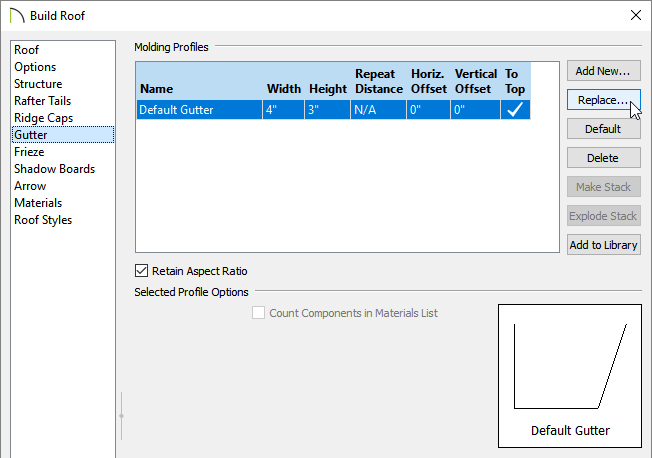
- Select the current gutter molding profile if one is present, and click the Replace button.
If a gutter molding profile is not present, select the Add New button.
If you'd like to delete the gutter, select it and click Delete.
- If you're replacing or adding a gutter molding profile, a Select Library Object will open, in which you can then search or browse for one that suits your needs. Once your desired gutter molding profile is chosen, click OK.
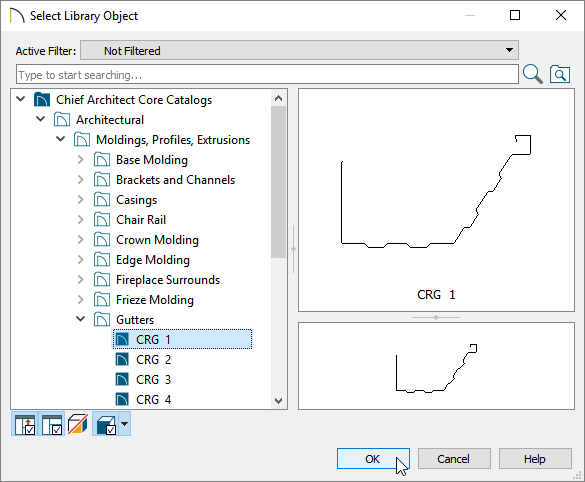
You can also create your own custom gutter molding profile. To learn more, please see article "Drawing a Custom Gutter Molding Profile" in the
Related Articles section below.
- Make any additional modifications to the gutter molding profile such as the Width, Height, and Offsets.
You can also check the Retain Aspect Ratio checkbox if you'd like the gutter profile to retain the aspect ratio when either the Width or Height is modified.
- Next, select the Materials panel, click on the word Molding under the name of the gutter molding profile that you selected, then click the Select Material button.
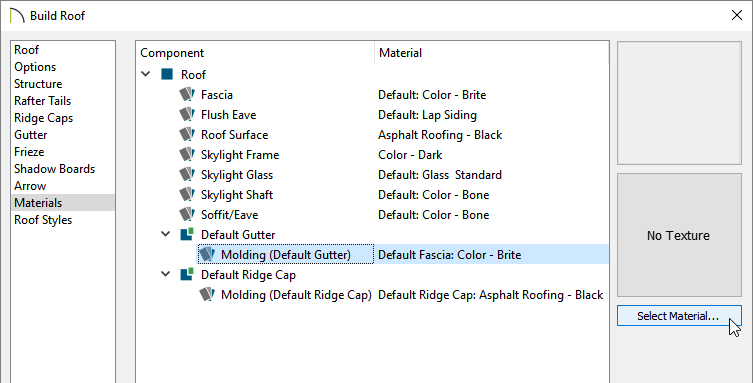
- In the Select Material dialog, browse the library for a material that you'd like to use for the gutters.
- Once a desired material is chosen, click OK.
- On the Roof panel, place a check in the box beside Build Roof Planes.
If you instead group selected and opened your roof planes up to specification, skip this step.
- Click OK to confirm the changes and close the dialog.
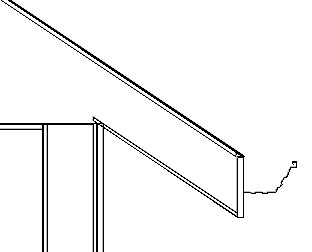
- To confirm that your selected gutter molding profile has been applied or removed, select 3D> Create Orthographic View> Backclipped Cross Section
 and click and drag a camera arrow running parallel to the roof plane eaves with gutters so that the profile can been viewed.
To add or remove a gutter from an individual roof plane or edge
- Using the Select Objects
 tool, click on the edge of a roof plane that you'd like to add or remove a gutter to/from, and then click on the Open Object edit button.
- On the Gutter panel of the Roof Plane Specification dialog that opens:
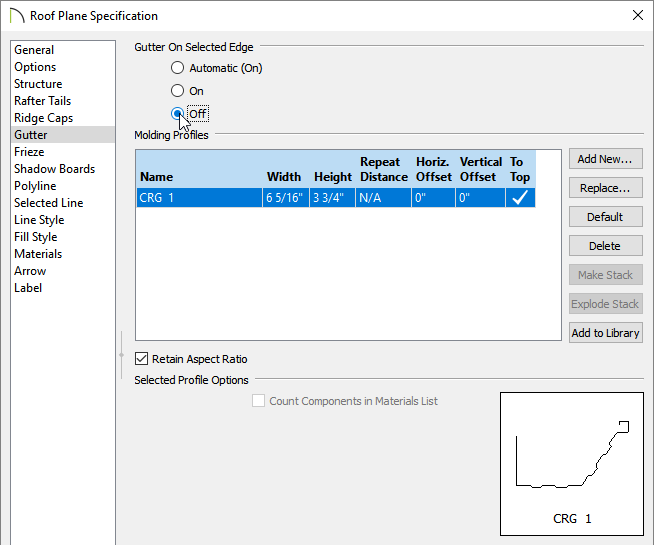
- Under the Gutter On Selected Edge heading, select the Automatic (On/Off) option to use the default behavior that is set within the Build Roof dialog.
Select the On option to always display the specified gutter molding profile for this edge of the roof plane.
Select the Off option to remove the gutter molding profile from this selected edge.
The ability to adjust the gutter for each individual roof edge is only available in Chief Architect Premier X11 and newer program versions.
- To add, remove, or replace the gutter molding profile for all edges of the opened roof plane, choose the Add New, Replace, or Delete button.
In Chief Architect X10 and prior program versions, the gutter can be turned on/off for each individual roof plane by selecting the Options panel, and checking/unchecking the Gutter box.
- Once all desired changes have been made, click OK to close the dialog.