QUESTION
My project calls for steel framed walls. How do I generate these types of walls?

ANSWER
Wall framing properties are associated with the Main Layer that is specified for each wall type. You can use a predefined steel wall type or create your own by accessing the Wall Type Definitions dialog.
To create steel framed walls
- In your plan, navigate to Build> Wall> Define Wall Types
 .
.
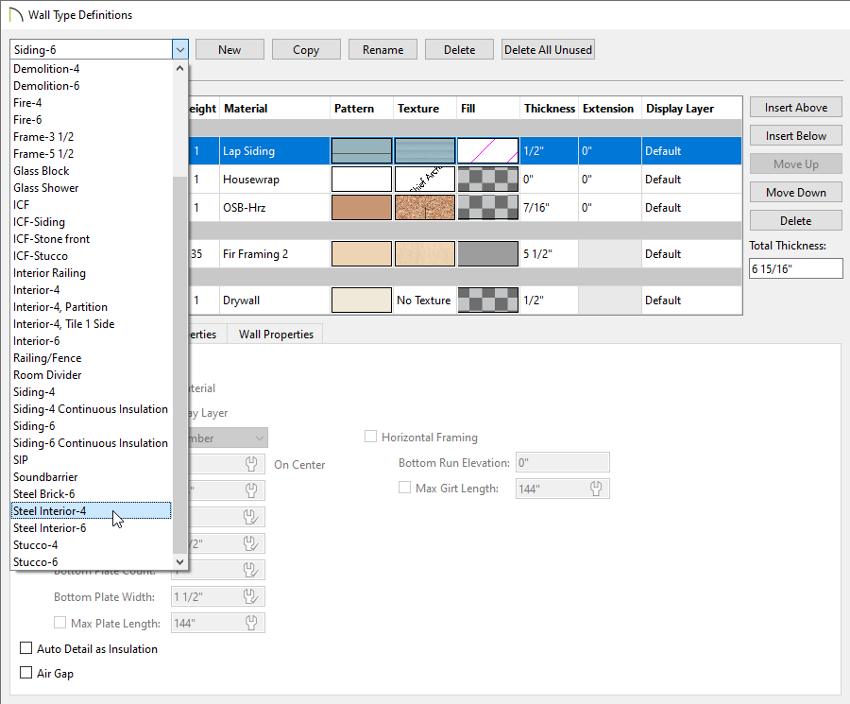
- In the Wall Type Definitions dialog that opens, use the drop-down located in the top left corner to choose a predefined steel wall type.
In this example, the "Steel Interior-4" wall type is selected.
- If you would like to make changes to the predefined steel wall type, click on the Copy button to create a copy of the wall type, then click Rename to change the name of the copied wall type to something descriptive.
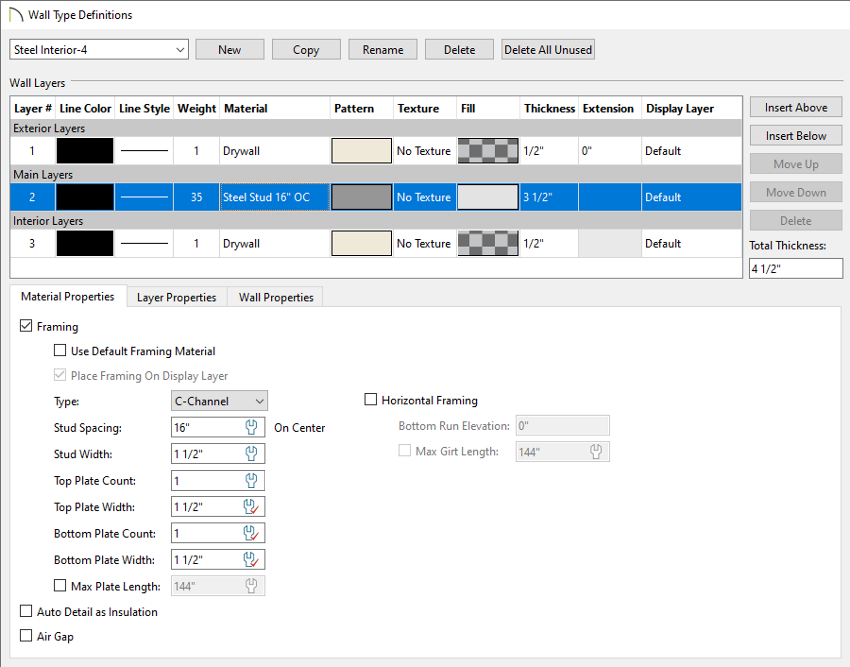
- Make any desired modifications to the wall type, then click OK.
It's important to ensure that the Main Layer consists of a steel material, is located in the Main Layers section within the Wall Layers table, and that the layer is marked as Framing.
The predefined steel wall types consist of a Steel Stud 24" OC material, have the Framing box checked, and have the framing Type set to C-Channel.
- We can now specify this wall type to be used as the default going forward. Select Edit> Default Settings
 from the menu, expand the Walls category, select the desired wall option, then click Edit.
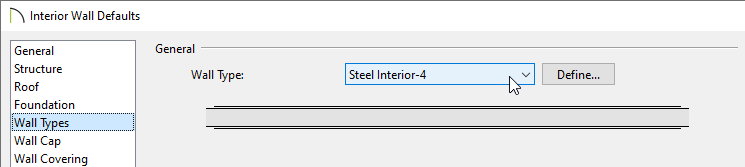
In this example, the "Interior Wall" option is selected.
- If you specify a steel framed wall type as the Interior Wall default, then next time you use the Interior Wall
 tool to draw walls in this plan, they will be drawn using that wall type.
- Similarly, if you specify a steel framed wall type as the Exterior Wall default, then next time you use the Exterior Wall
 tool to draw walls in this plan, they will be drawn using that wall type.
- In the dialog that appears, click on the Wall Types Panel, use the Wall Type drop-down to choose your desired steel wall type, then click OK and Done.
In this example, the "Steel Interior-4" wall type is selected.
- Next, select Build> Framing> Build Framing
 .
.
- In the Build Framing dialog, check the Walls box under either the Automatically Rebuild Framing or Build Framing Once section, then click OK.
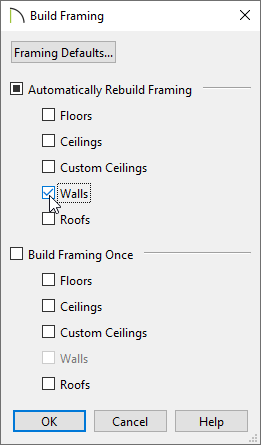
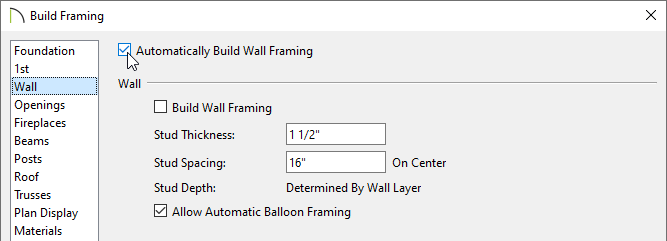
In X15 and prior versions, check the Automatically Build Wall Framing or Build Wall Framing box located on the Wall panel, then click OK.
Now, any walls in your plan that are using a steel wall type will have steel framing that can be seen in a Framing Overview  , as well as in a Materials List.