The information in this article applies to:

QUESTION
I am trying to mull windows and/or doors together using the Make Mulled Unit tool, but an Information message keeps telling me:
"The selected openings cannot be mulled. They must be within 24 inches (600 mm) of one another, cannot overlap, and must be aligned vertically or horizontally."
How can I mull these items together?

ANSWER
Doors and windows can be mulled together to form a wide variety of custom units using the Make Mulled Unit edit tool. In order to use this tool, however, a couple of conditions must be met:
-
The openings in question cannot be more than 24 inches or 600 mm apart.
-
The openings cannot be overlapping.
-
The openings in question must be aligned vertically or aligned horizontally
Bearing these rules in mind, doors and windows can be mulled into a single unit quickly and easily, even when the unit has multiple rows of windows.
To create rows of stacked windows
-
Open
 the plan in which you want to create a mulled window unit.
In this example, a simple rectangular structure is used. The ceiling height is set at 15' so there is plenty of room for placing rows of windows above one another.
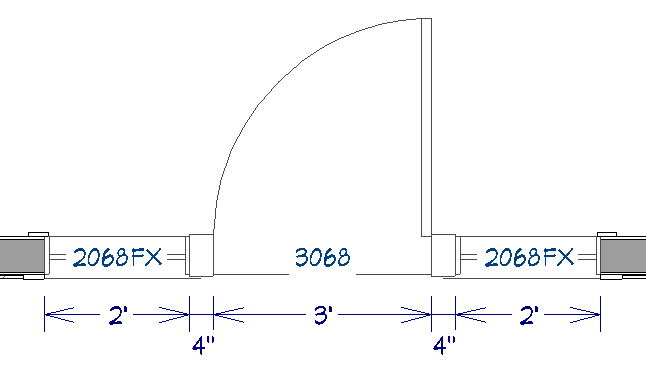
- Place a door and as many windows as you will require for your first row of units, then edit the door and windows to your liking.
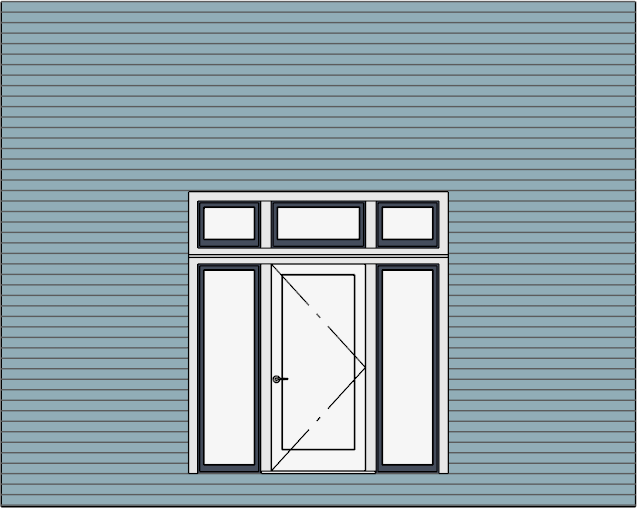
In this example, a 36" wide Glass Panel door is positioned between two 24" wide Fixed Glass windows. The Fixed Glass windows are 80" in height, are spaced 4" from the door, and have no exterior sill.
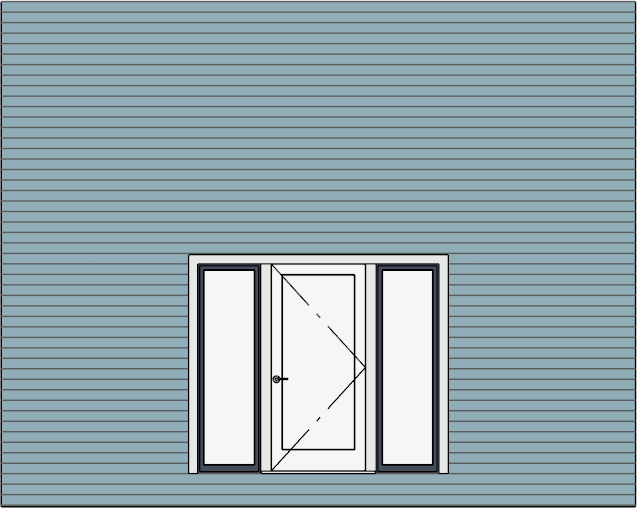
- Select 3D> Create Orthographic View> Cross Section/Elevation
 from the menu, then click and drag a camera arrow towards the door and windows.
- Using the Select Objects
 tool, click on one of the windows to select it, hold down the Shift key on your keyboard, then click on the other window to add it to the selection.
When multiple objects are selected, the total number is stated at the bottom of the program window, on the left side of the Status Bar.

- With the windows selected, click the Transform/Replicate Object
 edit button and in the dialog dialog that displays:
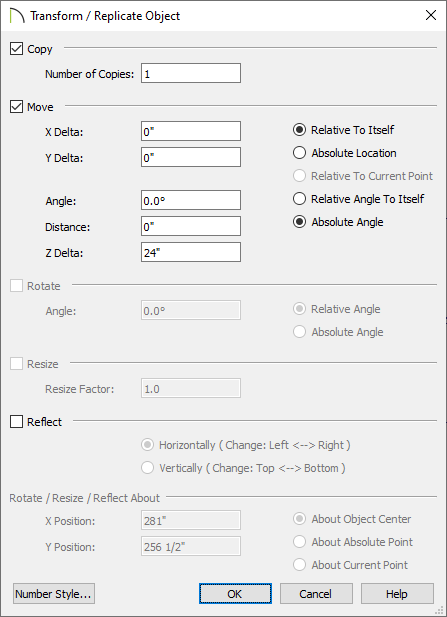
- Check the box beside Copy and set the Number of Copies to 1;
- Check the box beside Move and set the Z Delta value to a positive value such as 24".
- Click OK to close the dialog to see that the selected windows have been copied and moved to be 24" higher.
- With the newly created windows still selected, click the Open Object
 edit button, specify a new Height value for the windows, then click OK.
In this example, a Height of 18" is used.
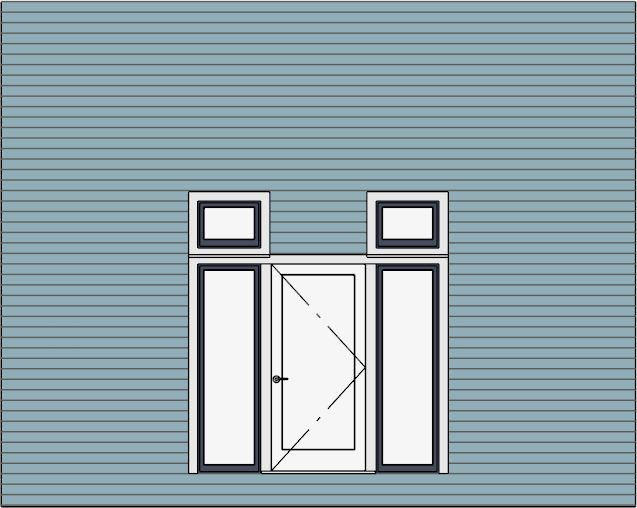
- Place an additional Fixed Glass window centered above the door.
In this example, the Width is set to 36" to match the width door, the Height is set to 18" to match the height of the windows on either side, and the exterior casing is removed.
- Repeat these steps as needed to produce any additional windows.
Once the door and its side and transom windows are in position, they can be mulled.
To create a mulled unit
- Using the Select Objects tool, click on the door to select, hold down the Shift key on the keyboard, then click on the two windows on each side of the door to add them to the selection.
- With these three objects selected, click the Make Mulled Unit
 edit tool.
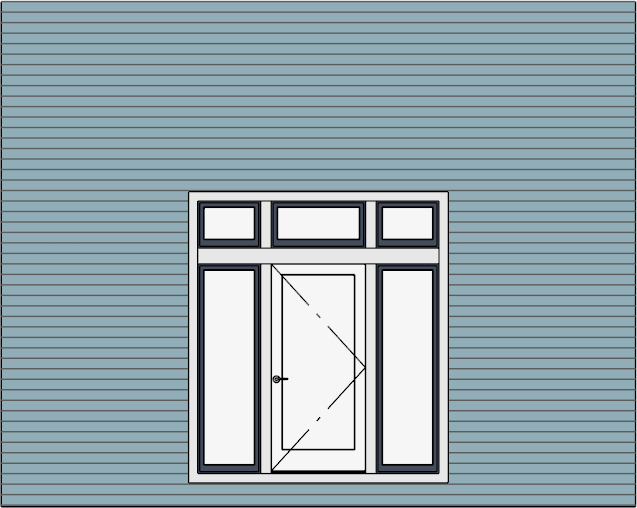
- Next, use the Shift key to group-select the three windows at the top and click the Make Mulled Unit edit tool once again.
- With the newly created mulled unit selected, hold down the Shift key, select the bottom mulled unit, then click the Make Mulled Unit edit tool a third time to form a single mulled unit.
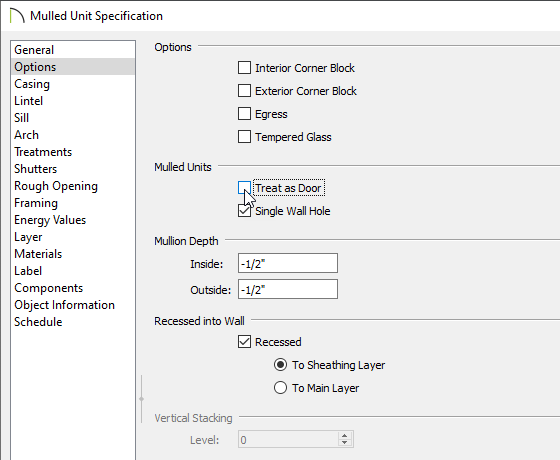
- By default, mulled units that include a door are treated as doors for the purposes of producing schedules and materials lists.
If you would prefer that this unit be treated as a window, select the unit, click the Open Object edit tool, and on the Options panel of the Mulled Unit Specification dialog that displays, uncheck Treat as Door, then click OK.
- This mulled unit can now be added to the library for use in other plans by selecting the Add to Library
 edit tool.