The information in this article applies to:

QUESTION
How do I change the layer that an object is on?
ANSWER
An object's layer can be changed using a variety of methods in Chief Architect. In this article, we will discuss the following:
Changing the layer in Default Settings
- Navigate to Edit> Default Settings
 from the menu.
- Choose a category you'd like to change the default layer for, then click the Edit button.
- In the dialog that appears, select the Layer or Line Style panel.
- Using the Layer drop-down menu, select the layer you would like these objects to be assigned to.
- Click OK to confirm the change, then click Done.
Changing the layer through the object's Specification dialog
- Using the Select Objects
 tool, click on the objects that you'd like to change the layer for, then click on the Open Object
  edit button.
Multiple objects can be selected and modified all at once. To learn more, please see the "Group Selecting Objects" resource in the Related Articles section below.
- In the object's Specification dialog, select the Layer or Line Style panel.
- Using the Layer drop-down menu, select the layer you would like these objects to be assigned to.
- Click OK to confirm the change.
Using the Layer Painter tool
- Select Tools> Layer Settings> Layer Painter
 from the menu.
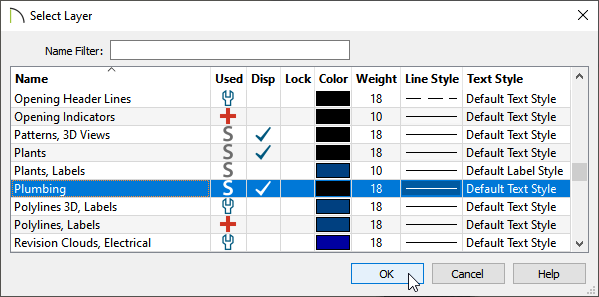
- In the Select Layer dialog that displays, select the layer that you would like to assign objects to, then click OK.
- Your cursor will now display the Layer Painter
 icon.Click on the objects that you would like to assign to your specified layer.When you are finished, select the Spacebar on your keyboard or click on the Select Objects tool.
Using the Layer Eyedropper tool
- In any view, select Tools> Layer Settings> Layer Eyedropper
 from the menu.
- Click on an object to load the assigned layer into the Layer Painter .
- Your cursor will display the Layer Painter icon, and you can click on other objects to assign them to the selected layer.
Merging layers together*
*Applies to X14 and newer program versions
- Select Tools> Layer Settings> Display Options
 from the menu.
- In the Layer Display Options dialog that displays, select the two layers that need to be combined together using the Control key on Windows or Command on macOS. The first layer selected will be the one that is kept.
You can also select a group of layers using Shift on both Windows and macOS.
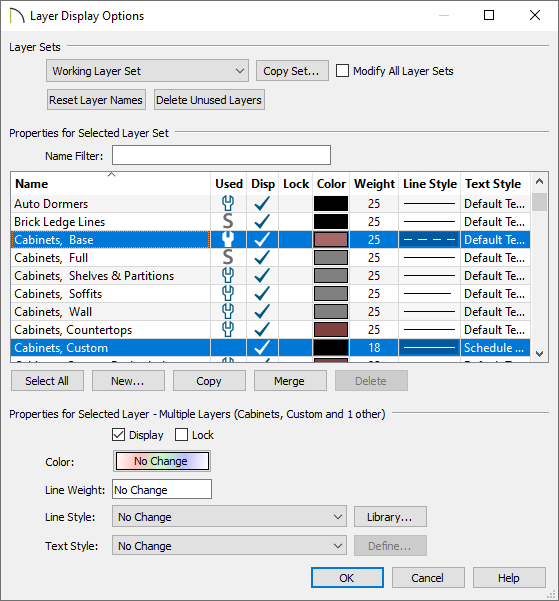
- Click the Merge button to merge the layers.