The information in this article applies to:

QUESTION
How do I create a completely custom schedule and specify what objects are included in that schedule?
ANSWER
Use custom categories along with the Custom Schedule tool to create a completely custom schedule that can consist of multiple objects of different types. For example, you can combine specific cabinets, fixtures, and other objects into a single custom schedule, such as in the event that you're doing a kitchen remodel.
Creating or managing custom categories
- Navigate to Tools> Schedules> Manage Custom Categories
 .
.
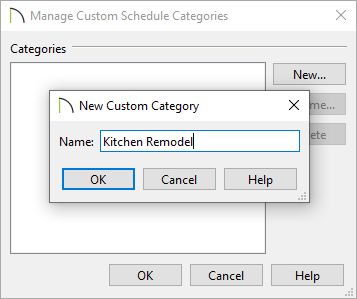
- In the Manage Custom Schedule Categories dialog that displays, click the New button and provide an appropriate name for the category. In this example, "Kitchen Remodel" is specified.
- You can also manage any custom categories that have been created.
- Click on a category and select Rename to give it a new name, or Delete to delete it from the plan.
If objects are assigned to display in a custom category, and the custom category is then deleted, the object may no longer appear in any type of schedule until you open the object and assign it to display in a new category. Please see the next section on Adding objects to a category to learn more.
Adding objects to a category
- Click on an object that you would like to be apart of a custom category, then click on the Open Object
 edit button.
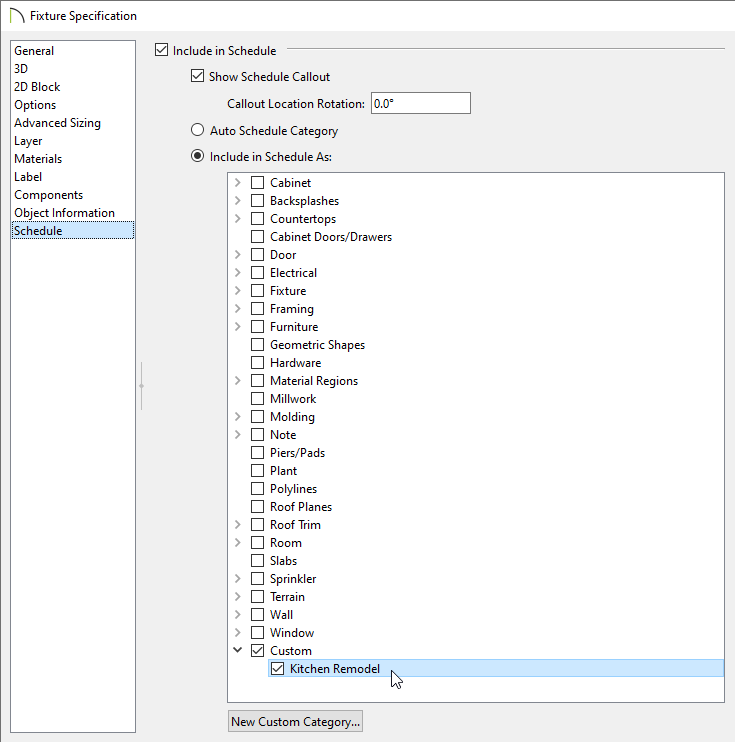
- In the Specification dialog that displays, click on the Schedule panel, select the Include in Schedule As radio button at the top, then place a check in your desired custom category.
Objects can be assigned to display in multiple different categories. For example, a single cabinet object can be set to be displayed in the Cabinet category, as well as a Custom category. This allows a single object to appear in multiple schedules at once.
- Perform this same procedure for any and all objects that you would like to be associated with this category.
Creating a Custom Schedule
- Navigate to Tools> Schedules> Custom Schedule
 and click to place a schedule in your desired location.
We highly recommend creating schedules within the separate Schedules Detail window. This window can be located and opened by accessing the Project Browser  and expanding the CAD Details folder, or by navigating to CAD> CAD Detail Management
  .
.
- Once placed, select the schedule using the Select Objects
 tool, then click the Open Object edit button.
- On the General panel of the Schedule Specification dialog that displays:
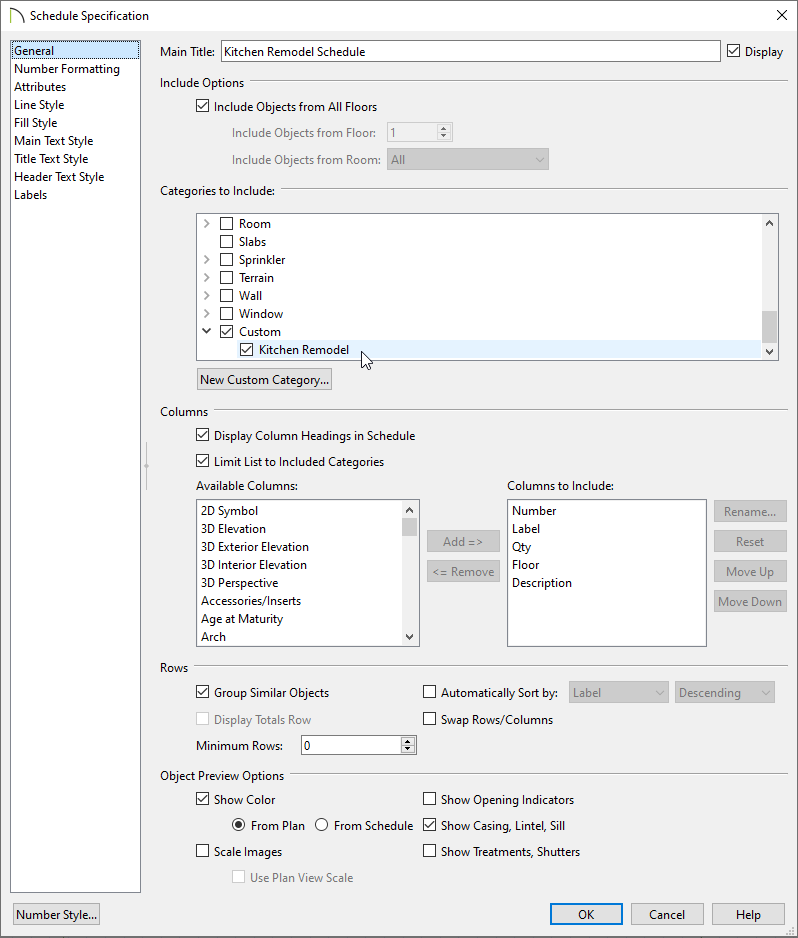
- Specify the Main Title for the schedule.
- Pick and choose what categories you would like to include in the schedule.
In this example, we chose the "Kitchen Remodel" custom category that was created earlier in the article.
- Choose the Columns that you would like to be included in the schedule.
- If desired, check the Swap Rows/Columns box to swap the position of column headings with row headings.
- Make any other desired adjustments to the Display and Object Preview Options. For more information on these options, click the Help button at the bottom of the dialog to open your program's documentation.
- Navigate to the Main, Title, and Header Text Style panels to change the text properties associated with the schedule.
In legacy versions, only the Text Style panel is available, which affects all text within the schedule.
- Make any additional adjustments, such as to the Labels or Fill Style, then click OK.
- Any objects that were assigned to display in the custom category will now display in the schedule.
