The information in this article applies to:

QUESTION
How can I create a custom molding profile and apply it as casing for my doors?
ANSWER
Custom molding profiles can be created using the CAD tools that are available in the software and then added to your User Catalog or plan template for future use.
These custom profiles can then be applied as casing for doors by accessing the Door Defaults or Door Specification dialog.
To create a custom molding profile
- First, launch Chief Architect and select File> New Plan
 .
.
It's recommended to create custom molding profiles in either a floor plan view or in a CAD detail window.
- Select CAD> Lines> Draw Line
 from the menu:
- Draw a vertical line to form the back of the molding profile. The back of the molding must be drawn vertically so that it forms the left side of the polyline.
- In nearly all cases, this line's length should match the height of the profile you are creating for the door casing.
- Continue to create your desired molding profile using the CAD tools, making sure that the result is a closed polyline shape, and that it's drawn at the actual size.
In this example, we will be using the shape shown in the image below.
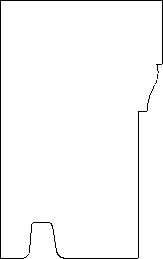
For more information on molding profiles, please see the "Creating and Editing Molding Profiles" resource in the Related Articles section below.
- Using the Select Objects
 tool, select the closed polyline shape that was just created and click on the Add to Library
  edit button to add it to your User Catalog. .
- Your molding profile can now be renamed and moved into your desired location within the library browser.
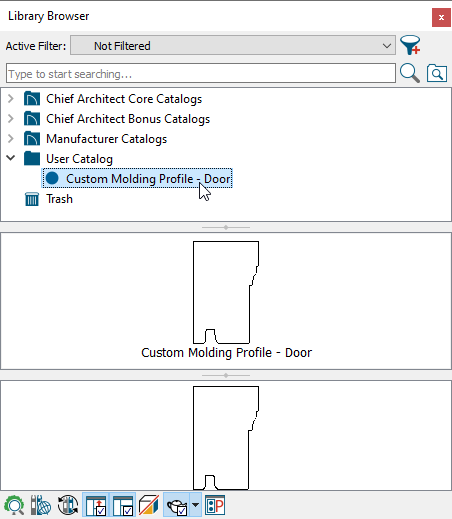
If you would like to be able to have this molding applied to your doors every time one is placed, you may want to consider adding it to your Default Settings for your plan template.
For more information on plan templates, please see the "Creating and Using a Plan Template" resource in the Related Articles section below.
To apply the molding to a plan template
- Select File> Templates> New Plan From Template
 , browse to your template's location on your computer, select it, then click Open.
- In the new file, select Edit> Default Settings
 from the menu.
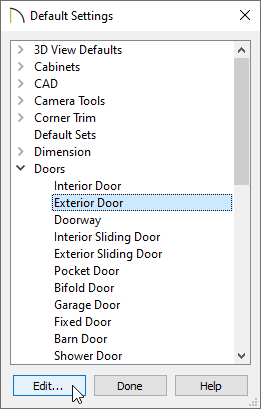
- Expand the Doors category, select the door tool that you would like to modify, then click Edit.
In this example, we have selected the Exterior Door option.
- On the Casing panel of the Door Defaults dialog that displays:
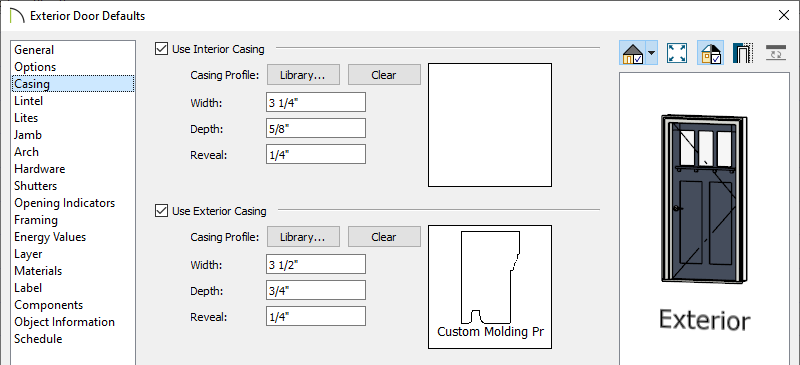
- Ensure that Use Exterior/Interior Casing is checked.
- Click the Library button next to Casing Profile, browse to your User Catalog, select the molding profile that was created, then click OK.
In this example, we have applied the custom molding profile to the exterior casing only.
- Adjust the Width, Depth, and Reveal to your liking.
- Make any other desired changes, such as to the Materials, then click OK and Done to close the dialogs.
- Navigate to File> Templates> Save As Template
 to save the template.
- When you create a New Plan , doors will automatically use the custom molding profile that was created.
To apply the molding to a single door
- Using the Select Objects tool, select a door in the plan and click on the Open Object
 edit button.
- On the Casing panel of the Door Specification dialog that displays:
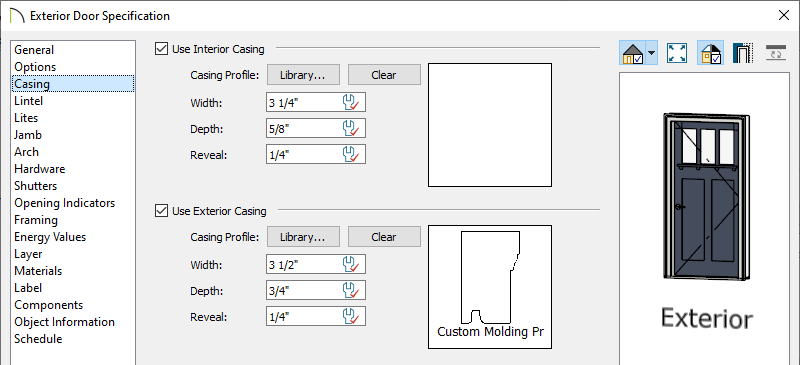
- Ensure that Use Exterior/Interior Casing is checked.
- Click the Library button next to Casing Profile, browse to your User Catalog, select the molding profile that was created, then click OK.
In this example, we have applied the custom molding profile to the exterior casing only.
- Adjust the Width, Depth, and Reveal to your liking.
- Make any other desired changes to the door, then click OK.
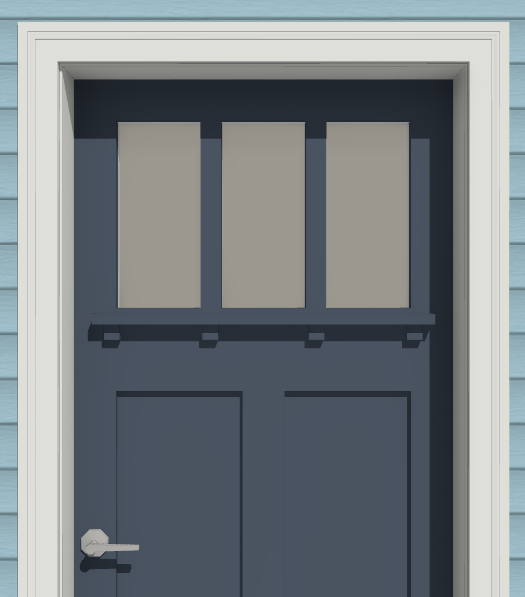
- Take a Camera
 view to see the results.