The information in this article applies to:

QUESTION
What are layout template pages, and how can I make use of them to improve my productivity?
ANSWER
In Chief Architect, you can use Layout Page Templates, which allow you to create one or more title blocks and borders and then assign them to the layout pages of your choice.
Unlike regular pages with content, Layout Page Templates do not print as part of a print range.
In this example, two Page Templates will be created: one for the cover sheet and one for the sheets that follow it.
To create multiple page templates
- Select File> New Layout
 or File> Templates> New Layout From Template
  to select the desired Layout Template to be used.
If a custom Layout Template needs to be created, please see the "Creating and Using Layout Templates" resource in the Related Articles section before proceeding.
- Click on the Project Browser docked to the right side of the program window to make it active.
- If the Project Browser is not open, select View> Project Browser
 to open it.
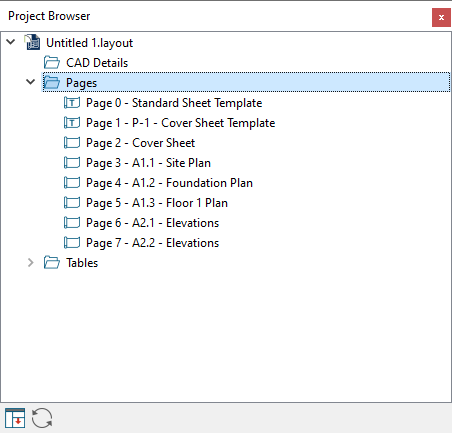
- Click the arrow next to the "Pages" folder to expand a list of the pages in the layout file that are currently in use.
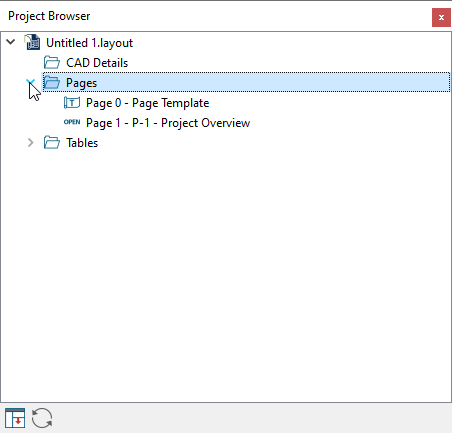
- Notice the icons beside each page. Page 0 is specified as a Page Template.
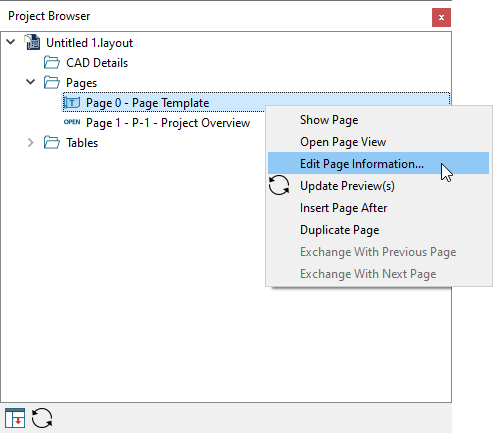
- Right-click on Page 0 in the Project Browser and select Edit Page Information from the contextual menu.
- In the Layout Page Specification dialog, change the Title to "Standard Sheet Template" and click OK.
- Right-click on Page 1 in the Project Browser and select Edit Page Information from the contextual menu.
- In the Layout Page Specification dialog:
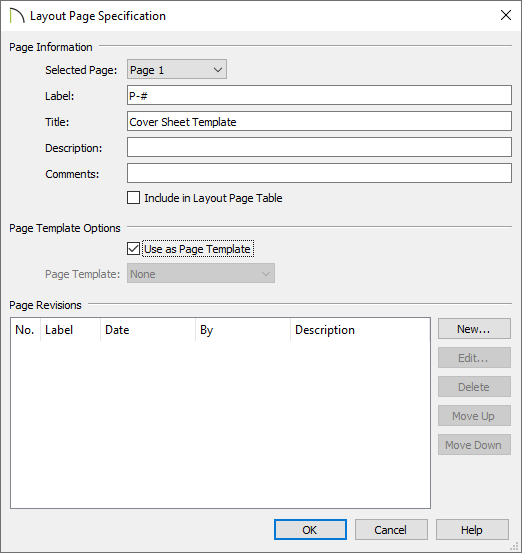
- Change the Title to "Cover Sheet Template".
- Check the box beside Use as Page Template and click OK.
- As you move off of Page 1 to a different page, notice that Page 1’s icon in the Project Browser has changed and now indicates that it is a Page Template.
Using the same steps, you can create additional Page Templates for every discipline and sheet type that you typically use in your own layout template file. If you want to create a Page Template out of a page that is not displayed in the Project Browser, select Tools> Layout> Change Layout Page, enter the page number you wish to make a Page Template and click OK. Next, select Tools> Layout> Edit Page Information  and repeat the steps outlined above.
Once multiple Page Templates have been created, they can be assigned to non-template pages: either blank or with content. You can wait and do this when you actually send views to layout for a project, or you can save time and set aside pages for specific purposes beforehand.
Here, a fairly typical variation of the US National CAD Standard page numbering convention is used.
To use multiple page templates
- Select Tools> Layout> Change Layout Page and go to Page 2.
- Select Tools> Layout> Edit Page Information .
- In the Layout Page Specification dialog:
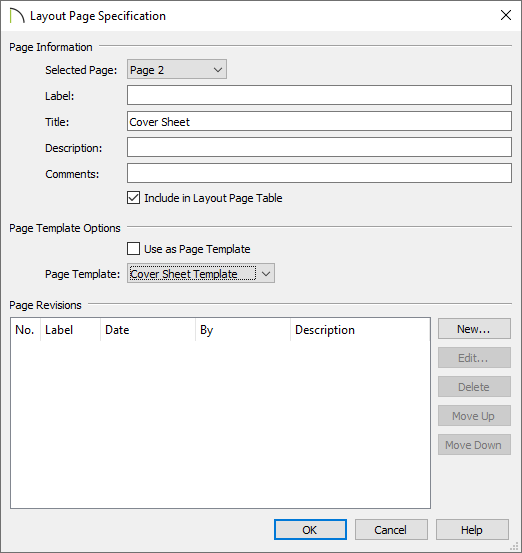
- Specify the Title as "Cover Sheet".
- Click the Page Template drop-down and select "Cover Sheet Template" from the list. Remember, this was created in Step 6 in the section above.
- Click OK and notice that Page 2 is now listed as a blank page in the Project Browser.
- Note, too, that the sheet no longer has a title block and border from template page 0. Instead, it displays only objects on page 1.
- Select Tools> Layout> Page Up
 to go to Page 3.
- Select Tools> Layout> Edit Page Information .
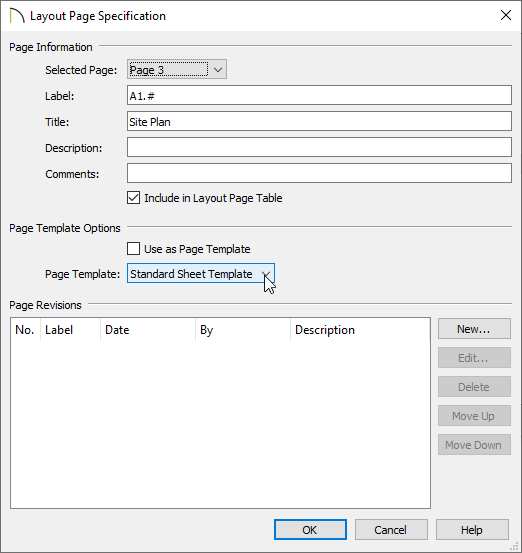
- Specify the Label as "A1.#".
- Specify the Title as "Site Plan".
- Confirm that the "Standard Sheet Template" is selected in the Page Template drop-down list.
- Click OK and notice that in the Project Browser, Page 3 is listed now and that:

- It uses its Label, "A1.#", and that the # has been replaced with a 1.
- It uses its Title, "Site Plan".
- It has the title block and border from the template on page 0.
- Repeat the steps above to edit Pages 4 and 5 so that they also use the "Standard Sheet Template" and the Label "A1.#", and have the Titles "Foundation Plan" and "Floor 1 Plan", respectively.
- Modify Pages 6 and 7 so that they use the "Standard Sheet Template" use the Label "A2.#"., and have the Title "Elevations".
In your own layout template file, you can assign sheet numbers that you typically use in advance and use the numbering convention of your choice.
If you need to add additional disciplines, types, and/or pages, they can be easily inserted at any time: either in a specific project or in your layout template file.
To insert new layout pages
- Select File> Open Layout
 and open the layout file that you wish to insert pages into.
- Select Tools> Layout> Change Layout Page and go to the page that is either before or after the location where you wish to insert a new page.
- Select Tools> Layout> Insert Page Before
 to add a page before the current page. The current page number as shown in the Change Layout Page button will increase by one but the page number defined by its Label will not change.
- Select Tools> Layout> Insert Page After
 to add a page after the current page. The current page will not be affected but any pages that follow it will have their page numbers increase by one.
- Right-click on the new page in the Project Browser and select Edit Page Information .
- In the Layout Page Specification dialog:
- Specify the Title.
- If the page is to be a page with content, specify its Label and choose a Page Template from the drop-down list.
- If the page is to be a template, check the box beside Use as Page Template.
Once your Page Templates have been defined as such, you can create a border and title block for each that matches how it will be used