QUESTION
I need a raised stage in one portion of my plan. How can I create it?

ANSWER
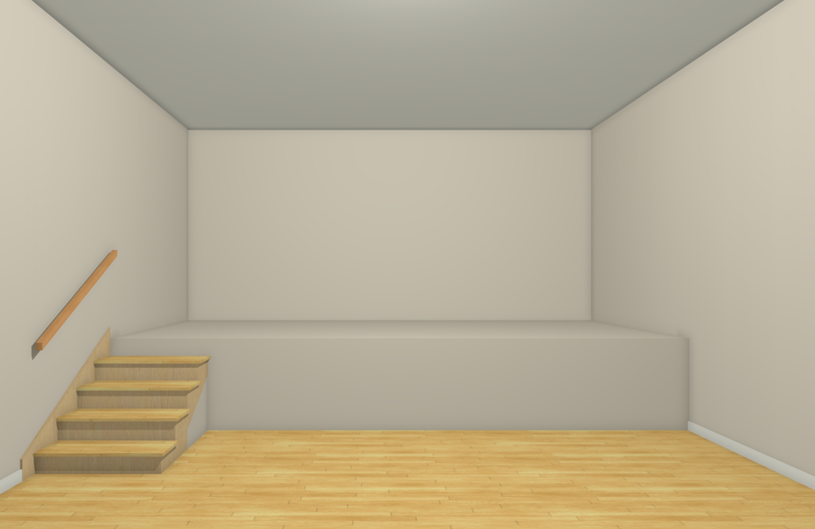
Stages are often found in churches, schools, theaters, and other public buildings. A raised area such as a stage can be created in several ways in Chief Architect. This article describes two of the most common methods.
To create a stage by defining a room
- Launch Chief Architect and choose to Open
 the Chief Architect plan in which you would like to design a stage.
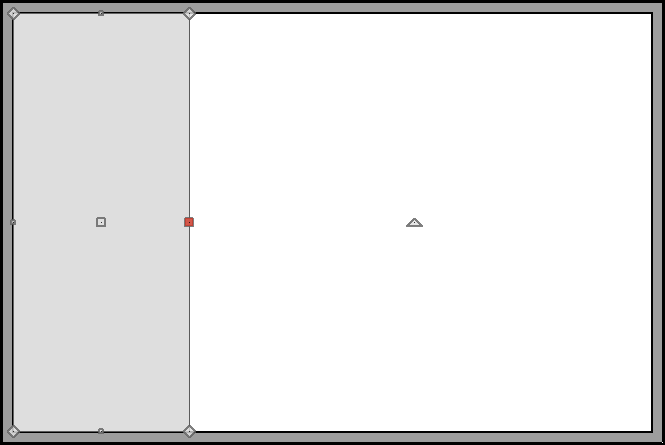
- Select Build> Wall> Room Divider
 from the menu, then click and drag divider lines to define the stage area.

- Using the Select Objects
 tool, click inside the stage room formed by the room divider to select it, then click the Open Object
  edit button.
- On the Structure panel of the Room Specification dialog, specify an appropriate Floor value for your stage height, then click OK to close the dialog and apply your change.
In this example, a value of 36" is used.

- Use the Stair
 tools to create a staircase if desired, then take a Camera
  view to see the results.
To create a stage using a 3D/polyline solid
- Launch Chief Architect and choose to Open the Chief Architect plan in which you would like to design a stage.
- Select Build> Primitive> 3D Solid
 from the menu, then click and drag to draw a rectangle.
In X13 and prior program versions, navigate to Build> Primitive> Polyline Solid  instead.

- Using the Select Objects tool, click on the 3D/polyline solid to select it, and use its edit handles to resize it and move it into your desired position.
- With the 3D/polyline solid still selected, click the Open Object edit button.
- In the 3D/Polyline Solid Specification dialog that opens:
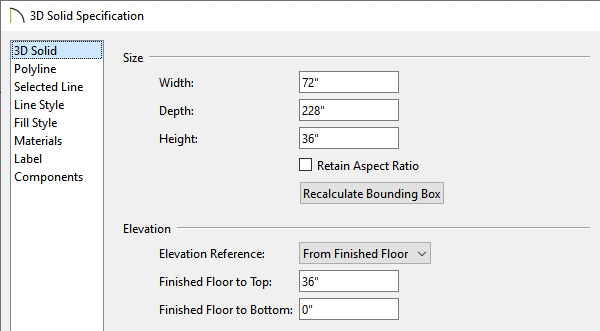
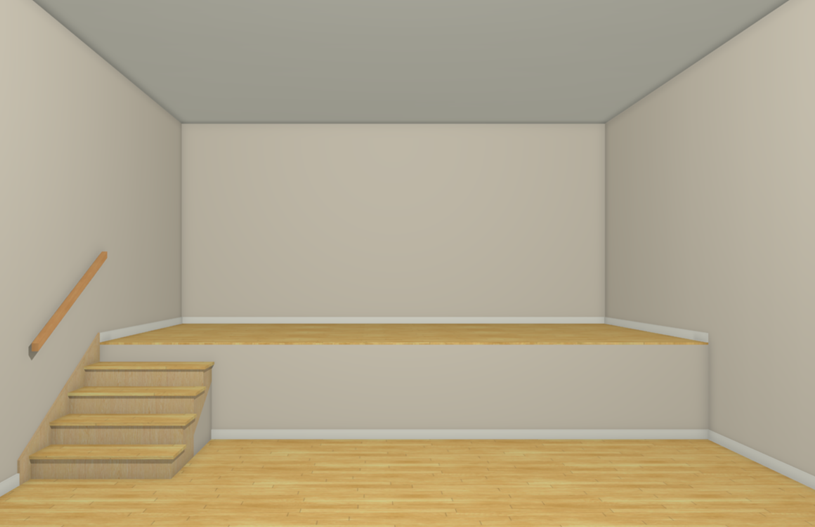
- Set the Height or Thickness to your liking, then specify where the 3D/polyline solid will be placed in relation to the floor.
In this example, both the Height/Thickness and the Finished Floor to Top values are set to 36."
- On the Materials panel, click on the 3D/polyline solid component, then click the Select Material button.
- In the Select Material dialog that opens, browse to the material you would like to apply to your stage platform, select it, then click OK.
- Click OK to close the dialog and apply your changes.
- Use the Stair tools to create a staircase if desired, then take a Camera view to see the results.