QUESTION
My clients need a deck built around their existing above-ground pool. How can I design it for them in Chief Architect?

ANSWER
You can easily drop a pool or spa into a deck by specifying part of the deck room as "Open Below".
To drop a pool into a deck platform
- If you have not done so already, select View> Library Browser
 from the menu, then select an above ground pool of your choice. Move your cursor into the drawing area and click to place the pool at that location in your plan.
In this example, the "Oval Above Ground Pool - Large" was selected and placed.
- Using the Select Objects
 tool, click on the pool to select it, then click the Open Object
  edit button.
- On the General panel of the Fixture Specification dialog that opens:
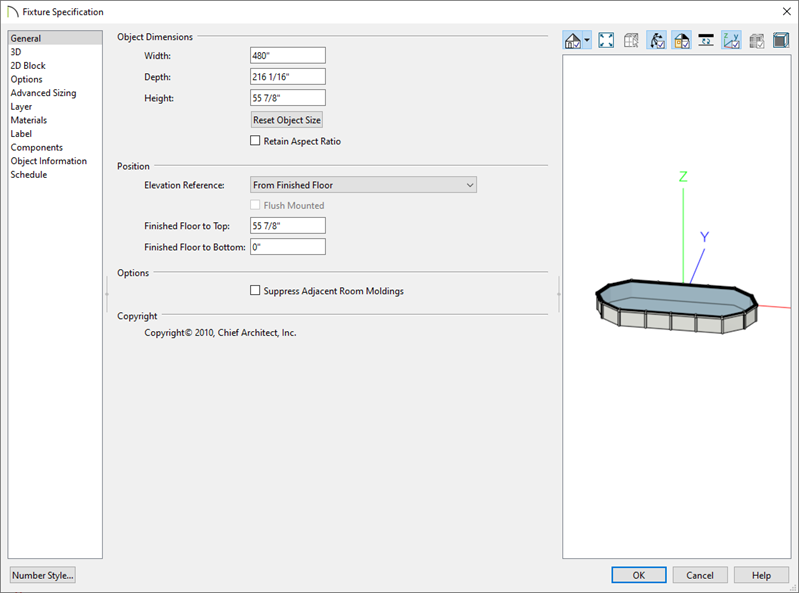
- Specify the size of the actual pool used in your project.
- Make a note of the pool's Height value
- Make any other desired changes, then click OK.
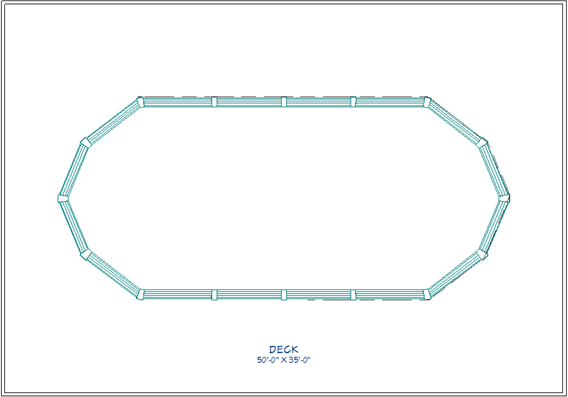
- Select Build> Railing and Deck> Straight Deck Railing
 from the menu, then click and drag to draw deck railings around the pool, creating a Deck room.
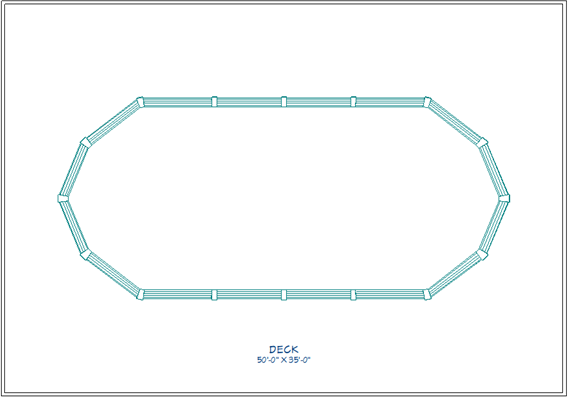
- Using the Select Objects tool, click on the deck railings and move them as needed to create a deck of the desired size and position.
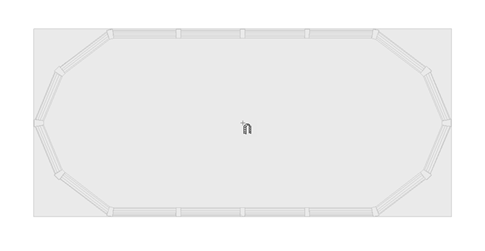
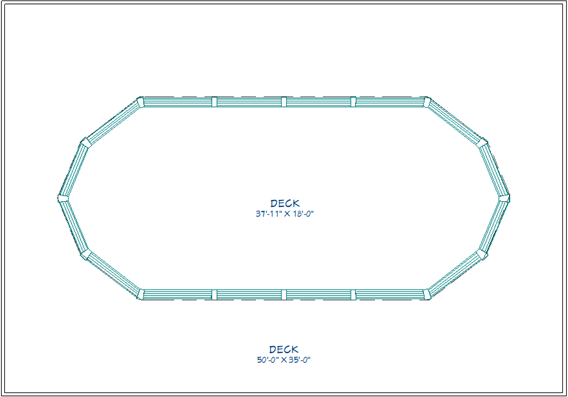
- Select Build> Wall> Room Divider
 from the menu, then click and drag to draw a second enclosed room following the pools perimeter as demonstrated below.
Depending on the shape of the pool it may be helpful to modify your allowed angle snaps. This can be done by navigating to Edit> Defaults Settings> Plan and modifying the Allowed Angles.
In this example we will change it from 15 Degrees to 7 1/2 Degrees.
- If your pool is round or has rounded edges, you can instead use the Curved Deck Edge
 tool to create the room.
- To learn how to create a perfectly round room, please see the Related Articles section below.
- Using the edit handles, position the room divider walls or deck edges to align with the outside edge of the pool.
- Using the Select Objects tool, click in an empty space in the larger rectangular deck room to select it, then click the Open Object edit button.
- On the Structure panel of the Room Specification dialog that opens, specify the Floor as the same or slightly less than the pool's Height value, then click OK.
In this example, the pool's Height is 55 7/8", and the Floor height for the deck is specified as 50".

- Using the Select Objects tool, click in the smaller room that encompasses the pool to select it, then click the Open Object edit button.
It is likely that you will select the pool instead of the room first. Click the Select Next Object  edit button or press the Tabkey until the room is selected.
- In the Room Specification dialog that opens:
-
On the General panel, select Open Below from the Room Type drop-down list.
-
On the Structure panel, uncheck Roof Over This Room.
-
Click OK to close the dialog and apply your changes.
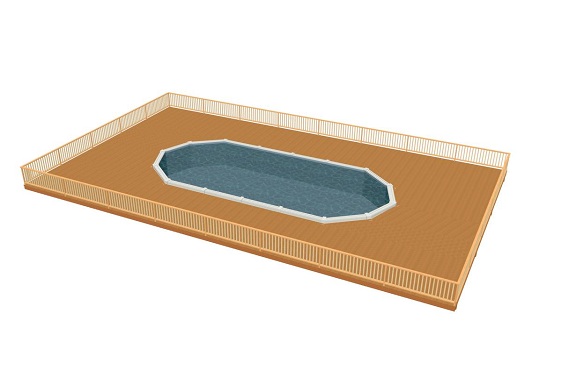
- Select 3D> Create Perspective View> Perspective Full Overview
 from the menu to see the results.