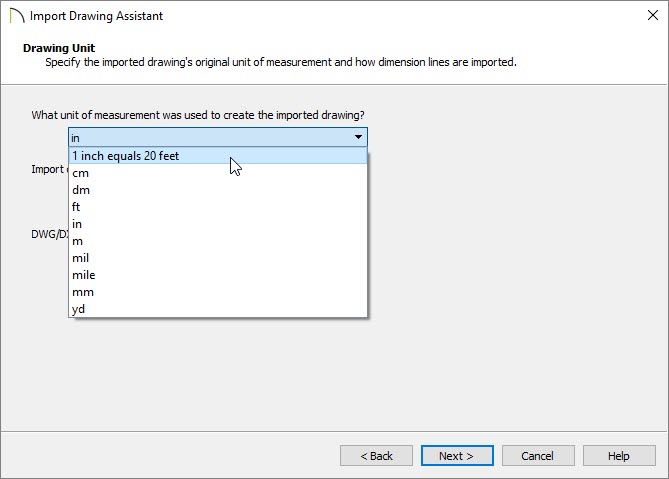
I have a DWG drawing that was drawn at a scale of 1" = 20', and when imported into Chief Architect it is the wrong size. How can I change the scale so it displays at the correct size?
In Chief Architect, all architectural and CAD drawings in plan files are drawn at a one to one scale. A 24" X 24" cabinet really is 24" square, and a CAD line 8" long really is that length - regardless of how far you zoom in or out. To produce a scaled working drawing, the desired scale is specified when a view is sent to layout or printed.
Since drawings are not scaled in the Chief Architect drawing window, it is not possible to assign a scale to an imported drawing. If you have a DXF or DWG drawing that was not drawn at 1:1, it needs to be imported using a custom unit of measurement that takes the drawing's scale into account and converts it to a 1:1 drawing.
 from the menu if you're on a Windows PC or Chief Architect> Preferences if you're on a Mac.
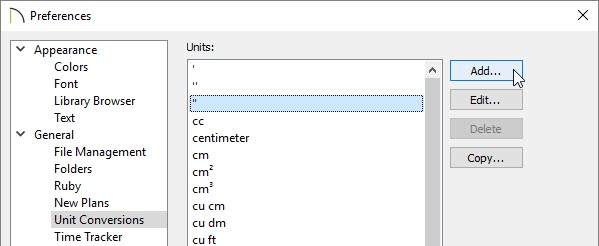
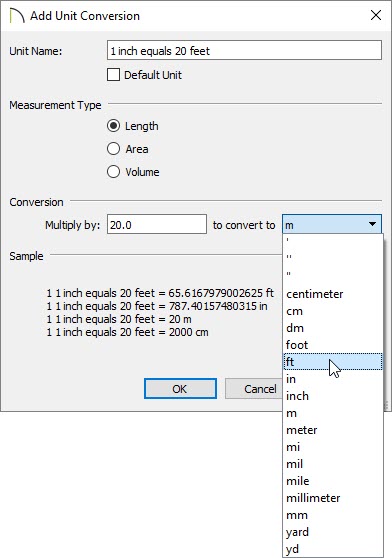
There are several ways to do a unit conversion. For example, a scale of 1" = 20' can be re-scaled by multiplying by 20 and converting to feet. Or, it can be multiplied by 240 (12" X 20) and converted to inches.
 from the menu and open a new CAD Detail window to import your drawing into.
 from the menu.