QUESTION
What are Default Sets, and how are they used in Chief Architect?
ANSWER
Default Sets are collections of Saved Defaults that allow you to quickly switch the Active Defaults for all of the following text-based objects at once, as well as the Current CAD Layer:
- Dimensions
- Rich Text
- Text
- Revision Clouds
- Callouts
- Markers
- Notes
- Arrows
For more information on Saved and Active Defaults, please see the Related Articles section below.
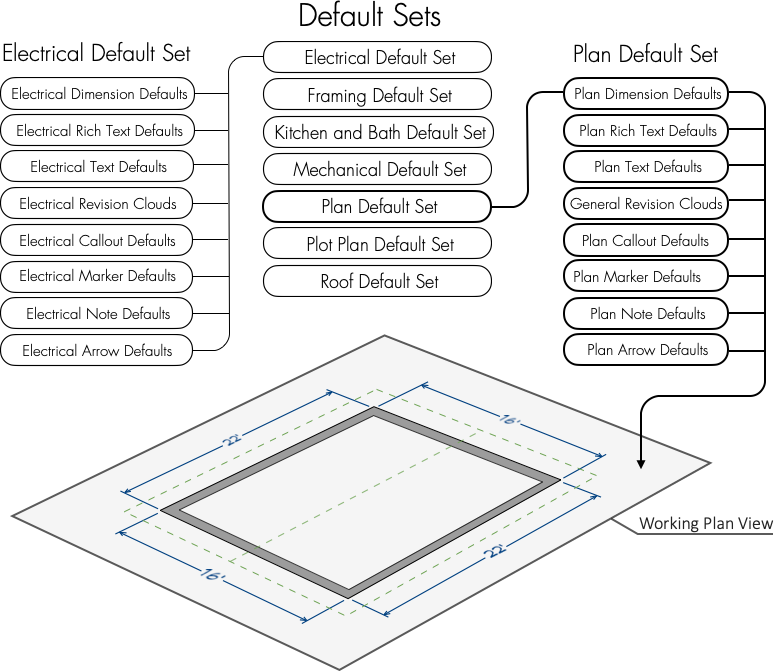
Multiple Default Sets can be saved in any plan, each for a specific purpose, and can be quickly switched from one set to another. For example, you could create a set for site plans with large dimensions, text, callouts, markers, and arrows; a dimension format using feet, yards, or meters instead of inches or millimeters; and custom layers for dimensions and text. Additionally, Default Sets are connected to Saved Plan Views, which allow you to change a variety of options in the program with a single click.
You can learn more about Default Sets in the following sections:
To create a new Default Set
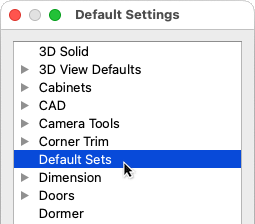
- From the menu, select Edit> Default Settings
 .
.
- In the Default Settings dialog that opens, select Default Sets, then click the Edit button below.
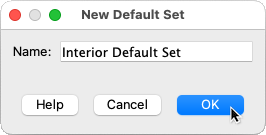
- In the Default Sets dialog that opens, select a Default Set on the left that closely matches what you want to create, then click the New button below.
- In the New Default Set dialog that opens, enter a Name, then click OK. Default Sets must have unique names, so if you try to give a new Default Set the same name as an existing Default Set, the program will prompt you to give it a different name.
In this example, we specified Interior Default Set as the name.
At this point, your new Default Set is selected on the left, but it is using the same set of Defaults as the Default Set you selected in Step 3 above. To make this Default Set useful, we will create a new set of Defaults for it to contain.
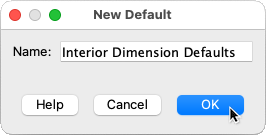
- Click the New Default
 button to the right of Dimensions to create a new Dimension Default.

- In the New Default dialog that opens, enter a Name and click OK. Defaults must have unique names, so if you try to give a new Default the same name as an existing Default, the program will prompt you to give it a different name.
In this example, we specified Interior Dimension Defaults as the name.
- Next, in the Dimension Defaults dialog that opens:
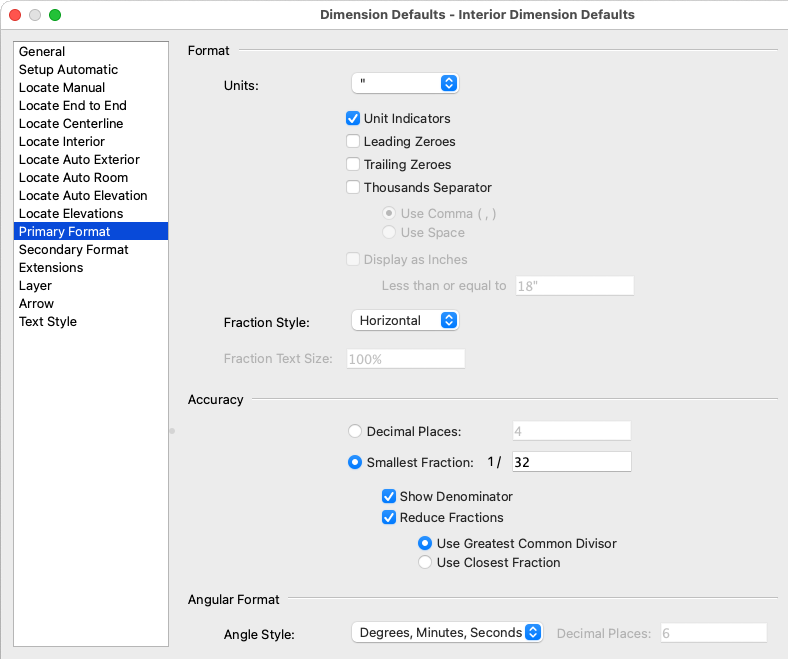
- Select the Primary Format panel and make any desired changes to how dimensions will be displayed.
In this example, we set Units to " (inches), and Smallest Fraction to 1/32.
- Select the various Locate... panels and specify how you would like dimensions to locate objects when using each tool.
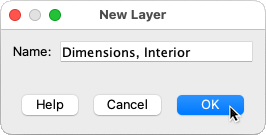
- Select the Layer panel, click the Define button to open the Layer Display Options dialog, and create a new layer for dimensions to be drawn on when your new Dimension Default is active. Layers must have unique names, so if you try to give a new Layer the same name as an existing Layer, the program will prompt you to give it a different name.
In this example, we specified Dimensions, Interior as the name.
- Click OK to save your changes and close this dialog.
- Create new Defaults for Rich Text, Text, Revision Clouds, Callouts, Markers, Notes, and Arrows, clicking through the panels of each Default and modifying the properties to best suit the purpose of your new Default Set.
Just as with the Dimension Defaults that were mentioned in the previous step, important considerations for each new Default include:
- The layer each object type is assigned to
- The properties of the layer each object is assigned to
- Object sizing
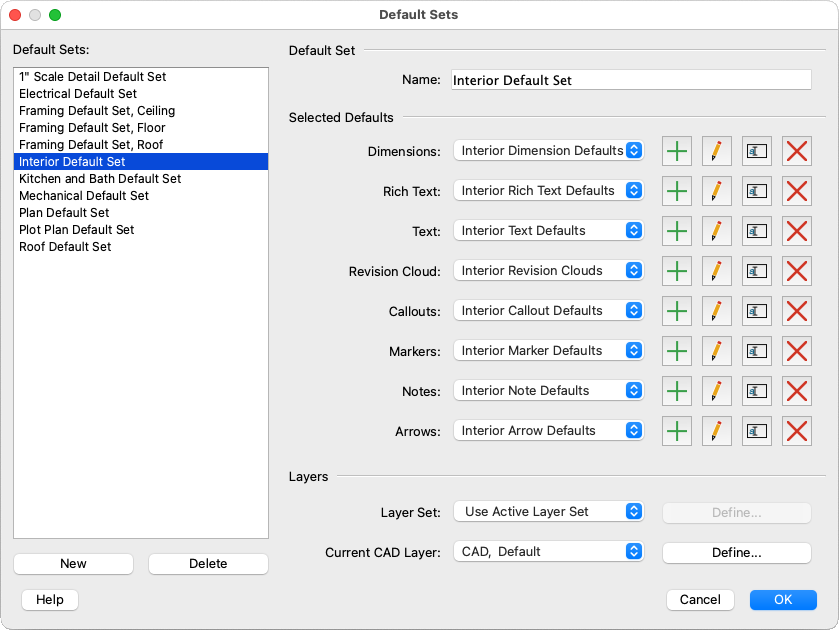
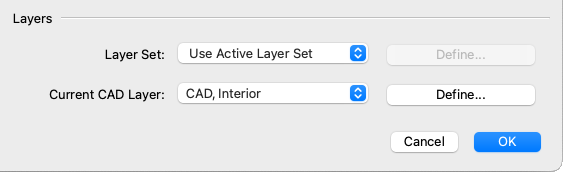
- In the Default Sets dialog, either click the Define button to the right of Current CAD Layer and create a new layer for CAD objects to be drawn on when your new Dimension Default is active, or select a preexisting layer from the Current CAD Layer drop-down menu.
In this example, a new layer was created called CAD, Interior.
- Click OK, then Done to save your changes and close the dialog boxes.
Once you've spent time creating custom Default Sets, you may want to copy them to another planor your plan template file for use there. Proceed to the last section of this article to learn how to do that. For information on creating a custom plan template, please see the Related Articles section below.
To edit a Default Set
- From the menu, select Edit> Default Settings .
- In the Default Settings dialog that opens, select Default Sets, then click the Edit button below.
- In the Default Sets dialog that opens, select the Default Set on the left that you want to edit.
- Type in the Name field to change the name.
- Use the object type drop-down menus in the Selected Defaults section to change which Saved Defaults are used.
- Click the Edit Default
 or Rename Default
  buttons to make changes to the properties or names of any of the Selected Defaults.
- Use the drop-down menus in the Layers section to change the Layer Set and Current CAD Layer used.

- Click OK to save your changes and close this dialog.
To delete a Default Set
- From the menu, select Edit> Default Settings .
- In the Default Settings dialog that opens, select Default Sets, then click the Edit button below.
- In the Default Sets dialog that opens, select the Default Set on the left that you want to delete, then click the Delete button below.
Deleting a Default Set does not delete any of the Saved Defaults that it used. For more information on Saved Defaults, including how to delete them, please see the Related Articles section below.
- Click OK to save your changes and close this dialog.
To copy Default Sets to another plan
- Select File> Export> Export Default Sets
 from the menu.
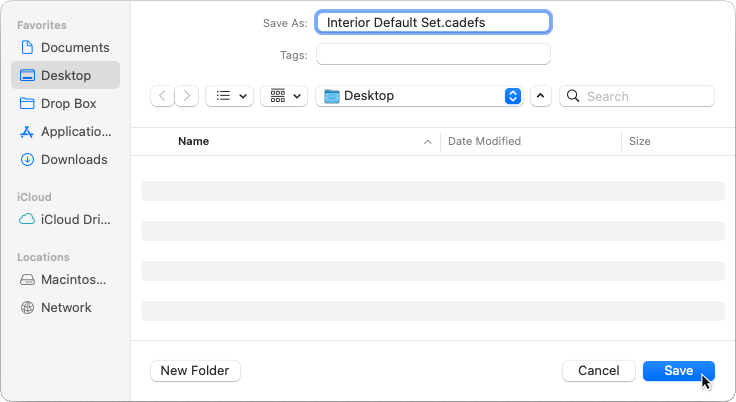
- Choose an easy to find location, such as your Desktop.
- In the Save As field (or File name field, if you're on a PC), type a short, descriptive name for the *.cadefs file, then click the Save button.
- Select File> Open Plan
 to open the plan or template in which you want to import your Default Sets.
- Select File> Import> Import Default Sets
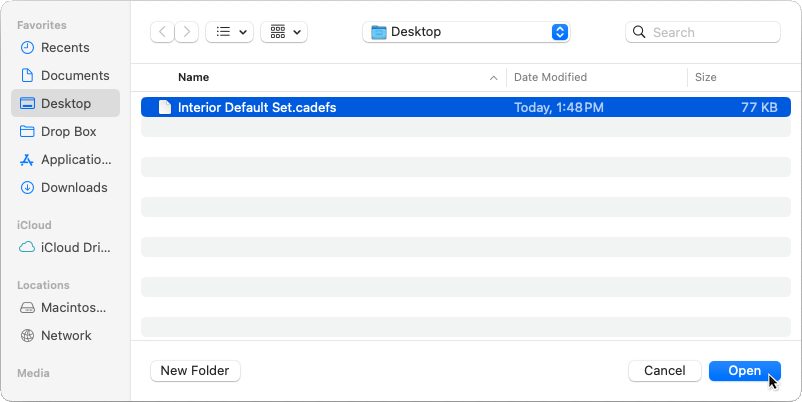
 and browse to the Desktop, or wherever you chose to save your exported Default Sets file.
- Click to select the file you previously saved, then click Open.
- In the Import Default Sets dialog that opens, select your desired options, then click OK.
Click the Help button to learn more about each of the options available in this dialog, if needed.
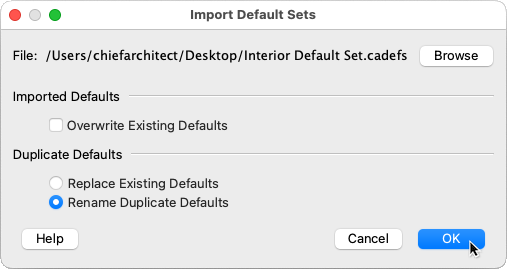
- Once the Default Sets file has been imported, a dialog will appear with details about the import. Click OK to close this dialog.
- Select File> Save
 from the menu to save the imported Default Sets in the plan or template that you're working with. Alternatively, select File> Templates> Save As Template
  to save a new plan template with the imported Default Sets.