QUESTION
I would like to modify the bounding box around an object. How can I accomplish this?

ANSWER
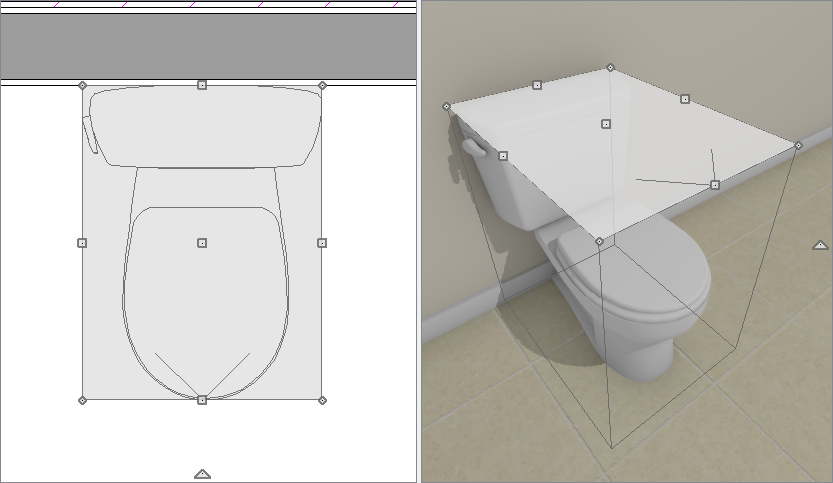
An object’s bounding box determines the amount of space it requires, and thus how close it can be moved to other objects before it bumps into them. When an object is selected, its edit handles display around the perimeter of its bounding box.
When an object is first created, its bounding box is the same size as the actual 3D object, and in most cases this is appropriate. Some objects in Chief Architect, however, such as toilets, may require a larger bounding box to allow for extra space.
The bounding box also defines the selectable area around an object: when you click within an object’s bounding box, it will become selected. Similarly, the bounding box affects whether an object is included in a selection marquee.
To view and adjust an object's bounding box
-
If the Library Browser is not already open, navigate to View> Library Browser
 , then browse to
-
Browse to Chief Architect Core Catalogs> Architectural> Plumbing Fixtures> Toilets, select the Standard Toilet object, then click in the drawing area to place the selected toilet at that location.
- Select 3D> Create Perspective View> Full Camera
 from the menu, then click and drag a camera arrow towards the object.
- Using the Select Objects
 tool, click on the toilet to select it and note where the edit handles are located in both a 2D and 3D view.
To tile the two views side-by-side, select Window> Tile Vertically  from the menu.
- With the toilet still selected, click on the Open Object
 edit button.
In X14 and prior versions, click on the Open Symbol  edit button instead.
- On the Advanced Sizing panel of the Fixture Specification dialog that opens, focus on the Bounding Box Spacing section.
In X14 and prior versions, access the Sizingpanel within the Symbol Specification dialog, and focus on the Bounding Box Dimensions section instead.
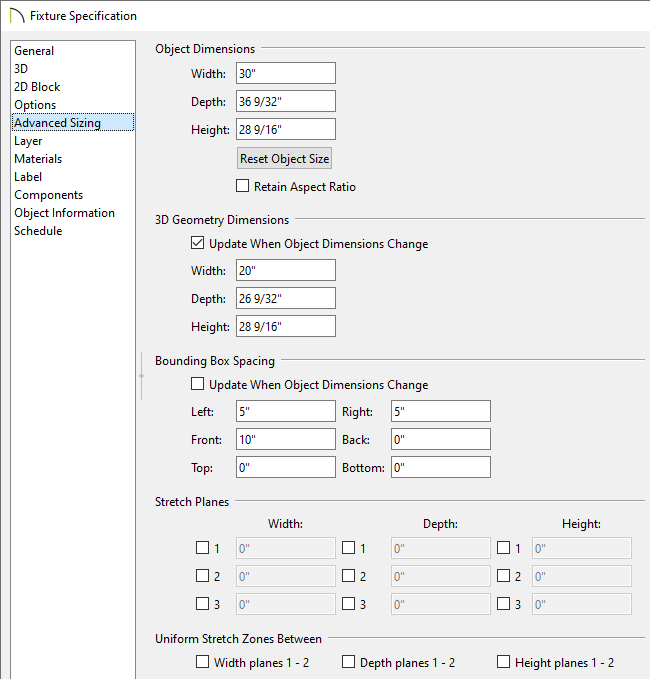
- Specify your desired values in the Left and Right fields.
Alternatively, you can uncheck the Update When Object Dimensions Change box under the 3D Geometry Dimensions section, then adjust the Width value located under the topmost section titled Object Dimensions. Doing this will update the values under the Bounding Box Spacing section automatically.
In X14 and prior versions, specify the total Width ( X ) of the bounding box instead.
- Specify your desired values in the Front and Back fields.
As mentioned in the point above, you can uncheck the Update When Object Dimensions Change box under the 3D Geometry Dimensions section, then adjust the Depth value located under the Object Dimensions.
In X14 and prior versions, specify the total Depth ( Y ) of the bounding box.
- Specify your desired values in the Top and Bottom fields.
Again, you can uncheck the Update When Object Dimensions Change box under the 3D Geometry Dimensions section, then adjust the Height value located under the Object Dimensions.
In X14 and prior versions, specify the total Height ( Z ) of the bounding box.
- For many symbol categories, including furnishings and fixtures, the origin is located at the bottom, back, center point of the symbol, as shown here with this toilet.
- Once all desired changes have been made, click OK to apply them and close the dialog.
- Now you can add the modified object to the Library Browser for future use. With the edited object selected, click on the Add to Library
 edit button to add the toilet to the User Catalog.