QUESTION
I want to add, modify, or delete roof ridge caps. How can I do this?

ANSWER
Chief Architect has the ability to automatically generate, modify, and delete roof ridge caps using the Build Roof and Roof Plane Specification dialogs. This article will explain the differences, and show you how to customize your ridge caps to meet your specific needs.
To add, modify, or delete ridge caps using the Build Roof dialog
When adjusting ridge cap properties using the Build Roof dialog, you will want to keep in mind that your changes will apply to all roof planes that are generated going forward, whether they are created automatically or manually. This is helpful if you want to generate the same ridge caps for all of your automatically generated roof planes or if you want to set a baseline for manually created roof planes.
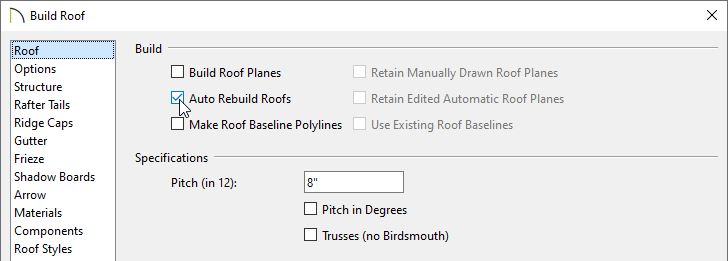
- First, navigate to Build> Roof> Build Roof
 from the menu.
The Build Roof dialog is nearly identical in appearance and function with the Roof Defaults dialog, which is accessed via your Default Settings. If you make a change in the Build Roof dialog, it will update in the Roof Defaults dialog, and vice versa.
- On the Ridge Caps panel:
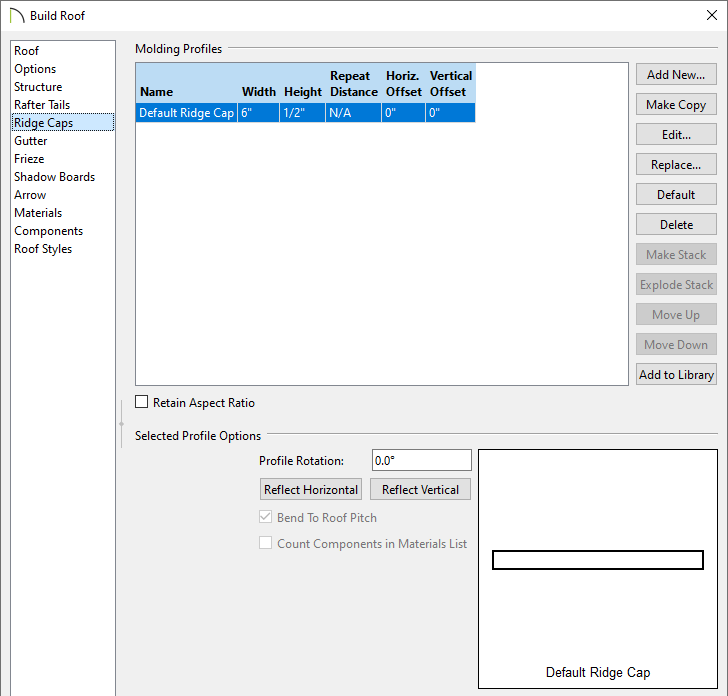
- If a Default Ridge Cap exists and you want to modify it's properties, double-click in a desired field to edit it or click the Edit button.
- Click Add New to add a new profile from the Library.
- Click Make Copy to add a copy of the selected profile to the bottom of the table.
- Click Replace to change the currently selected profile to one chosen from the Library.
- The Default button resets the properties of the Default Ridge Cap back to the out-of-the-box values. The Default Ridge Cap profile has flat sides and is 1/2” (13 mm) thick and 6” (150 mm) on each side.
- Click Delete to delete the currently selected profile.
- Click the Add to Library button to save a copy of the molding in the User Catalog.
- When Retain Aspect Ratio is checked, if you change either the Height or Width, the other value changes to maintain their original ratio. When this is unchecked, the two values can be edited independently.
- Specify your desired Profile Rotation.
- Check Bend To Roof Pitch to force the profile to conform to the pitch of the roof. This setting is not available for the Default Ridge Cap profile as it conforms to the roof pitch automatically.
- To apply these changes to automatically generated roof planes, the roof must be rebuilt. Select the Roof panel and either check Build Roof Planes or Auto Rebuild Roofs, then click OK.
To add, modify, or delete ridge caps using the Roof Plane Specification dialog
Ridge caps can be controlled on an edge-by-edge basis by first selecting the edge of the roof plane that you would like to modify, then opening the selected roof plane up to specification. This allows you full control over each individual ridge cap that is generated as part of your roof.
- Using the Select Objects
 tool, select the edge of a roof plane that you would like to modify, then click the Open Object
  edit button.
- On the Ridge Caps panel of the Roof Plane Specification dialog that displays:
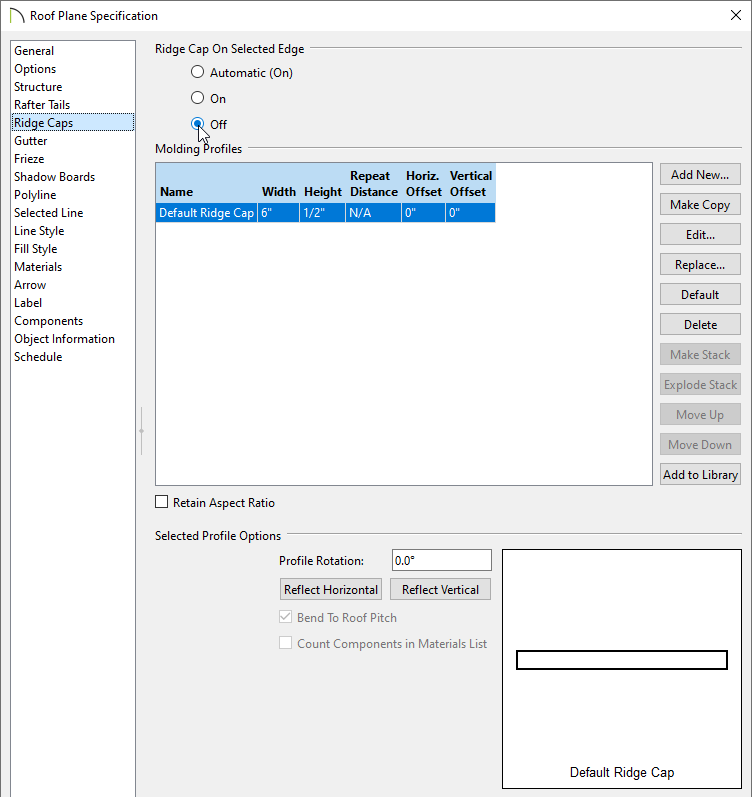
- You will notice an On Selected Edge section that did not exist in the Build Roof dialog. The settings in this section determine whether the profile(s) specified on the current panel generate along the selected roof plane edge.
- Select Automatic (On/Off) to use the default behaviors for ridge caps, which generate on ridges and hips by default.
- Select On to generate the profile in question on the selected roof plane edge whenever possible.
- Select Off to suppress the profile in question on the selected roof plane edge regardless of its location.
- Make any other desired adjustments to the ridge cap profile that is applied to the selected edge.
- Click OK. Repeat this procedure for any other roof edges that you would like to modify.