This article also applies to the following legacy products:
Pro
QUESTION
How do I create a corner window unit?

ANSWER
A corner window is a unit that occupies the corner of a structure. In this article, we will cover the steps for creating a corner window unit, including the removal of the corner post to create an all glass opening.
To create a corner window
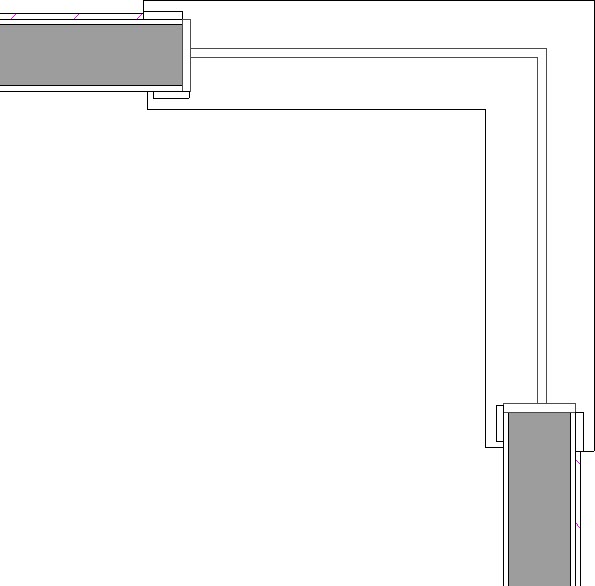
- Place two windows on each side of a corner where two walls meet.
- Select the first window, and drag it to the corner until you see the window snap to the end of the wall.

If you're having trouble moving windows into the corner like shown above, try holding down the Ctrl/Command key on your keyboard while the window is being moved. Doing this will disable the snap settings temporarily allowing for free movement of the object without any restrictions.
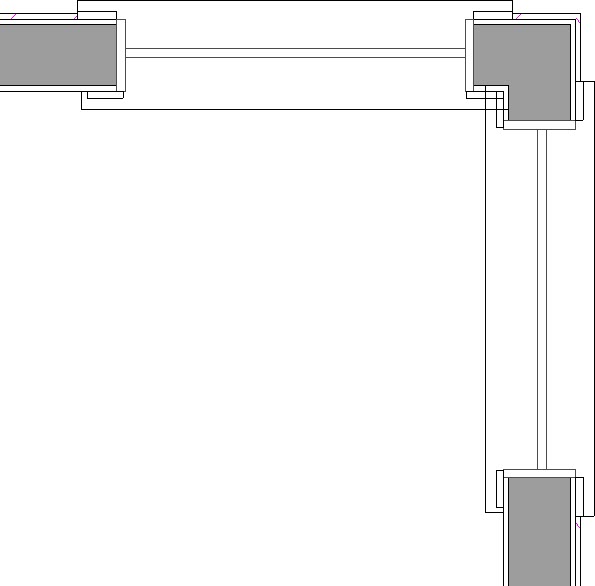
- Repeat this process for the second window to achieve the result shown below.

To remove the corner post
- Use the Select Objects
 tool and select the first window.
- Hold the Shift key on your keyboard, and click on the second window.
- Click the Open Object
 edit button.
- On the General panel of the Window Specification dialog that displays, change the Window Type to Fixed Glass.
- On the Frame panel, select the Mitered option next to Corner Join.
In X14 and prior versions, uncheck the Has Corner Post box instead.
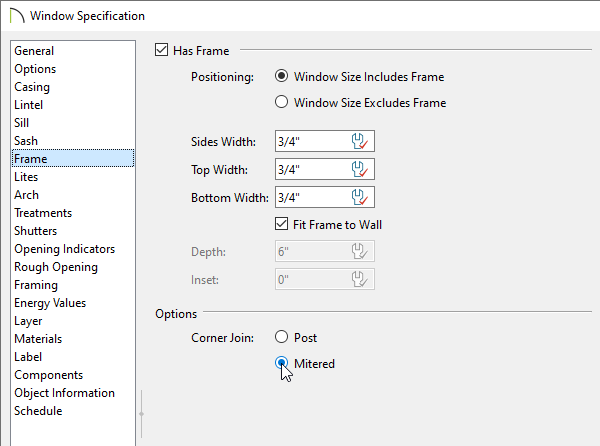
- Click OK to accept these changes and close the dialog. Your corner window should now be a glass-to-glass window unit.