QUESTION
I want to set up my printer so that I get good results when printing from layout. How is this done?
ANSWER
For best results, it is recommended that you specify the desired Drawing Sheet Setup settings not only in your layout file, but in any associated plan files as well.
To adjust the Drawing Sheet Setup in a Plan
- For each floor plan view, CAD Detail, and Cross Section/Elevation, set the drawing scale you will most likely use when printing by selecting File> Print> Drawing Sheet Setup
 from the menu.
- Set the Orientation and Size of your Drawing Sheet, then set the Drawing Scale to the scale you intend to print.
In most cases, this will be 1/4in = 1ft for imperial plans and 1m = 50m for metric plans.
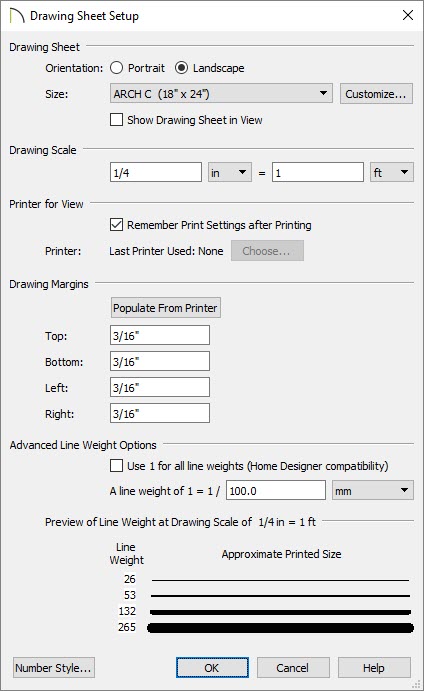
- Once you have completed making any necessary changes in the Drawing Sheet Setup dialog, click OK to apply them.
- Select File> Print> Print Preview
 to turn on the print preview display, to verify that the correct page size and orientation that you want have been accurately set.
A blue border represents the margins of the printable area. If the margins have been set to populate from the selected printer, this border may not display on all edges of the drawing sheet.
To set the Drawing Sheet Setup in a Layout
-
Open
 the layout file you wish to set up and select File> Print> Drawing Sheet Setup from the menu.
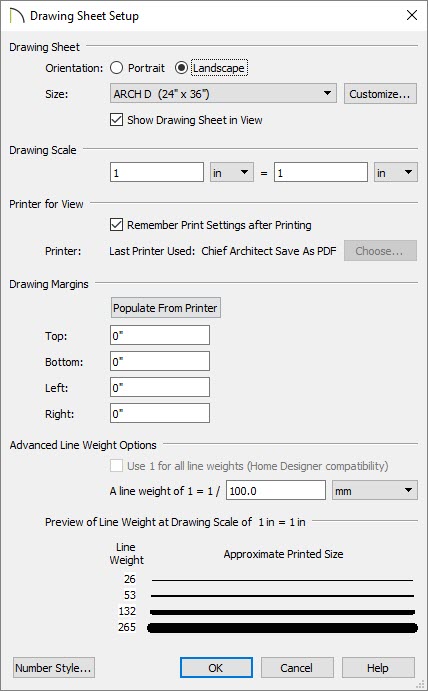
- Select the Drawing Sheet Size and Orientation.
- Specify a Drawing Scale of 1in = 1in if using Imperial units or 1mm = 1mm if using Metric units.
- Click OK to close the dialog and apply your changes.
- Select File> Save
 from the menu to save your Drawing Sheet Setup information so that it's ready for you whenever you wish to print this layout.