QUESTION
I've noticed that some fixtures can be included in a plumbing, HVAC, or appliance schedule, but do not see these options in the Schedule tools. How do I create one of these schedules?
ANSWER
You can create a plumbing, HVAC, or appliance schedule by creating a Fixture Schedule, and then making a few simple changes to it. A custom schedule could also be created with any of the available categories.
To create a plumbing, HVAC, or appliance schedule
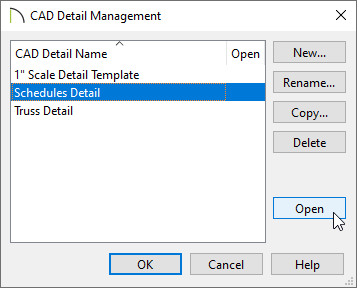
- Select CAD> CAD Detail Management
 from the menu.
- Choose to Open the Schedules Detail located in the CAD Detail Management dialog, or click New to create a separate CAD detail window.
A schedule can be created in floor plan view; however, schedules, CAD blocks and other 2D objects that enhance your working drawings are more easily organized when placed in a CAD Detail window.
- In the CAD detail window, select Tools> Schedules> Fixtures Schedule
 or Tools> Schedules> Custom Schedule
  from the menu, then click in a blank area to create the schedule.
- Using the Select Objects
 tool, click on the newly placed schedule and select the Open Object
  edit button.
- On the General panel of the Schedule Specification dialog that opens:
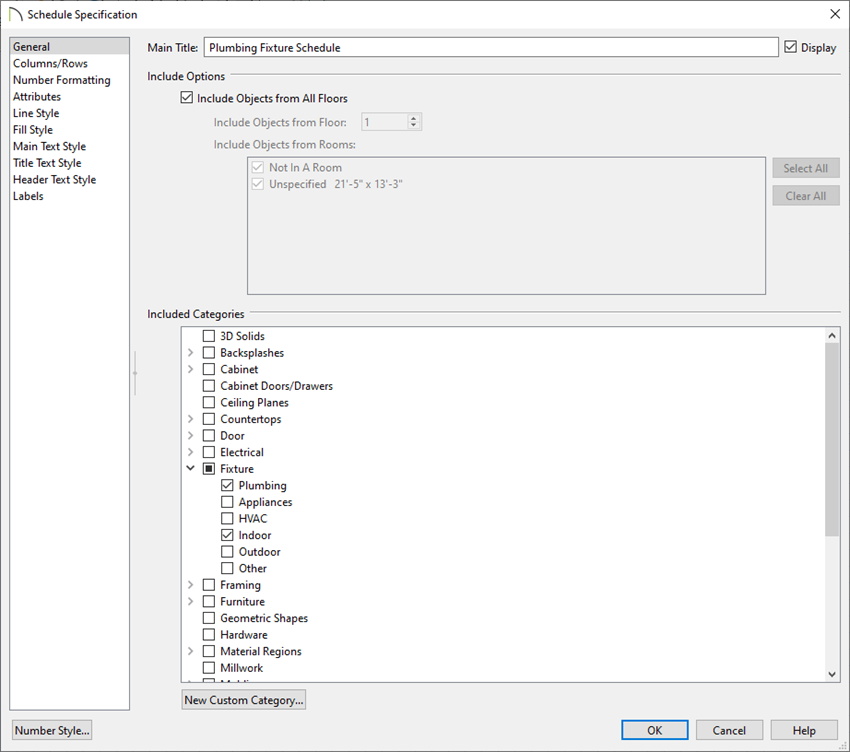
- For the Main Title, type the name that you would like for this schedule.
In this example, we have specified "Plumbing Fixture Schedule" for the title.
- Select if objects from all floors should be included or a specific floor or room.
In X16 and newer, you can select multiple specific rooms.
- Choose the categories that you would like to include under the Categories to Include section. Multiple categories can be selected to be included in the schedule, if desired.
In this example, both the "Plumbing" and "Indoor" boxes are checked under the Fixture category.
- On the Columns/Rows panel of the Schedule Specification dialog that displays:
In X15 and prior versions, the column and row selections are on the General panel.

- Choose the Columns that you would like to be included in the schedule.
In X16 and newer versions, highlight an included column and choose to Calculate Total and Sum Similar Rows, if desired.
- Select to Group Similar Objects and Display Totals Row, as needed.
- If desired, check the Swap Rows/Columns box to swap the position of column headings with row headings.
- Make any other wanted adjustments to the Display and Object Preview Options. For more information on these options, click the Help button at the bottom of the dialog to open your program's documentation.
- On the Attributes panel, make adjustments as desired to the display of the Border and Grid Lines.
In X16 and newer versions, adjust the Alignment within the columns and rows.
- Navigate to the Main, Title, and/or Header Text Style panels to change the text properties for those respective elements of the schedule.
In legacy versions, only the Text Style panel is available, which affects all of the text in the schedule.
- Make any additional adjustments, such as to the Labels or Fill Style, then click OK.
To specify an object for inclusion in your schedule
- Select an object that you would like to include in your new schedule and click the Open Object edit button.
- On the Schedule panel of the Specification dialog that opens, select the desired categories by clicking the Include in Schedule As radio button and checking the appropriate boxes.
In this example, we have specified the "Bowl Sink" from the Chief Architect Core Catalogs to be part of the "Plumbing" subcategory under Fixture. This is also the default schedule category for this sink, so if we didn't choose the Include in Schedule As radio button and left the Auto Schedule Category option selected, this sink would still appear in our Plumbing Fixture schedule.
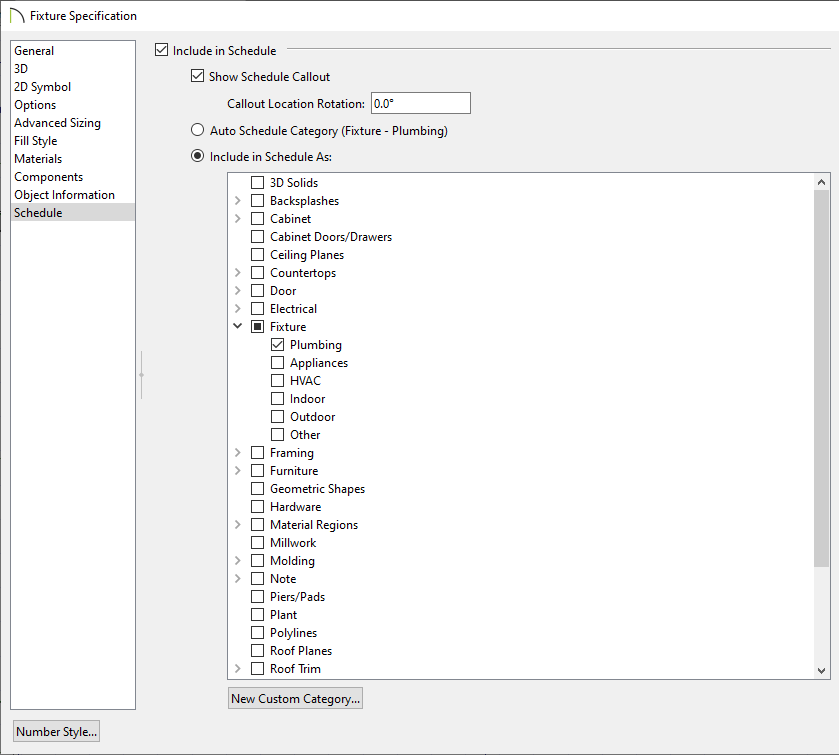
- Click OK.
To save a schedule to the library*
*Applies to Chief Architect X16 and newer program versions.
- Open the Project Browser
 and expand the Schedules folder.
- Right-click on the desired schedule and click the Add to Library
 edit tool.