QUESTION
I need to create a custom shaped countertop for my plan. How can I use the tools in Chief Architect to accomplish this task?

ANSWER
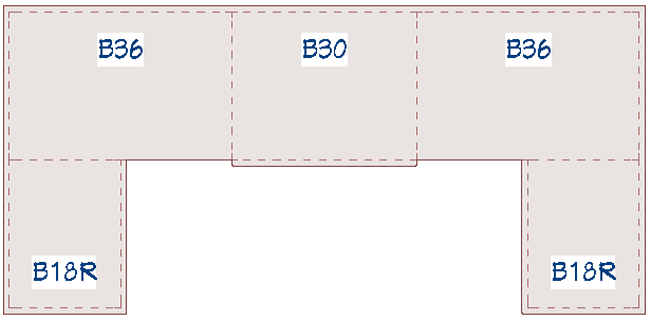
In this article, we will walk you step-by-step through creating the countertop shape in the image above. This will help you to learn the basic tools available for editing custom countertops, to create the various shapes that may be necessary for your plans.
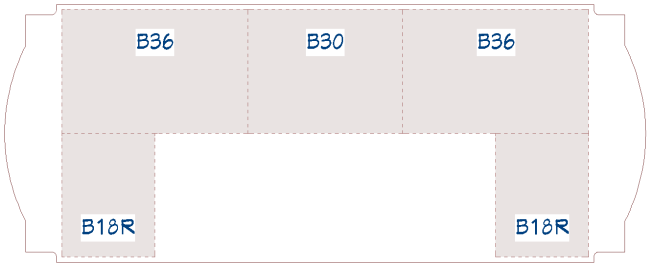
Before we begin, let's also take a look at what our reshaped custom countertop will look like in plan view.

To generate the custom countertop
- First, launch Chief Architect and choose File> New Plan
 to create a new, blank plan using the default template.
- Select Build> Cabinet> Base Cabinet
 , click in your floor plan view to place cabinets, and resize them to your liking.
- Once the cabinets are placed, select Build> Cabinet> Custom Countertop
 then click and drag a rectangle snapping to the edge of the cabinets.
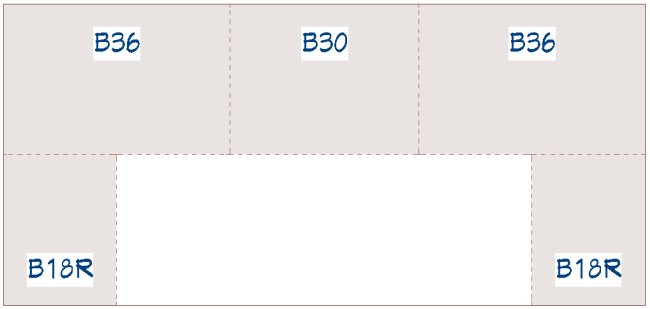
- Select the custom countertop and use dimensions or the snap grid to pull the edges away from the base cabinets 1" to create the overhang.
Now that we have created our Custom Countertop, we are ready to begin editing it.
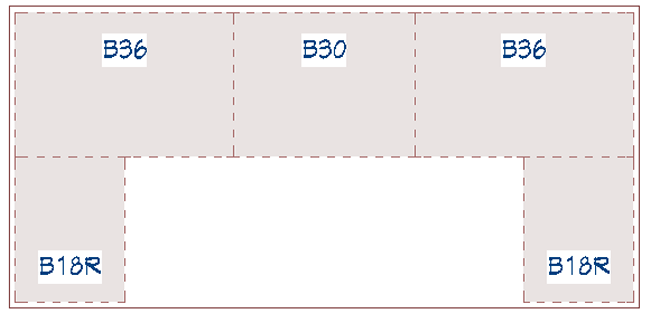
To add additional edges to the countertop perimeter
- To guide where the breaks will be placed in the countertop, we will place CAD lines at specific locations. Select CAD> Lines> Draw Line
 and draw CAD lines where a break or change will be made in the countertops shape.

- Select CAD> Dimensions> Manual Dimension
 and draw manual dimensions locating the CAD lines.
- Re-dimension CAD lines to the desired size. Again, these will be used as references for the break points we will be creating.
- Use the Select Objects
 tool to select the Custom Countertop.
If you accidentally select one of the base cabinets first, click on the Select Next Object edit button, or select the Tab key on your keyboard to cycle to the countertop object.
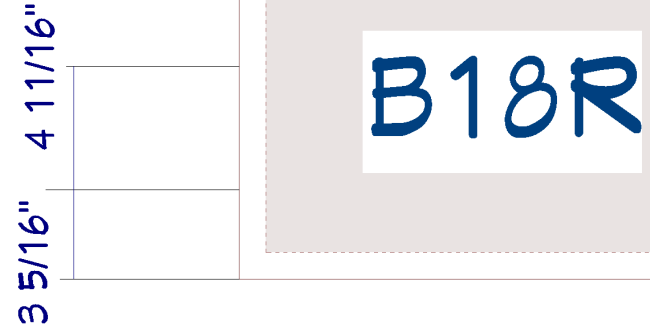
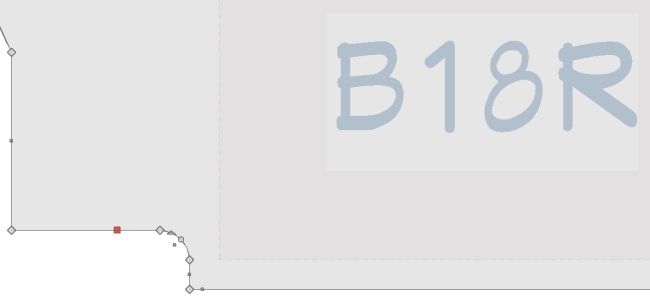
- Click on the Add Break
 edit tool to activate it, click the Sticky Mode secondary edit tool
  to stay in this mode, then move the cursor to the lower portion of the left side of the Custom Countertop.
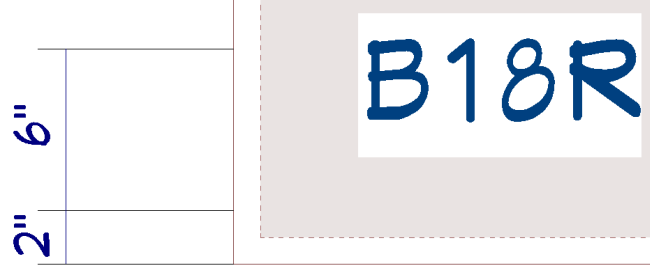
- Click to place a break 2" from the bottom and another break 6" higher than that..
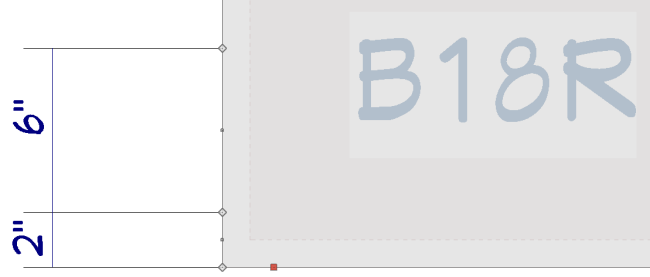
- Repeat for the upper left and the right side.
To reshape the countertop
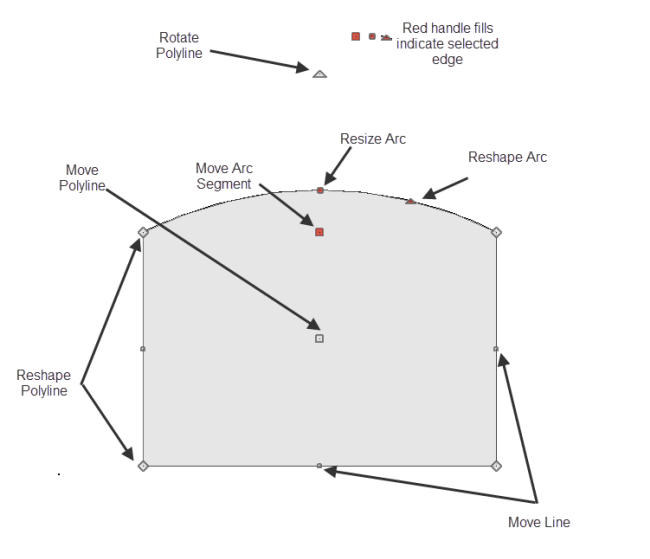
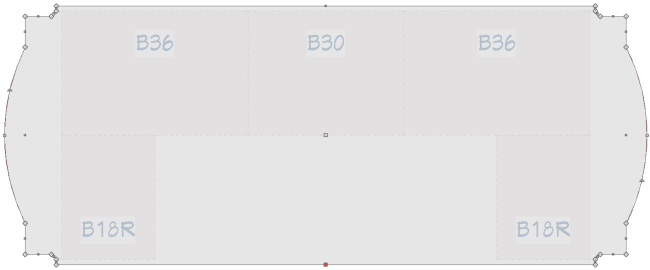
Once our breaks are placed, we are ready to begin actually editing the shape of our custom countertop. Different edit handles will reshape the object in different ways.
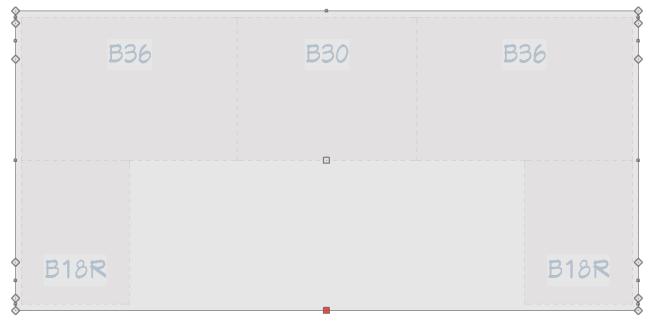
- Use the square edit handles to move the inner three line segments on either side, 6" out to achieve this shape:
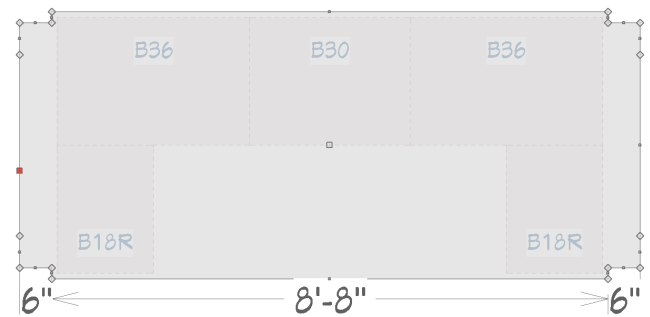
A total of six separate edges were moved outwards during this step.
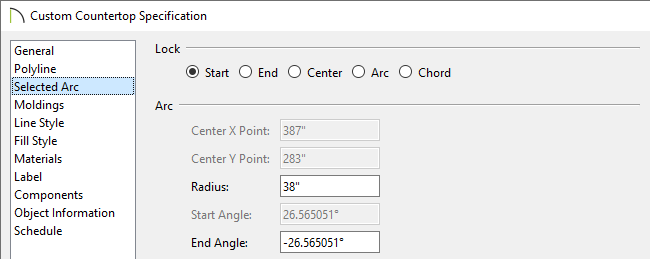
- Next, select the center segment that was moved outwards and click the Change Line/Arc
 edit tool to convert this segment to an arc. Repeat this procedure on the opposite side.
- With the arc selected, the radius of the arc can be adjusted using the triangular Reshape Arc edit handle, or the specification dialog can be opened and the radius manually input on the Selected Arc panel.
To fillet and chamfer the countertop corners
Now that we have created the basic shape for our Custom Countertop, we are ready to fine tune the corners. To do this, we will use the Fillet and Chamfer edit tools.
- With the countertop selected, click on the Fillet Lines
 edit tool, click the Set Fillet Radius
  secondary edit tool, then specify a Fillet Radius value to be used for a filleted corner. Click OK once your desired value is specified.
In this example, a value of 1" is used.

- Once a radius has been set, select the bottom left vertical edge of the Custom Countertop, then click on the Fillet Lines edit tool.
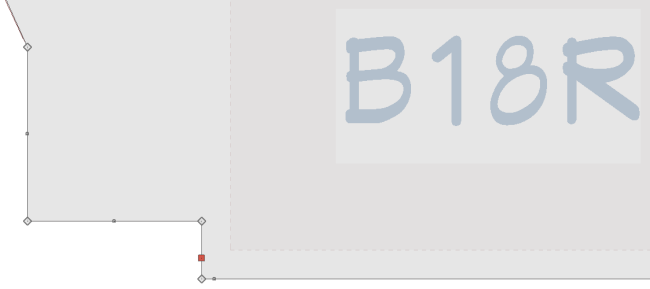
- Click on the horizontal line just above the vertical line to fillet these two lines.
- Repeat this process for the remaining corners on the countertop.
To add a molding to the countertop edge
Finally, let's apply a molding to the edges of our Custom Countertop to round off those sharp edges.
- Use the Select Objects tool to select the custom countertop, then click the Open Object
 edit tool.
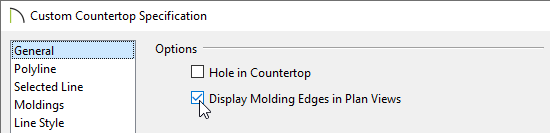
- On the General panel of the Custom Countertop Specification dialog, place a check in the Display Molding Edges or Display Molding Edges in Plan Views box.
- Next, select the Moldings panel, and click the Add New button to display the Select Library Object dialog.
- In the Select Library Object dialog, browse to an appropriate molding that you would like applied to the edges of your countertop, select it, and click OK.
In this example, we browsed to Chief Architect Core Catalogs> Architectural> Moldings, Profiles, Extrusions> Edge Molding> CA-35.
If you cannot locate a suitable molding profile already in the Library Browser to apply to your Custom Countertop edges, consider either modifying an existing one from the Library Browser, or create your own from scratch. Please see the Related Articles section to learn more.
- While still on the Moldings panel, set the Width and Height for the Molding.
- Select the Materials panel to set the material for both the Custom Countertop, as well as the Molding.
- After your desired changes have been made, click OK to apply the changes.
You are now ready to edit your cabinets materials, sizes, panels, add millwork, etc. as necessary to suit the newly edited custom countertop.