QUESTION
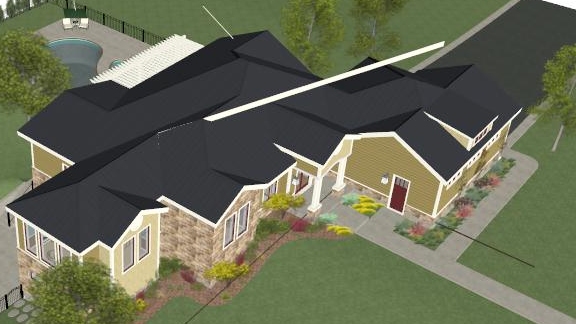
I am observing an aberrant shooting spike in my 3D camera views. What is causing this undesirable behavior, and how can I correct it?
ANSWER
Observing irregular spikes, shooters, or other odd extensions in 3D camera views typically indicates an alignment issue with objects in the plan.
Some of the most common reasons for experiencing this behavior include off-angled or overlapping objects, such as:
- Walls
- Roof Planes
- Stair Railings
- Framing
- Moldings
- 3D Solids
To troubleshoot spikes
In some cases, it may be obvious based on the material of the spike what type of object it is related to, and if so, either correcting the problematic object, or simply deleting it and replacing it may be the easiest way to correct the issue.
If you are having trouble with drawing straight walls, lines, stairs, framing and other elements that are resulting in spikes, then it is likely that you have turned off Angle Snaps. Select Edit> Snap Settings> Angle Snaps to turn this feature back on, if you have toggled it off.
If it is not obvious where the extension is emanating from, attempt to select the object in the 3D view. If it is related to a roof plane, for example, you should see "Roof Plane" listed in the Status Bar, and the roof plane highlighted in the 3D view.
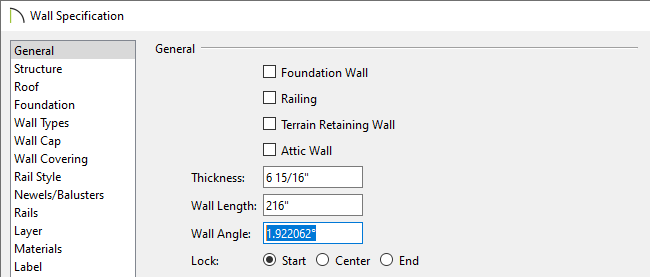
- If the object is a wall or railing, use the Open Object
 edit tool to display its Specification dialog, then check the Wall Angle value located on the General panel.
Shooters are most often caused by a bad wall connection due to a slightly off-angle wall. To learn how to locate and correct off-angle walls, please see the Related Articles section below.
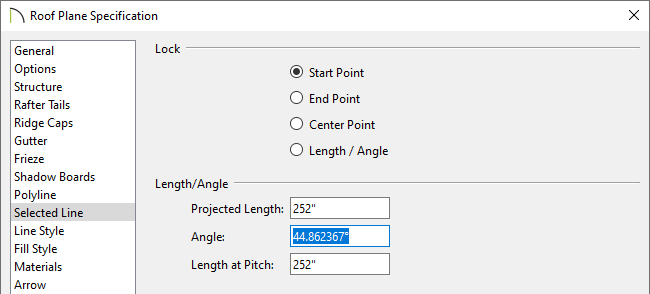
- If the object is a roof plane, use the Open Object edit tool to display its Specification dialog, then check the Angle value located on the Selected Line panel. Note that this value only represents the edge of the roof plane that was selected prior to opening it to specification. Consider performing this process on each edge of a problematic roof plane.
Typically undesired extensions of roof planes are caused by a slightly off-angle side of the roof plane where it doesn't actually join the roof plane edge it is connected to. Correct the angles of both roof planes, then use the Join Roof Planes  edit tool to join them together to correct the shooter if this is the cause.
-
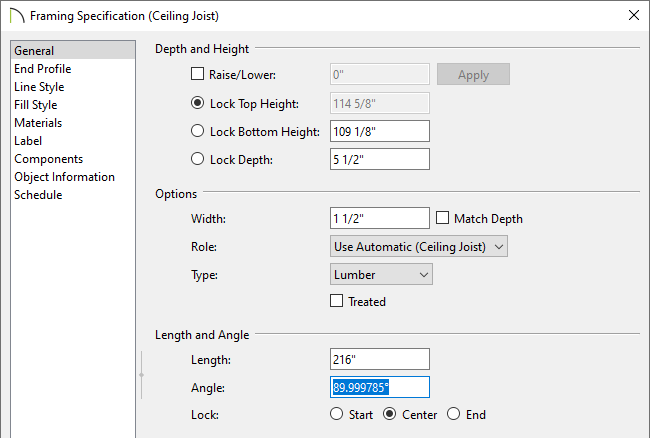
If the object is framing, use the Open Object edit tool to display its Specification dialog, then check the Angle value located on the General panel.
- If the object is a staircase, or more specifically, a railing associated with a staircase, it may not be as easy to tell if it is slightly off-angle using its Specification dialog. Instead, use the Make Parallel/Perpendicular
 edit tool to make a staircase parallel with an existing wall.
-
If the object is a custom countertop, molding polyline, or 3D solid, then you should have received a warning, along with a circle highlighting the problem area or object. Open the object and inspect it's size/dimensions for any obscurities.
- If the object isn't easily selectable in a 3D camera view, try switching to the Glass House
 rendering technique to see if you can trace the shooter back to its origin and correct the relevant object(s).
Finally, if you are still unable to determine the cause of the shooter and correct the relevant items, please submit the plan file to Technical Support using the Technical Support Center. More information on the Technical Support Center can be found in the Related Articles section below.