QUESTION
How can I add feet to my cabinets?

ANSWER
Feet can be added to cabinets through the Cabinet Specification dialog or by placing them as independent symbols.
With the right modifications, cabinet tools can be used to create storage furniture, kitchen islands, tables, and a variety of other household items.
To add feet to a cabinet using the Cabinet Specification
- Select a cabinet you'd like to apply feet to using the Select Objects
 tool, then click on the Open Object
  edit button.
- On the Accessories panel of the Cabinet Specification dialog:
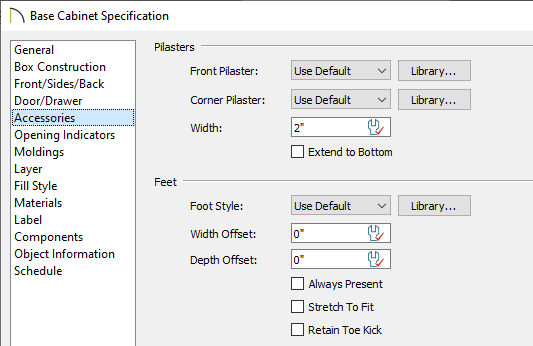
- Select the Use Default option if you'd like to use the cabinet feet that are specified in the cabinet defaults for this particular cabinet type or select the Library option/button to browse for a cabinet foot profile within the library.
Cabinet feet can be located by navigating to Chief Architect Core Catalogs> Architectural> Millwork> Cabinet Feet.
- Specify a Width or Depth Offset if desired.
- Place a check in the Always Present box if you don't want cabinet feet to be removed when cabinets are bumped up to each other. When multiple cabinets that have feet applied are bumped up to each other, Chief Architect will automatically remove any feet that aren't necessary, unless this box is checked.
- For more information on these options, click on the Help button at the bottom of the dialog.
- Once done, click OK to confirm the changes and close the dialog.
To place cabinet feet as independent symbols
With some simple adjustments to a base cabinet's settings, one can easily place a cabinet foot symbol from the library and slide it under the cabinet manually. One reason you may want to do this is to place two different style feet under a cabinet, or if you're using a special shaped cabinet that cannot have feet added to it automatically using the specification dialog.
- Select a cabinet you'd like to apply feet to manually using the Select Objects tool, then click on the Open Object edit button.
- On the General panel of the Cabinet Specification dialog:
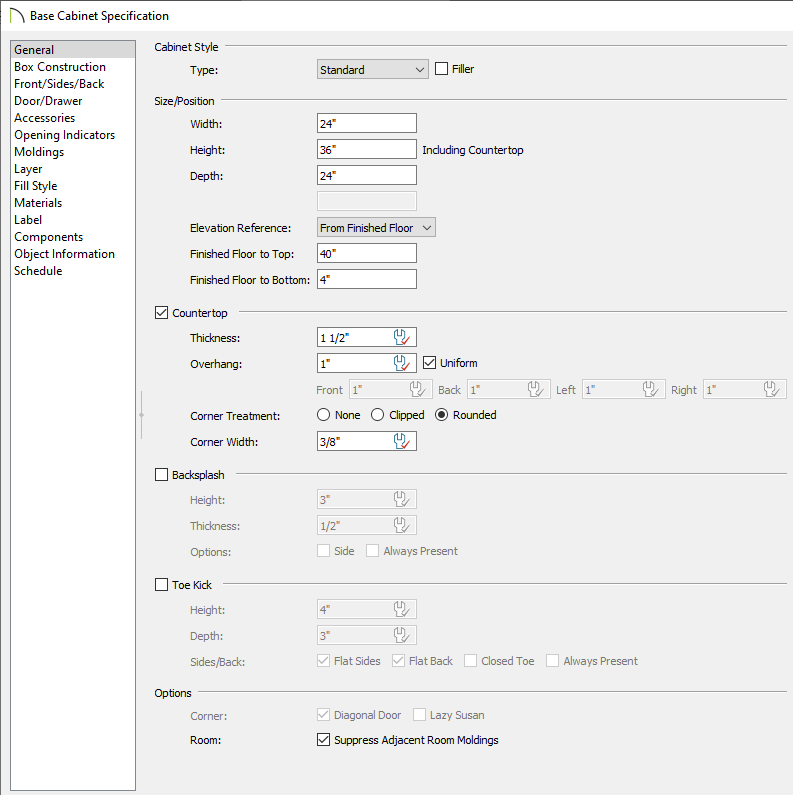
- Set the Finished Floor to Bottom value to 4" or your preferred value.
This raises the cabinet off the ground to make room for the feet that will be placed.
- Deselect the checkbox for Toe Kick.
- Click OK to confirm the changes and close the dialog.
- In the library, navigate to Chief Architect Core Catalogs> Architectural> Millwork> Cabinet Feet and find a cabinet foot symbol that you'd like to place.
- Once a cabinet foot is selected from the library, click near or within the same space your cabinet is located, to place it into the plan.
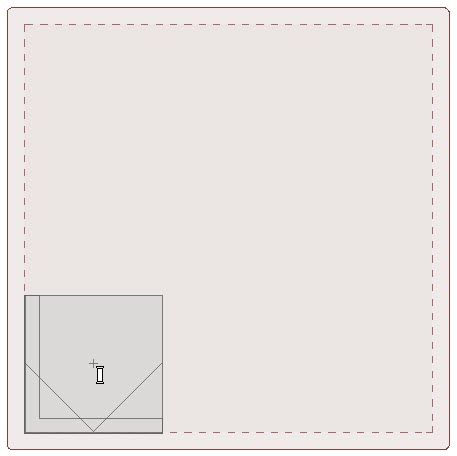
For more control over the positioning of items such as cabinet feet, hold down the Ctrl key on a Windows PC or the Command key on a Mac while moving the object to disable all snap settings temporarily.
- With this foot symbol still selected and now in the correct place, click on the Copy/Paste
 edit button or navigate to Edit> Copy
  to make copies of the symbol. Alternatively, if a different foot symbol is desired, repeat steps 4 and 5.
To rotate a cabinet foot, click on it to select it, and use the triangle edit handle that displays to rotate the foot in a clockwise or counter-clockwise direction.
-
If you think you may want to use this cabinet again in the future, group select the cabinet and the feet, click the Make Architectural Block
 edit button, then click on the Add to Library
  edit button to add it to your User Catalog.