QUESTION
I would like to add rollout shelves or drawers to a cabinet with a door. How do I do this?

ANSWER
Rollout shelves and drawers can be specified for a cabinet by checking the Rollout checkbox located in the Cabinet Shelf Specification dialog. A specific shelf or drawer symbol can also be selected from the library, if desired.
In this article, we will place a standard base cabinet, then we will specify a symbol from the Rev-A-Shelf® manufacturer catalog to represent rollout shelves.
Additional catalogs that contain shelves and drawers can be located in the 3D Library. The Kohler® manufacturer catalog contains a rollout tray and rollout drawer for vanities, while the Cabinet Specialty Storage bonus catalog contains shelves, file storage, and more.
For more information on accessing and installing additional catalogs, please see the "Obtaining Library Content" resource in the Related Articles section below.
To specify rollout shelves or drawers
- Create a New Plan
 or Open
  a plan that you want to create rollout shelves or drawers within.
- Navigate to Build> Cabinet> Base Cabinet
 from the menu, then click in the plan to place a base cabinet.
- Using the Select Objects
 tool, click on the newly placed base cabinet, then click on the Open Object
  edit tool.
- In the Base Cabinet Specification dialog that displays, select the door face item in the 3D preview on the right. The Front/Sides/Back panel will become active and the Door - Auto Right face item will be highlighted.
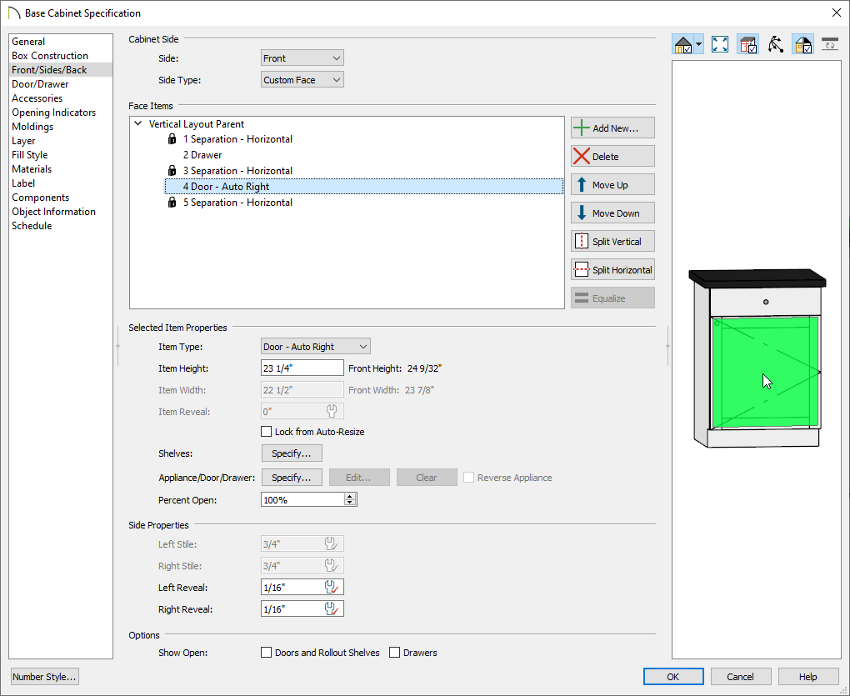
- With the face item selected, click on the Specify button next to the "Shelves" setting towards the bottom of the dialog box.
- In the Cabinet Shelf Specification dialog that displays:
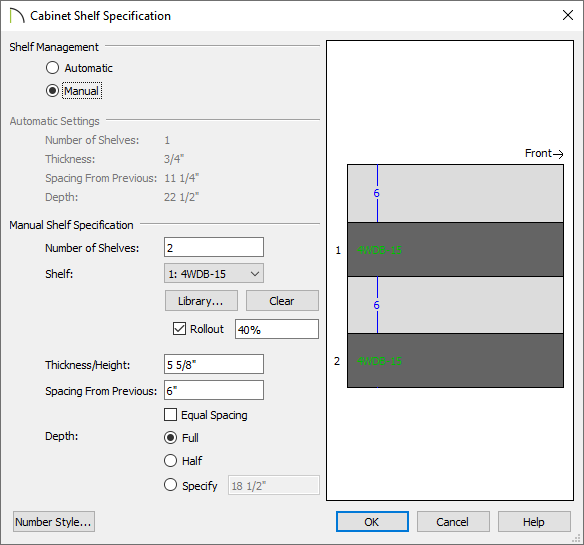
- Select the Manual radio button under the Shelf Management section.
- Specify the Number of Shelves (or drawers) that will be placed behind the cabinet door.
In this example, we have specified 2 shelves.
- Use the Shelf drop-down menu to select a specific shelf for editing, or choose the All Shelves option to edit all shelves at once.
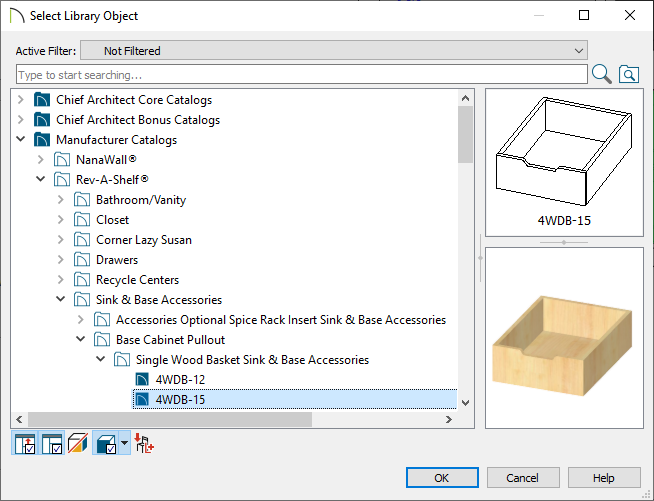
- To choose a different shelf or drawer style, click on the Library button to open the Select Library Object. Browse the library for an appropriate shelf or drawer symbol, select it, then click OK.
In this example, we have specified the 4WDB-15 symbol located in the Rev-A-Shelf® manufacturer catalog. For a lower profile shelf, consider the CVJD symbols located in the Closet subfolder.
- Check the Rollout checkbox and specify the amount the shelves will roll out when set to show open.
In this example, shelf 1 is set to 40% and shelf 2 is set to 80%.
- Specify the Thickness/Height, Spacing from Previous, and Depth settings of each shelf to your liking, then click OK.
In this example, both shelves have a Thickness/Height of 5 5/8" and a Full Depth. Shelf 1 has a Spacing From Previous value of 6", while shelf 2 is set to 0" so that it sits at the bottom of the cabinet.
- To view the shelves or drawers in the cabinet preview or a camera view, place a check in the Doors and Rollout Shelves box located in the "Show Open" section on the Front/Sides/Back panel of the Base Cabinet Specification dialog. How wide the door is open can be controlled with the Percent Open setting.
- On the Materials panel, locate and select the symbol name representing one of the shelves, click the Select Material button, then browse the library for an appropriate material. Once a material has been selected, click OK. Repeat this process for any other shelf symbols.
In this example, we have specified an Ash wood material for both shelves.
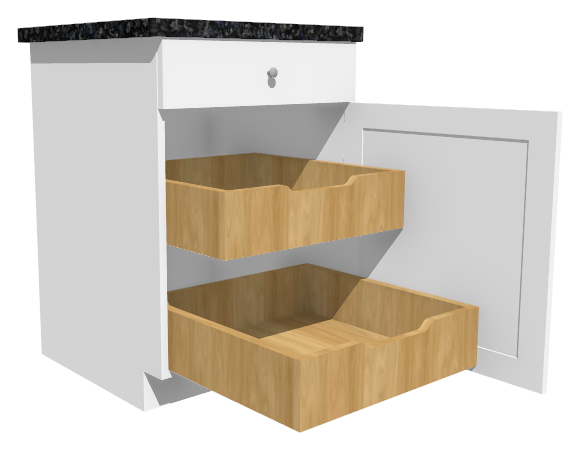
- Click OK to confirm the changes and close the dialog, then take a Camera
 view to see the results.