Notes, Saved Cameras, 2D Plan View, the Cross Section Slider, and the Mini Map provide extra perspective into the model's design.
Written Notes and Saved Cameras call attention to special features in the design while 2D Plan View, the Cross Section Slider, and the Mini Map give you additional ways to see how a model's floor plan is laid out and how different spaces relate to one another.
Numbered Note callouts can display in all types of on-screen views. Tap the View  icon and select Notes for a list of all Notes in the model.
, under Notes.In a saved model, Notes can also be added, edited, and deleted and are synced to the cloud automatically. Any shares of the model will be updated automatically as well. Tap the View icon and select Notes, then:
 icon to update the Note's default view perspective.
 icon to change Note's text.
 icon to remove the Note.
Models can have saved cameras associated with them. Tap the View icon and select Camera to access a list of any cameras saved with the model. Click or tap on one to activate it.
Saved cameras can also be activated in VR Mode: simply look at a round camera hotspot until it activates.
Tap the Plan View  icon to enter a top-down view of the model's floor plan.
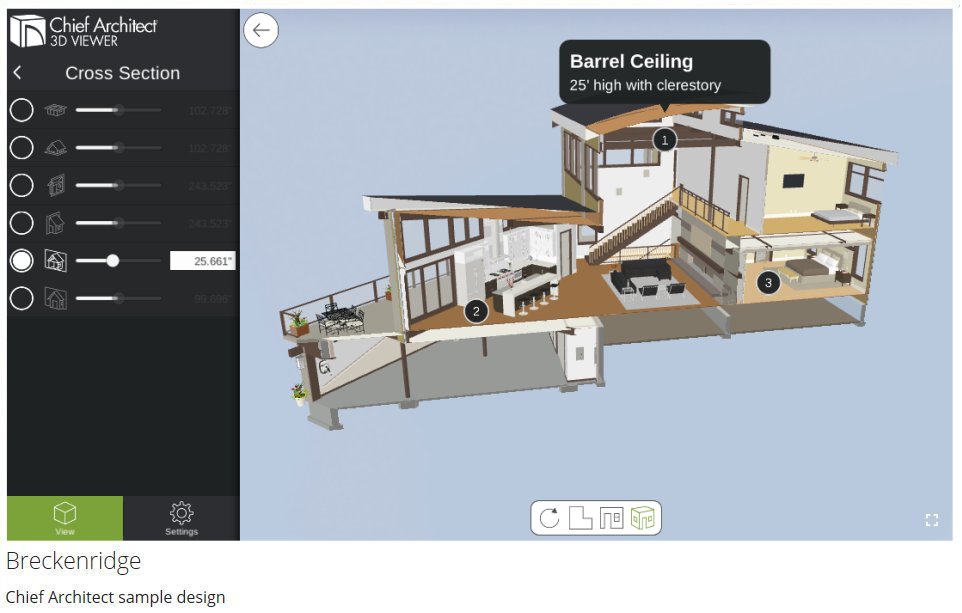
The Cross Section Slider allows you to create customizable section views of the model.
icon and select Cross Section to open the Cross Section Slider panel. .
.In Room View, the Mini Map window at the top left corner of the screen shows a 2D Plan View of the model. The camera’s position and direction are represented by a blue arrow, providing a sense of its location within the model.
button and selecting Views..