QUESTION
I would like to create stairs with custom railings. How can I accomplish this task?

ANSWER
A custom stair railing can be added to a staircase using the Railing tool and setting it to follow the slope of the stairs.
If glass railing panels or cable railings are desired, please see the "Specifying Glass, Cable, or Decorative Railing Panels" resource in the Related Articles section below.
Drawing stair railings manually
- Using the Select Objects
 tool, select the staircase, then click the Open Object
  edit tool.
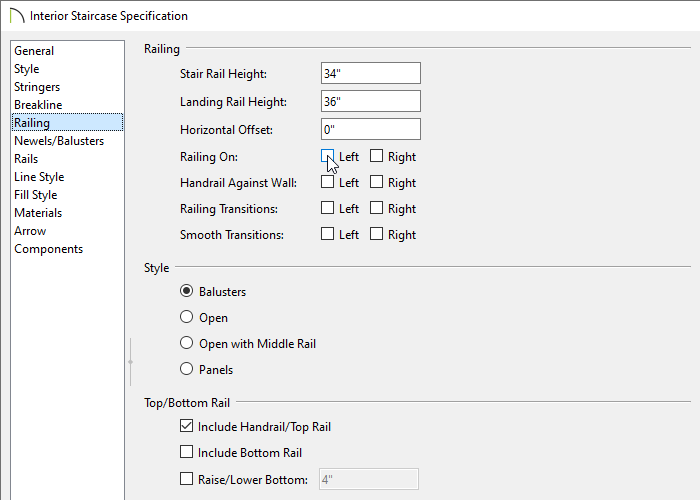
- In the Staircase Specification dialog, switch to the Railing panel and uncheck both the Left and Right boxes next to Railing On, along with Handrail Against Wall, if desired, then click OK.
In X14 and prior versions, uncheck the boxes beside Railing On and Railing At Wall instead.
- Next, select Build> Railing and Deck> Straight Railing
 from the menu.
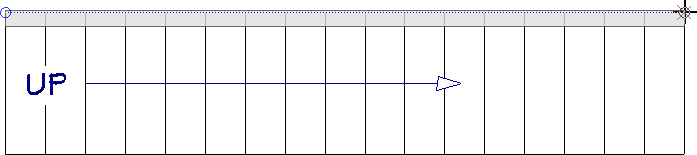
- Draw a railing under the staircase on each side.
- Select one of the newly created railings and click the Open Object edit tool.
If you have trouble selecting the railing, try clicking where the railing should be and then pressing the Tab key on your keyboard. This will tell the program to cycle to the next object that may exist in the same area.
- In the Railing Specification dialog that displays:

- On the Rail Style panel, check Follow Stairs.
To learn more about the various options located here, click the Help button at the bottom of the dialog.
- On the Newels/Balusters panel, specify the Height of the railing, along with other parameters such as the Type, Spacing, Width, and Offsets of the Newels/Posts and Balusters.
- On the Rails panel, adjust the properties for each individual rail that makes up the railing.
- Make any other desired changes to the railing, then click OK.
- Repeat the process with the opposite railing, then take a Camera
 view to see the results.