This article also applies to the following legacy products:
Pro | Architectural | Suite
QUESTION
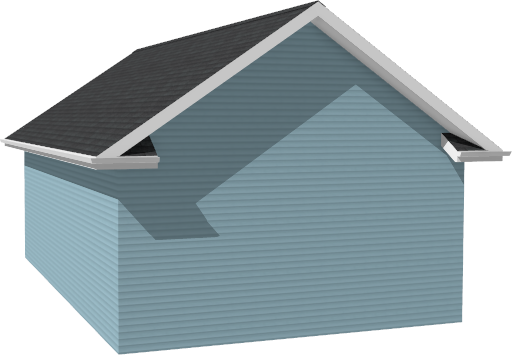
How do I create roof returns in my plans?

ANSWER
Roof returns can be created automatically on a wall-by-wall basis by accessing the Wall Specification dialog, or manually* using individual roof planes.
*Manual roof returns can only be created in Home Designer Pro, Chief Architect Interiors, and Chief Architect Premier.
To create automatic roof returns
- Using the Select Objects
 tool, select the wall(s) you'd like to generate roof returns on, then click the Open Object
  edit button.
Multiple walls can be group-selected by holding down the Shift key on your keyboard while selecting them. This grouped selection can then be opened to specification for further modification.
- On the Roof panel of the Wall Specification dialog that displays, check the box beside Auto Roof Return.
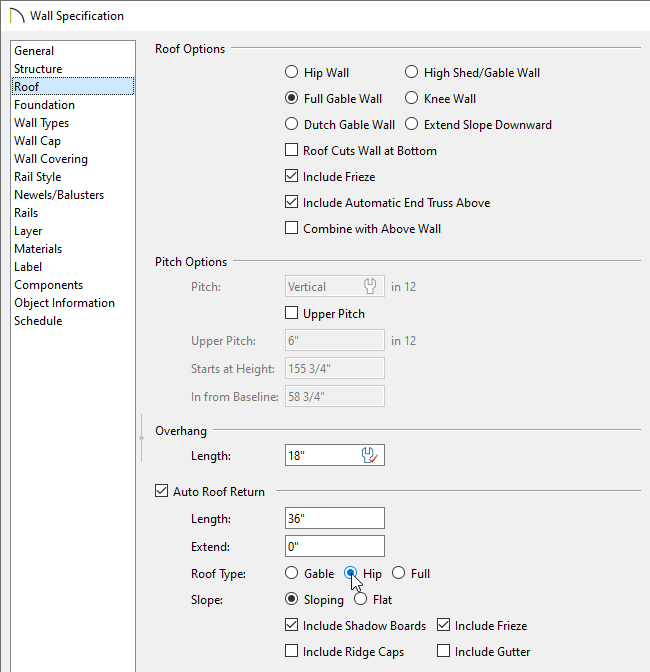
- Specify the horizontal Length of the roof returns along the wall.This will be grayed out if Full roof returns are specified.
- In the Extend field, specify how much the roof returns should extend beyond the roof overhang.
- Select either Gable, Hip or Full roof returns.
- Select either Sloping or Flat roof returns.
If you select Sloping, the pitch will be the same as the roof planes above the return.
If you select Flat, the pitch will be 1:12, or 4°.
- You can also choose to generate Shadow Boards*, Ridge Caps*, Frieze*, and Gutters** for the returns by checking the appropriate boxes.
*Applies to Chief Architect Interiors and Chief Architect Premier.
**Applies to Home Designer Pro, Chief Architect Interiors, and Chief Architect Premier.
-
Once all your desired settings have been specified, click OK to close the dialog.
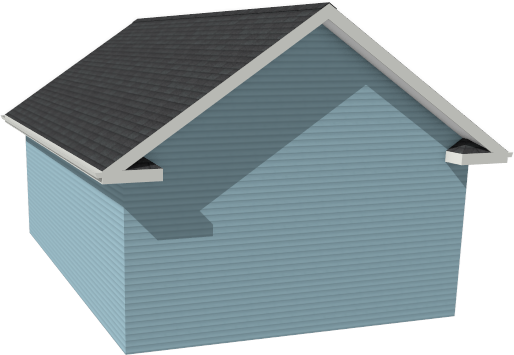
- Create a Camera
 view to see the results.
To create manual roof returns*
*Applies to Home Designer Pro, Chief Architect Interiors, and Chief Architect Premier only.
-
Open
 a Chief Architect plan in which you would like to create roof returns.
In this example, a simple rectangular plan with a gable roof is used. For instructions on creating a gable roof, see the Related Articles section at the bottom of this article.
- Select Build> Roof> Roof Plane
 from the menu.
- Click-and-drag a new roof plane baseline along the outside edge of the framing layer of the wall that you would like to add returns to. Make sure you drag over the wall and not over the roof edge.
- Click once inside the plan to locate the ridge and create a roof plane.
- A Question dialog may appear if you have Auto Rebuild Roofs enabled. Click Yes to disable Auto Rebuild Roofs to allow the creation of manual roof planes.
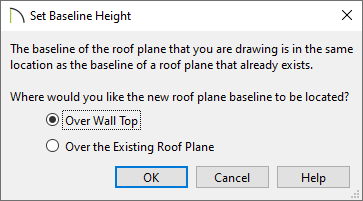
- If the Set Baseline Height dialog appears, click the radio button beside Over Wall Top, then click OK to create a roof plane.
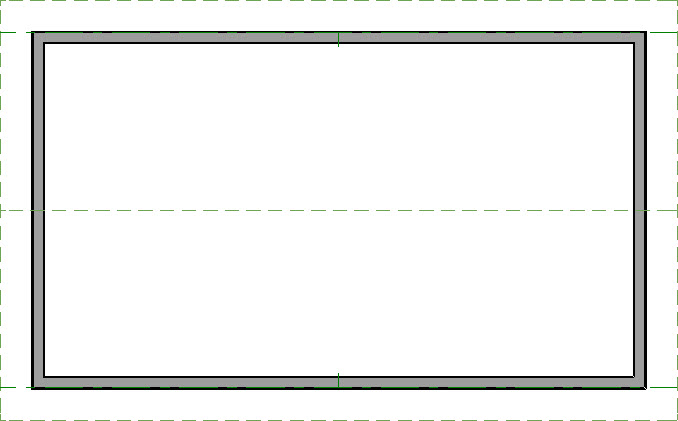
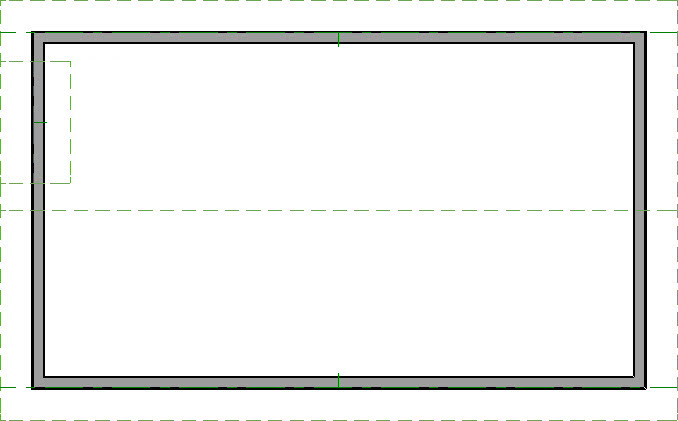
- The new roof plane will display in floor plan view inside the perimeter of the gable roof plane, as shown in the image below.
- Click on the top ridge edge of the newly created roof plane to select it, then use the edit handles to move the ridge down until it meets the outside surface of the wall.

-
Zoom
 in on the new roof plane.
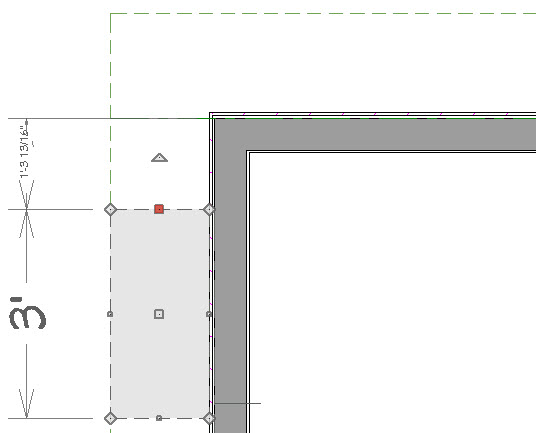
- Click on the side edge of the roof plane closest to the end of the wall to select it, then click on the temporary dimension that displays the length of the roof plane to prompt the Move Object Using Dimension text box.
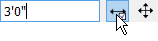
- Specify the desired length of the roof return you want to create.
In this example, we have specified a value of 3' 0".
- Make sure that the Move Edge
 option located to the right of the input field is selected, then press the Enter key on your keyboard.
- If you have difficulty selecting the new roof plane, click the Select Next Object
 edit button or press the Tab key on your keyboard until it becomes selected.
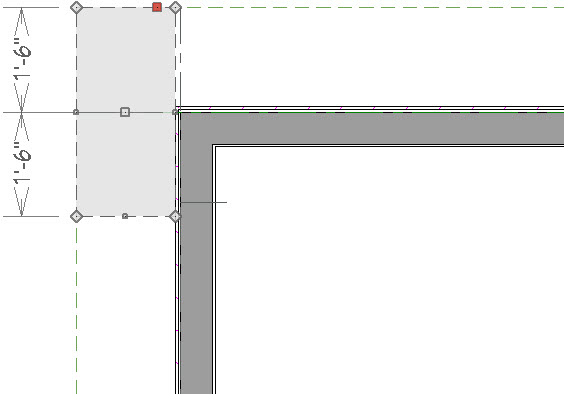
- With the side edge still selected, click on the temporary dimension that shows its distance to the roof plane edge past the eave.

- In the Move Object Using Dimension text box, specify an appropriate value to move the roof plane.
In this example, we have specified a value of -18" so that the side edge of the roof plane will meet up with the overhang on the perpendicular side.
- Make sure that the Move Entire Object
 option is selected to the right of the input field, then press the Enter key on your keyboard to move the roof plane.
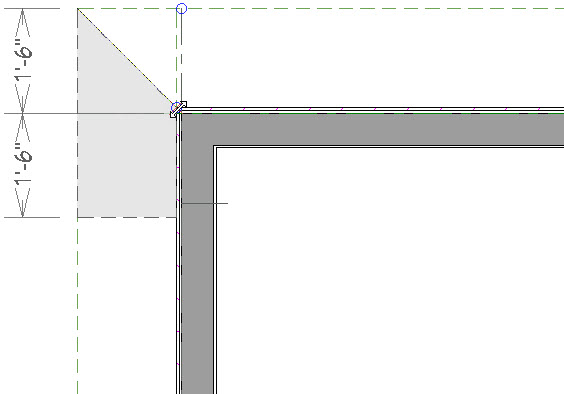
- With the roof plane still selected, click on the corner edit handle where the ridge and outside edges meet and drag it in until it meets the corner of the wall.
- Repeat steps 2 through 8 on the other side of the wall to create a pair of returns, or extend this roof plane to create a full return.
- Create a Camera view to see the results.