QUESTION
When I draw a sidewalk using the Sidewalk tool, it is created as a continuous slab. I would like to know how to create a sidewalk with expansion joints.
ANSWER
To model expansion joints in a sidewalk, create a single section of sidewalk, then replicate it with small gaps in between each section.
To create a sidewalk with expansion joints
- Select Terrain> Create Terrain Perimeter
 from the menu to create a terrain perimeter in your plan.
- Navigate to Terrain> Sidewalk> Straight Sidewalk
 from the menu, then click-and-drag to draw the first section of sidewalk.
- Adjust the size of the first sidewalk section to your specifications. This can be done using one of the following methods:
- With the sidewalk selected, use the Open Object
 edit button to open the Terrain Path Specification dialog. The Width and Thickness can be adjusted on the General panel, while the Length can be adjusted on the Selected Line panel.
in this example, our sidewalk section has a Width and Length of 48", and a default Thickness of 1".
- Use the edit handles along with Temporary
 or Manual Dimensions
  .
.
- Once the first sidewalk section is to your desired size, select it, then click the Multiple Copy
 edit button.
- Click the Multiple Copy Interval
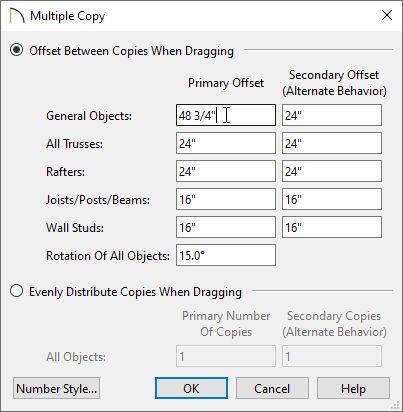
 secondary edit button to open the Multiple Copy dialog, specify the Primary Offset value for General Objects, then click OK.
In this example, we have specified a value of 48 3/4". This will give us a 3/4" expansion joint between each sidewalk section.

- Hover over the Move edit handle located on the sidewalk until the Multiple Copy
 cursor displays, then click-and-drag in your desired direction to make copies.
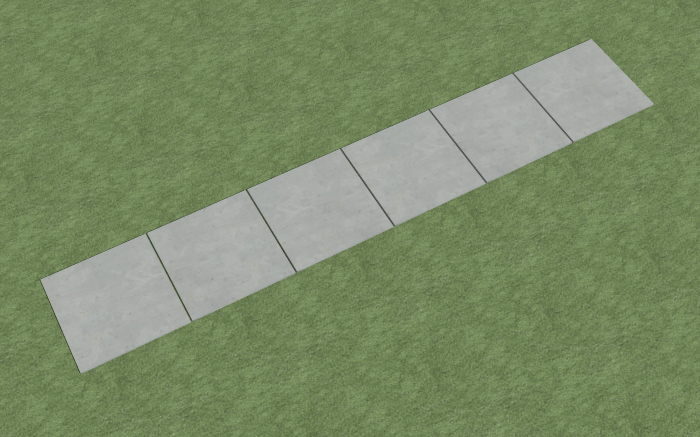
- When you have the desired number of copies, simply release the mouse button. You can now create a Camera
 view to see the results.

 from the menu to create a terrain perimeter in your plan.
 from the menu, then click-and-drag to draw the first section of sidewalk.
 edit button.
