This article also applies to the following legacy products:
Pro
QUESTION
I would like to change the height of one of the roof planes in my design. How do I accomplish this?
ANSWER
Roof planes generate on the wall top plates, which are governed by the ceiling height specified in a given room or floor. There are several ways to change the height of a roof plane. You can, for example, change a roof plane's height using the Transform/Replicate Object edit tool. You can also specify a new baseline height in the roof plane's specification dialog, or select and move the baseline in a 3D camera view.
To raise or lower a roof plane using the Transform/Replicate Object edit tool
- Using the Select Objects
 tool, click once on a roof plane near one of its edges to select it.
- Select the Transform/Replicate Object
 edit tool.
- In the Transform/Replicate Object dialog that displays:
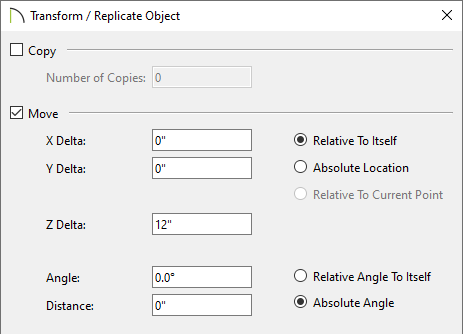
- Check the box beside Move, which will enable the selections directly beneath it.
- To the right, select the Relative To Itself radio button so that the roof plane moves relative to its current location.
- Specify how high you want to raise the roof plane, or how low you want to lower it, in inches or millimeters.To move the roof plane up, enter a positive (+) number in the Z Delta field. To move the roof plane down, enter a negative (-) number in the Z Delta field.
In this example, we are raising the roof plane by 12".
- Click OK to close the dialog and confirm the changes.
- Create a Camera
 view to confirm that the roof plane is in the desired location.
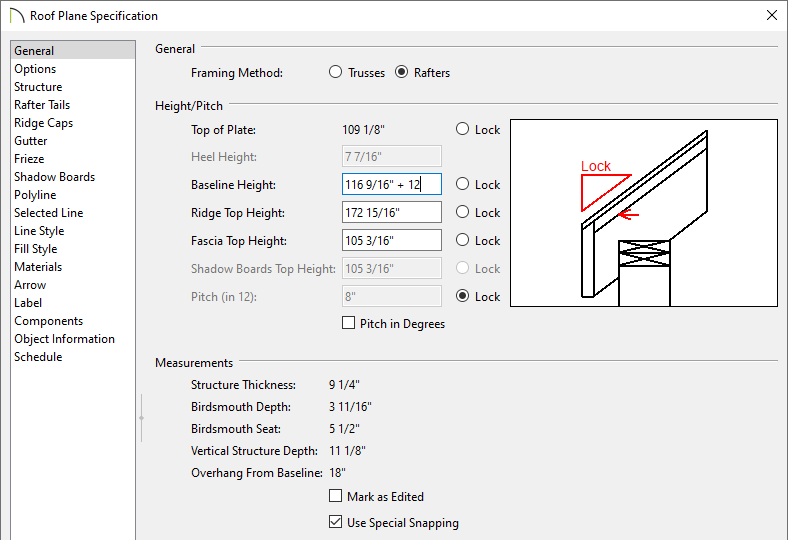
To raise or lower a roof plane using the Roof Plane Specification dialog
- Using the Select Objects tool, click once on a roof plane near one of its edges to select it.
- Select the Open Object
 edit tool.
- On the General panel of the Roof Plane Specification dialog that displays:
-
Lock the Pitch (in12) to keep the pitch of the roof plane the same.
- Specify the new height for the Ridge Top Height, Baseline Height, or Fascia Top Height. You can also use addition and subtraction in the dialog by using the "+" or "-" signs. Keep in mind that adjusting one of these values will automatically adjust the other values.
In this example we have raised the Baseline Height by 12" by adding "+ 12" in the field.
- Click OK to close the dialog and confirm the changes.
- Create a Camera view to confirm that the roof plane is in the desired location.