QUESTION
I would like to lock one single wall in my plan so that it cannot be moved, but not affect any other walls in doing so. How can I accomplish this task?
ANSWER
A single wall can be quickly and easily locked by assigning it to a unique layer, and then locking that layer.
To lock an individual wall
-
Open
 a drawing in which you would like to lock a single wall.
- Using the Select Objects
 tool, click on a wall you'd like to lock to select it and then click the Open Object
  edit button.
- On the Layer panel of the Wall Specification dialog that displays, take note of the layer name listed here, then click the Define button to open the Layer Display Options dialog.
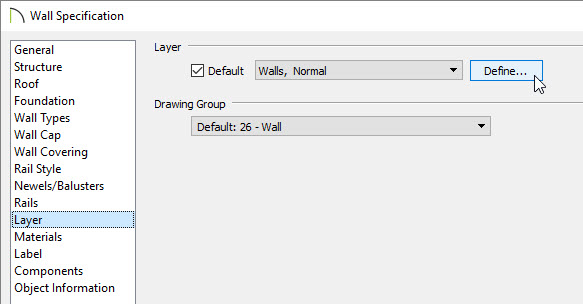
- The "Walls, Normal" layer is the default layer for walls. Click the Copy button to copy the layer, then click once on the newly copied layer to specify a new name.
In this example, "Walls, Locked" was specified as the name for the new layer.
- Next, click one time in the Lock column for the newly created layer, or check the Lock checkbox to lock this layer.
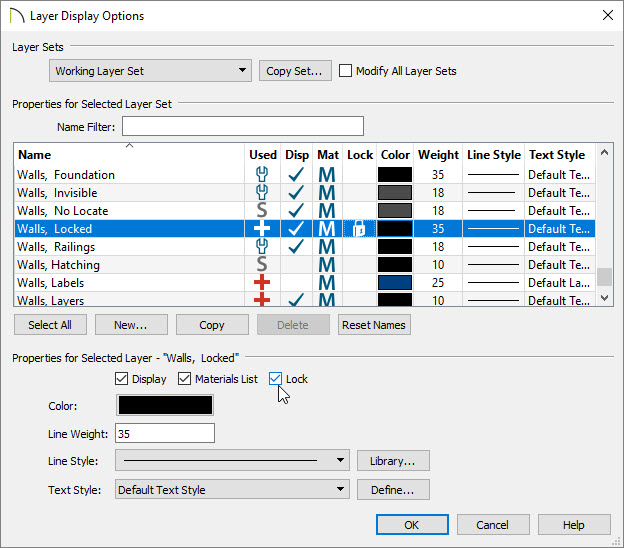
Locked layers are indicated by a padlock  symbol in the Lock column.
- Click OK to close the dialog and return to the Layer panel of the Wall Specification dialog. The selected wall is now on the "Walls, Locked" layer.
- If it is not on the "Walls, Locked" layer, click the drop-down menu and select "Walls, Locked" from the list.
- Click the OK button to close the dialog and return to floor plan view.
- In floor plan view, the wall's appearance will be unchanged, but you can no longer select, move, or alter the wall.
There are still some cases, such as adjusting the wall type's definition or adjusting the placement of a connected perpendicular wall, where a wall on a locked layer could be moved, so you should always verify your wall dimensions are accurate in your final plan.
- To make changes to the wall, you will first need to unlock the layer it is on:
- Select Tools> Layer Settings> Display Options
 to open the Layer Display Options dialog.
- Remove the padlock from the Lock column for "Walls, Locked" or uncheck the Lock checkbox.
- Click OK to close the dialog. The wall and any other objects on this layer are now unlocked and can be edited as needed.