I have an active software subscription, an NFR license, or active Support and Software Assurance (SSA) associated with a perpetual legacy license. How do I get the latest version of Chief Architect?
Upgrading to the latest Chief Architect version can be done by signing in to your Chief Architect Online Account, clicking on the Digital Locker: Downloads, Product Keys & License Management link, and then selecting the GET NEW VERSION button next to your license. Once you click this button, you will be prompted with the following message:
"Product key XXXXX-XXXXX-XXXXX-XXXXX is eligible to be upgraded at no charge. Your product key will remain the same between versions in most cases. Any older program versions present on your system will NOT be modified by installing the new version. Upgrade now?"
Click UPGRADE to continue the upgrade process, or CANCEL to avoid making any changes and return to the page.
Once an upgrade is complete, the latest version of Chief Architect will appear in your account. Select the DOWNLOAD link to proceed with downloading and installing the Chief Architect version you upgraded to.
Note: If you have an active software subscription, an NFR license, or the Support & Software Assurance (SSA) associated with a perpetual legacy license is active, but you don't see the option to upgrade to the latest version, please contact us.
If you choose to continue using template files that you used in a previous program version, it is very important that you take the time to review all the default settings in the file, making sure that they will continue to suit your needs.
If you do choose to continue using a legacy template plan, it is best to also use a legacy layout template from the same program version, as well. As with a template plan, take the time to go through the layout template’s defaults and make sure they are suited for use in the new version, and that their line weight scales do not conflict with those in your template plans.
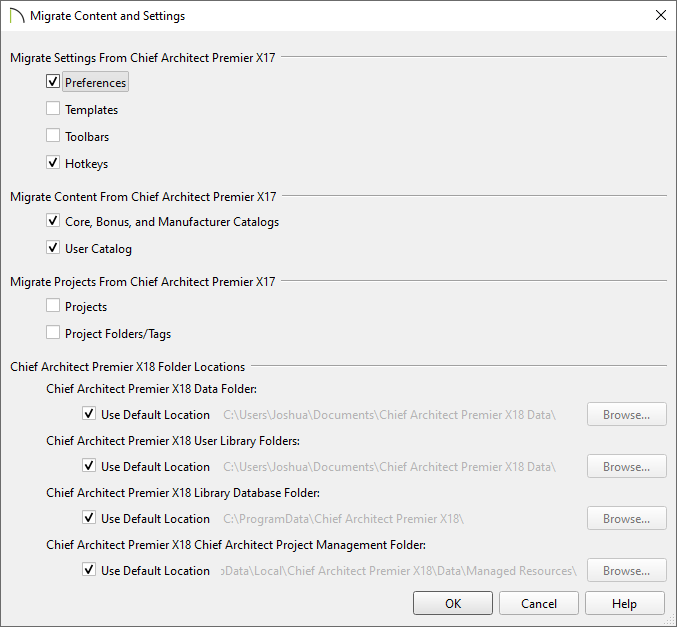
Note: If you choose not to migrate your projects forward, they can still be migrated at a later time by accessing the program's Preferences, selecting the Project Management panel, then clicking on the Migrate Forward Legacy Projects button. Individual projects can also be exported from a prior version and imported into your preferred version. Please see the Related Articles section to learn more.
With Project Management enabled, it's important that you do NOT change or redirect the program's Project Management folder onto a cloud/network or synced location, as this will likely lead to file corruption and/or data loss.
Chief Architect will be unable to provide support or assistance if you have redirected this folder to a location that is being synced or not local to the system.