QUESTION
How do I create log trusses in Chief Architect?

ANSWER
While the Truss tool does not produce log trusses, you can download a Bonus Catalog titled Log Truss Template that includes a selection of log trusses, ready to be placed in your plans, as well as templates that you can use to create custom truss sizes. This library can be found in the Millwork section of the Chief Architect 3D Library.
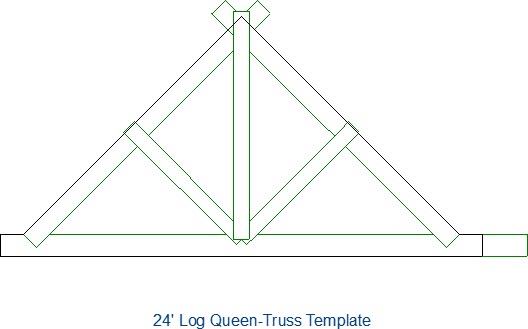
This article describes how to use these templates to create a custom log truss with a 22' span and 12/12 pitch.
To create a custom truss envelope
- Create a New Plan
 , then select View> Library Browser
  if your Library Browser is not already open.
-
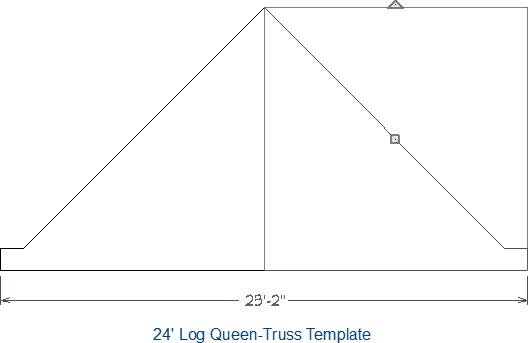
Browse to Chief Architect Bonus Catalogs> Log Truss Components> Log Truss Templates and select the 24' - 12/12 Log Truss Envelope.
-
Click once in the drawing area to place this CAD block at that location.

- Using the Select Objects
 tool, click on the CAD block to select it and click the Explode CAD Block
  edit button.
- For each of the three lines on the right side of the CAD block, click to select the line and then click the Disconnect Selected Edge
 edit button.
- Group select the three lines on the right side CAD block: the lines that represent the end of the bottom log, the top edge of the bottom log, and the top of the right-hand angled log.
- With these three lines selected as a group, click the Transform/Replicate Object
 edit button.
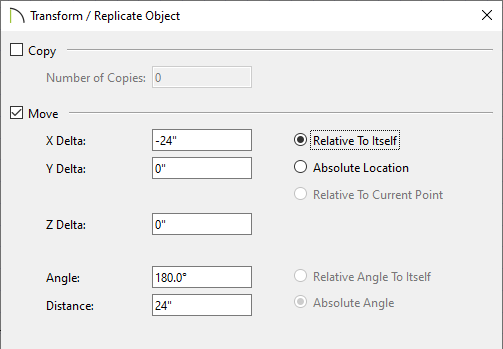
- In the Transform/Replicate Object dialog that displays:
-
Check the box beside Move.
-
Specify the X Delta as -24" and ensure that Relative To Itself is selected.
-
Click OK to close the dialog and move the selected objects 24" to the left.
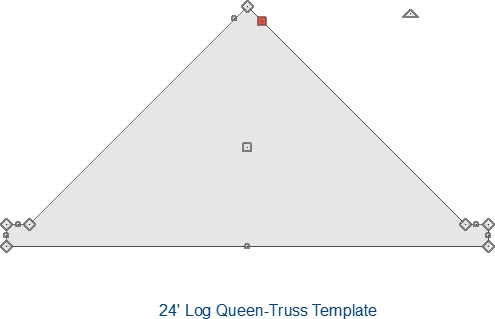
- Using their edit handles, reconnect the lines of the envelope. Make sure that the top edges meet at the new ridge point and the bottom edge snaps to the log end line on the right.
-
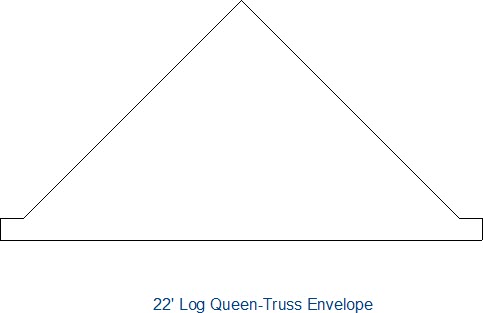
When this is accomplished, the lines will form a closed polyline that, when selected, will have a grey fill color.
-
At this point, the envelope polyline can be used as a guide to customize a truss template.
To modify a log truss template
- In the Library Browser, under Chief Architect Bonus Catalogs> Log Truss Components> Log Truss Templates:

-
Select the 24' - 12/12 Log Truss Template.
-
Click once to place this architectural block in your plan, near the envelope polyline.
-
Using the Select Objects tool, click on the newly placed truss template to select it.
-
Use the Point to Point Move
 edit button to align the left side of the truss template with the left side of the envelope polyline.
-
Click the Point to Point Move edit button.
-
Click once on the lower left corner of the truss template.
-
Click a second time on the lower left corner of the envelope polyline.
-
With the truss template still selected, click the Explode Architectural Block
 edit button.
The template's components can now be edited so that the logs on the right side align with the envelope polyline like those on the left side already do.
-
Select the right top chord log and use the Transform/Replicate Object edit button to move it 24" to the left (X Delta of -24"), as described in the section above.
-
Group select the king post and two angled logs and use the the Transform/Replicate Object edit button to move them 12" to the left (X Delta of -12").
-
Using the edit handles, shorten each of the modified logs so they fit within the envelope polyline.

-
Be sure to shorten the angled logs so they do not extend through the top chords.
-
To override movement restrictions, you can hold down the Ctrl or Command key on your keyboard while resizing these objects.
-
Once the logs are to your liking, group select all six logs and click the Make Architectural Block
 edit button to group them back into a single block again.
To convert the template into a symbol
-
Select the truss template that was just converted to an architectural block, then click the Convert Selected to Symbol
 edit button.
-
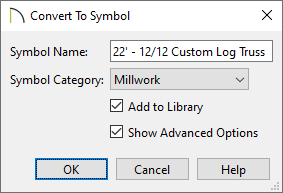
In the Convert To Symbol dialog that appears:
-
Specify the Symbol Name.
-
Select Millwork from the Symbol Category drop-down list.
-
Make sure that Add to Library is checked.
-
Check the box beside Show Advanced Options.
- Click OK.
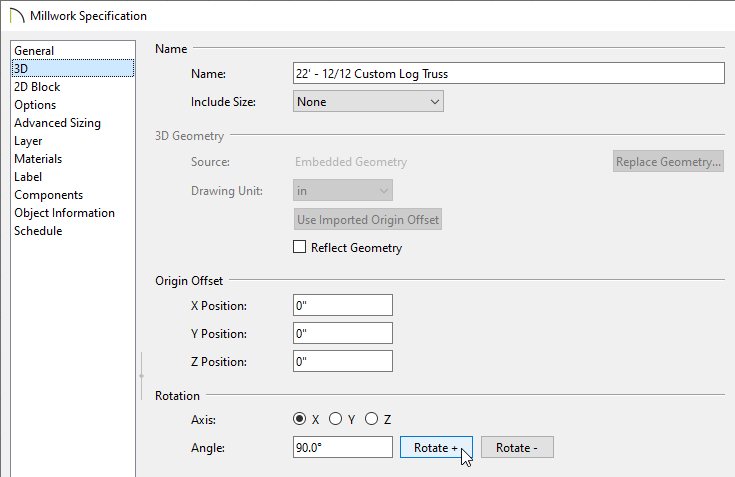
- On the 3D panel of the Symbol or Millwork Specification dialog that opens next:
-
Select the X Axis radio button under the Rotation heading.
-
Click the Rotate + button one time so the truss is oriented upright in the preview pane.
-
On the 2D Block panel, click Generate Block to generate the Truss's 2D CAD Block.
-
Click OK to confirm the changes.
-
Focusing on the User Catalog, right-click on the new truss object that was just added, then select the Open Object
 option.
-
Specify the desired elevation for the truss on the General panel, then click OK to close the dialog.
To save your custom envelope and template
-
Select the truss template that was converted to an architectural block, then select the Add to Library
 edit button to add it to the User Catalog.
-
Select the truss template architectural block that is still currently in the plan and move it so it's no longer on top of the envelope.
-
Select the label or text object below the envelope and click the Open Object edit button.
-
In the Rich Text Specification dialog, change the text to say
22' Log Queen-Truss Envelope, then click OK.
-
Group select the envelope and the text object, click the Make CAD Block
 edit button, then click the Add to Library edit button.