Rendering: Cameras & Lighting

Create 2D and 3D camera views: explore the different camera types, rendering techniques, and lighting options, and learn how to export a 360 panorama or photo-realistic ray traced view.

Number
Title / Description


13

2:05 Camera Views

Camera Views

Taking a camera view of your plan is just a click and drag away.

Video No. 13


14

3:31 Overview Cameras

Overview Cameras

Overview cameras allow you to see your plan from the outside.

Video No. 14


18

6:36 Navigating in 3D

Navigating in 3D

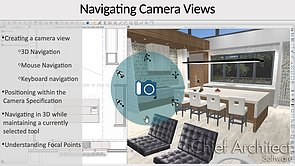
Get the best camera views by becoming familiar with the different camera movement tools.

Video No. 18


16

10:23 Cross Section/Elevation Views

Cross Section/Elevation Views

Cross Section and Elevation cameras make it easy to dimension and position objects vertically.

Video No. 16


6150

8:56 Rendering Techniques

Rendering Techniques

Use the different render techniques to create marketing materials.

Video No. 6150


2426

18:34 Physically Based Rendering Technique

Physically Based Rendering Technique

Lighting, materials, camera settings, rendering technique options, and the backdrop all play a role in generating a Physically Based Render.

Video No. 2426


6155

14:49 Clay Rendering & Real-Time Ray Tracing

Clay Rendering & Real-Time Ray Tracing

See your project as a clay model using the Clay Model Rendering Technique.

Video No. 6155


19

10:52 Virtual Walkthroughs

Virtual Walkthroughs

Record a tour of your project with the walkthrough tools

Video No. 19


21

1:57 Saving and Restoring Camera Views

Saving and Restoring Camera Views

Save a camera view so you can go back and forth between it and the plan view without fear of losing the view.

Video No. 21


2430

8:07 Light Sets

Light Sets

Light Sets allow you to easily control the amount of light in each scene.

Video No. 2430


70

3:25 Rope Lighting

Rope Lighting

Use the Rope Light tool to create under cabinet lighting, illuminated ceilings, or back lighting.

Video No. 70


1554

8:18 Applying Backdrops

Applying Backdrops

You can apply backdrops and background colors to any 3d view.

Video No. 1554


192

1:05 Creating Procedural (3D) Grass

Creating Procedural (3D) Grass

Use the Procedural Grass tool to create three-dimensional grass features.

Video No. 192


265

2:56 Using a Sky Model for a Backdrop in Camera Views

Using a Sky Model for a Backdrop in Camera Views

Use the Generated Sky settings in the Camera Specification to Control the moon, and stars. The sun can be adjusted with the Adjust Sunlight dialog and you can click in a camera view to move the sun and the moon in the sky of the camera view.

Video No. 265


5478

8:11 Creating Updatable Cross Sections and Modifying Layer Display

Creating Updatable Cross Sections and Modifying Layer Display

The cross section and elevation camera tools generate views that update as your make changes to your plan

Video No. 5478


191

4:26 Controlling the Display of Below Grade Lines

Controlling the Display of Below Grade Lines

The lines that display below the grade level can be changed to dashed by using the settings in the Camera Specification.

Video No. 191


260

2:51 Imply Distance in Elevations Using Depth Cue

Imply Distance in Elevations Using Depth Cue

The Depth Cue tool will add fog to an elevation in order to imply distance.

Video No. 260


5479

4:39 Using CAD Detail From View for Details

Using CAD Detail From View for Details

You can create a CAD Detail from your cross sections to allow you full control over display of each line.

Video No. 5479


266

2:14 Adding Focal Blur to Renderings

Adding Focal Blur to Renderings

Use the Depth of Field setting to bring an item into focus and to blur the background.

Video No. 266


5484

11:18 Creating 3D Presentation Views

Creating 3D Presentation Views

The Perspective Camera tools allow you to generate a wide variety of rendered and artistic views for presentation tools.

Video No. 5484


403

10:09 360 Panorama Renderings

360 Panorama Renderings

Save or export a 360 degree rendering to share your designs with your clients.

Video No. 403


1944

8:32 Creating Kitchen Island Elevations

Creating Kitchen Island Elevations

Create Back Clipped Wall Elevation and control the display of the camera callout in Plan View

Video No. 1944


5320

3:35 Sun Angle and Plan View Shadows

Sun Angle and Plan View Shadows

Quickly add plan view shadow polylines to see how the structure will shade the property on any given day of the year.

Video No. 5320


10205

30:24 3D Rendering: Tips and Tricks

3D Rendering: Tips and Tricks

From new construction to remodel projects, 3D rendering can make a big difference on how clients judge your work. [NKBA .1 CEU]

Video No. 10205


10153

7:52 Quick Tip – Chevron & Herringbone Materials with Normal Maps

Quick Tip – Chevron & Herringbone Materials with Normal Maps

Learn about a new Bonus Catalog of Chevron and Herringbone materials, and how Normal Maps work within our Chief Architect Premier software.

Video No. 10153


83

15:37 Advanced Materials

Advanced Materials

A detailed breakdown of the different material properties that can be adjusted to fine-tune your textures, as well as material maps that can be used in order to create more realistic renderings.

Video No. 83


84

9:05 Substance Player

Substance Player

Explore the many ways Adobe’s Substance Player can be used to generate material maps, creating custom, life-like materials to use in your designs.

Video No. 84


1541

10:48 Applying Materials to Cabinets

Applying Materials to Cabinets

You can apply materials to cabinets by using the specification dialog, Material Painter, and Style Palettes.

Video No. 1541


10208

27:02 3D Walkthroughs: How to Make Great Virtual Tours

3D Walkthroughs: How to Make Great Virtual Tours

3D Walkthroughs are the perfect way to animate and make your home designs come to life. You can share these virtual tours with your clients or post them on your website and social media. Virtual tour videos are a great way to help your clients visualize your designs and showcase your work.

Video No. 10208


10238

39:56 360 Renderings

360 Renderings

360 renderings offer a more expansive view and can better help your clients visualize the entire space. These panoramic renderings can be a great way to interact with clients when social distancing limits in‑person meetings. Learn how to position your camera, export the file, and share with your clients or place on your website. [NKBA .1 CEU]

Video No. 10238


904

5:40 Controlling What Displays in 3D

Controlling What Displays in 3D

Like floor plan view, what displays in 3D views is determined by the active layer set.

Video No. 904


Back to top