QUESTION
I need to create a breezeway in my design with columns and a roof. How can I do this in Chief Architect?

ANSWER
In this article, we will be designing a simple breezeway that runs from our house to our swimming pool area. The breezeway will be an open breezeway, with a roof and some exposed trusses. We will also be using columns to support the roof under the trusses.
To design the breezeway
- As with any other type of structure in Chief Architect, we will first need to define the room definition of our breezeway, sothat the program will know to generate a roof over it, and that we will have control over the floor height.
- Select Build> Wall> Room Divider
 .
.
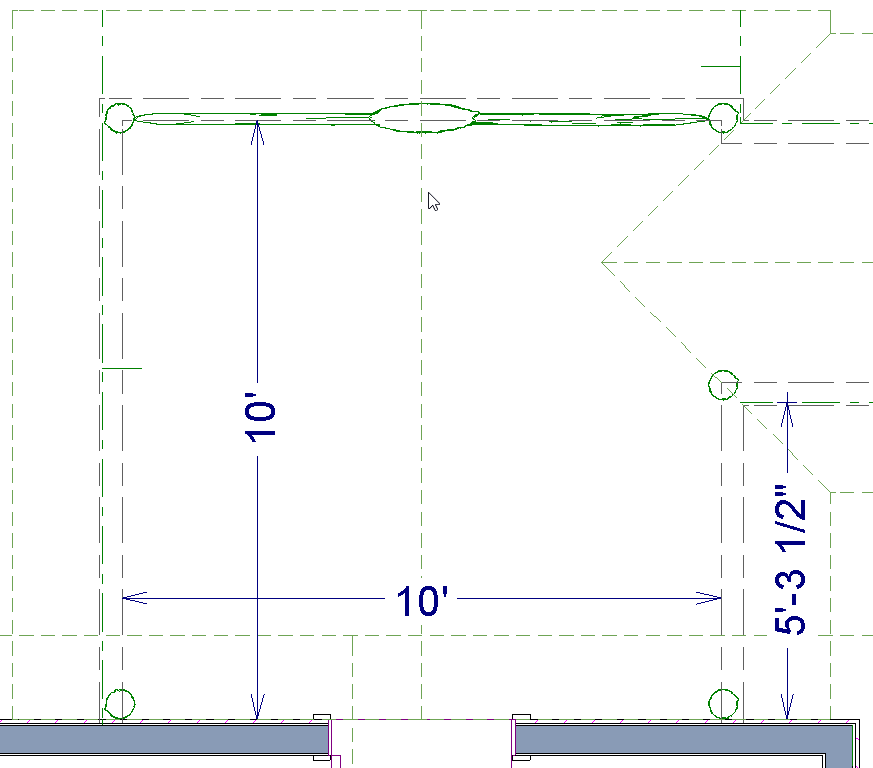
- Draw the shape of your structure and use the Move Object Using Dimension feature to adjust the measurements to what you need.

- Now select the room you've just created and click the Open Object
 edit button to display the Room Specification dialog.
- On the General panel, specify an appropriate Room Type for this area.
In this example, we have chosen the Slab Room Type.
- On the Structure panel:
-
Adjust your Floor height to your desired value.
In this example we will be using -14" to push our structure down to the ground.
-
Remove the check beside Flat Ceiling Over this Room.
- Click OK to apply these changes and close the dialog.
- Next, specify any gable walls that you need, then generate your roof by selecting Build> Roof> Build Roof
 .
.
For more information on specifying walls as gable walls, please see the Related Articles section below.
- Open your Library Browser
 and search for Column, or navigate to columns in the Millwork folder.
In this example, we will be using rustic columns from the Chief Architect Bonus Catalog, Columns and Pillars, which if installed can be found under Chief Architect Bonus Catalogs> Columns and Pillars> Rustic Columns.
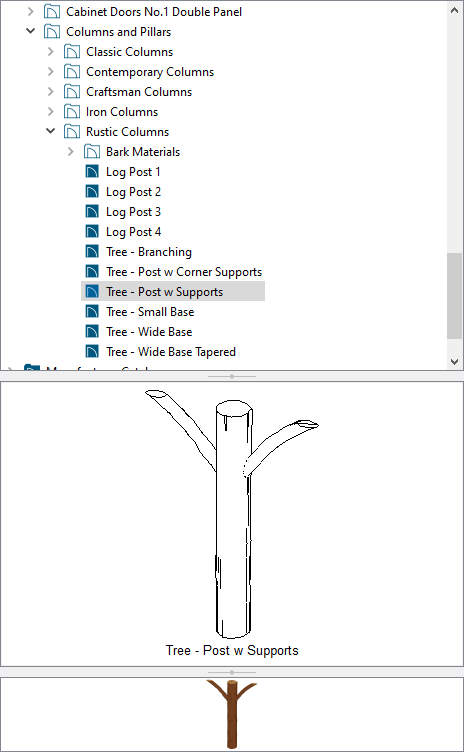
- Now, place your columns where you would like them.
- They can overlap the invisible walls without causing any problems.
- You may need to adjust the Height of the column to reach down to the lowered floor height.
- Select Build> Framing> Roof Truss
 and draw in your trusses under the roof line.
- Click 3D> Create Perspective View> Full Overview
 to create a camera view of the breezeway.
In this view, you can use the Material Painter  to apply the material you want to the trusses and columns.
If you don't see your Trusses be sure to check that the "Framing, Trusses" layer is turned on in your camera view layer set.
Your breezeway is now complete!
