QUESTION
How do I create a pony wall?

ANSWER
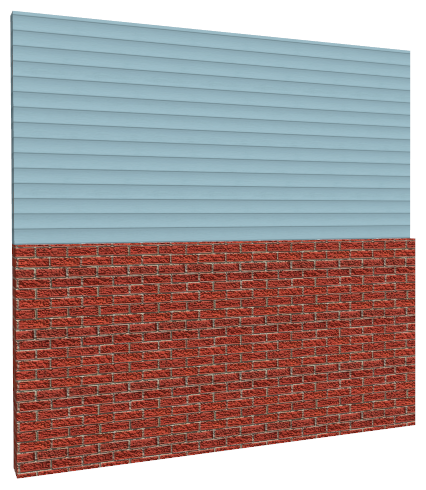
In Chief Architect, a pony wall, sometimes referred to as a split wall or stacked wall, is a single wall composed of two separate wall types, one built above the other.
There are two ways to create a pony wall: by drawing it using one of the Pony Wall tools or by specifying a normal wall as a pony wall.
To draw a pony wall
- Select Edit> Default Settings
 from the menu.
- In the Default Settings dialog that opens, expand the Walls category, click on the Pony Wall or Glass Pony Wall option, then click Edit.
- On the Wall Types panel of the Pony Wall or Glass Pony Wall Defaults dialog:
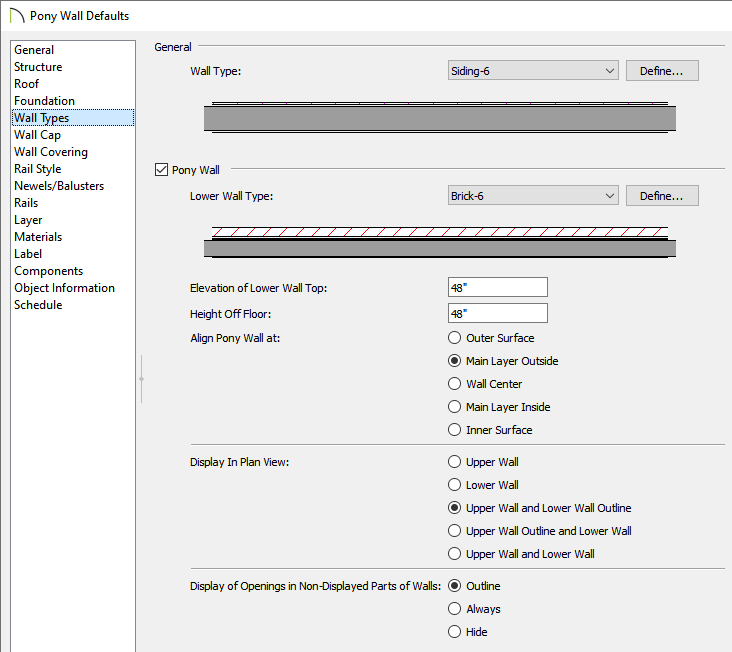
- Specify the wall types that you would like to use for the upper Wall Type and Lower Wall Type.
- Specify the desired Lower Wall height by setting the Height Off Floor or Elevation of Lower Wall Top.
- Select how you would like the pony wall to display in plan view.
For additional information on these options, please see the Related Articles section below.
- Select how you would like openings, such as windows and doors, to be displayed in the portion of the wall that won't be displayed in plan view.
- Click OK and then Done to apply the changes and close the dialogs.
- Select Build> Wall> Straight Pony Wall
 or Straight Glass Pony Wall
  from the menu.
- Click and drag to draw a pony wall based on the default settings that were just specified.
To specify a normal wall as a pony wall
- Using the Select Objects
 tool, click on a wall to select it, then click the Open Object
  edit button.
- On the Wall Types panel of the Wall Specification dialog that opens:

- Check the box beside Pony Wall.
- Specify the wall types that you would like to use for the upper Wall Type and Lower Wall Type.
- Specify the desired Lower Wall height by setting the Height Off Floor or Elevation of Lower Wall Top.
- Select how you would like the pony wall to display in plan view.
- Click OK to close the dialog and apply your change to the selected wall.
Wall caps can also be added to pony walls. For more information, please see the "Working with Wall Caps" resource in the Related Articles section below.