QUESTION
I would like to add window treatments to my windows. How can I do this?

ANSWER
In Chief Architect, shutters, curtains, and blinds can be applied to windows using the Window Specification dialog.
To add shutters to a window's exterior using the Window Specification dialog
- Using the Select Objects
 tool, click on a window to select it, then click on the Open Object
  edit button.
- On the Shutters panel of the Window Specification dialog that displays:
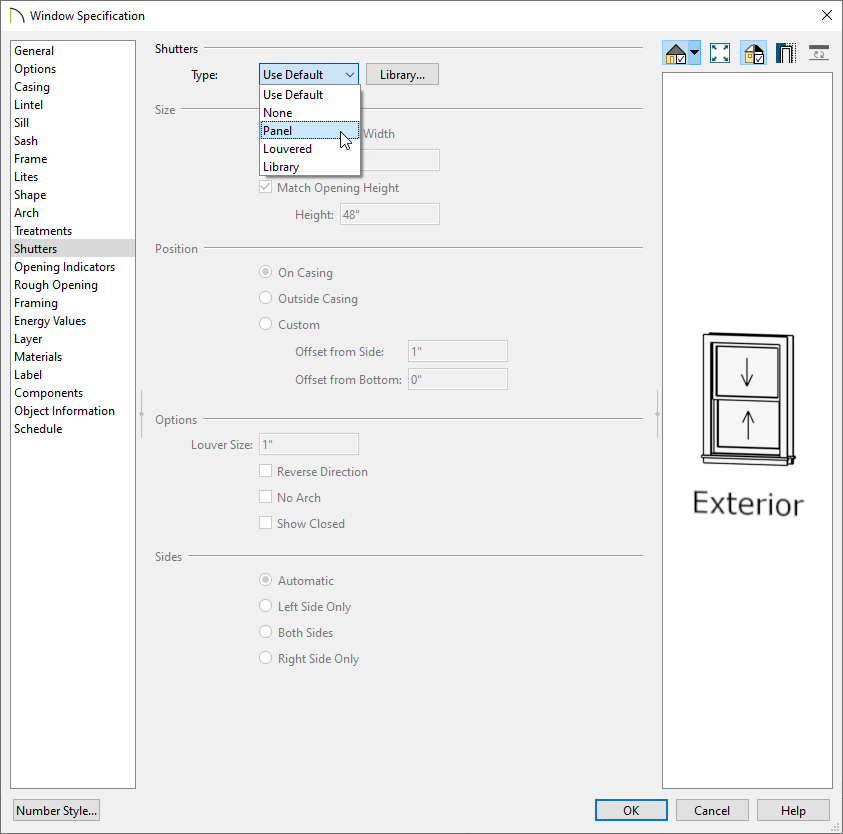
- Use the Type drop-down to choose the type of shutter you would like to apply, or click the Library button to choose a shutter option from the library. Some basic shutter options can be located by navigating to Chief Architect Core Catalogs> Architectural> Millwork> Exterior Shutters.
Additional shutters can be found in the Exterior Shutters bonus catalog. To learn more about additional catalogs, please refer to the "Obtaining Library Content" resource located in the Related Articles section.
- Once a shutter type has been selected, adjust the Size and Position to your liking.
- If the type is set to Louvered, the Louver Size can be defined.
- Select the checkbox for Show Closed if the shutters should appear closed in a 3D view.
- Specify which Sides of the selected window receive shutters.
- Once all desired changes have been made, click OK to close the dialog.
Shutters added to a window using the Specification dialog will display in both camera and floor plan views. They will also be placed onto a stand-alone layer titled "Shutters".
In X13 and prior program versions, shutters added to a window using the Specification dialog will only display in camera views. They are also placed onto the same layer as the window.
To add curtains or blinds to a window's interior
- Using the Select Objects tool, click on a window to select it, then click on the Open Object edit button.
- On the Treatments panel of the Window Specification dialog that displays:
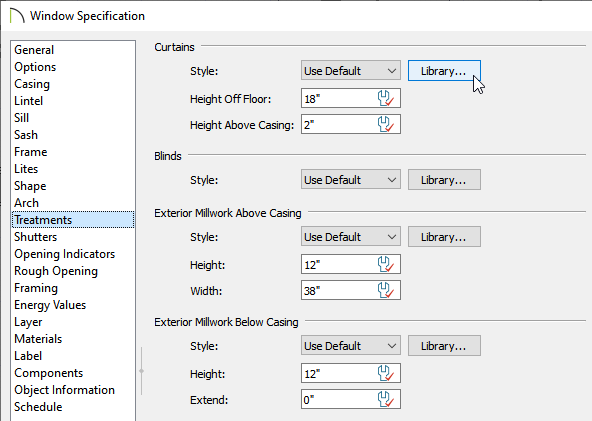
- Click the Library button under the Curtains section to choose a curtain style from the library. A variety of curtain styles can be located by navigating to Chief Architect Core Catalogs> Interiors> Window Treatments> Curtains.
- Click the Library button under the Blinds section to choose a blind style from the library as well, if desired. A variety of blinds can be located by navigating to Chief Architect Core Catalogs> Interiors> Window Treatments> Blinds and Shades.
- If a curtain style has been chosen, specify a Height Off Floor and Height Above Casing value.
- Once all desired changes have been made, click OK to close the dialog.
Treatments added to a window using the Specification dialog will only display in camera views. They will also be placed onto a stand-alone layer titled "Windows, Curtains & Blinds".
In X14 and prior program versions, treatments added to a window using the Specification dialog are placed onto the same layer as the window.
MORE INFORMATION
- The Treatments panel is not available in the Wall Niche and Window Symbol Specification dialogs.
- Exterior millwork can be added to windows on the Treatments panel of the Window Specification dialog. Some common objects that fall into this category include corbels, keystones, pilasters, and trim blocks.
- Shutters, curtains, and blinds can be searched and selected from the Library Browser, then placed into a plan as stand-alone objects. When taking this approach, be aware that the stand-alone objects are not part of the window in any capacity, and must be sized and positioned separately.